> ## Documentation Index
> Fetch the complete documentation index at: https://www.anything.com/docs/llms.txt
> Use this file to discover all available pages before exploring further.
# Facebook Login
> Let users login to your app with their Facebook accounts
Let users sign in to your app with their Facebook accounts. They'll share their email, name, and profile picture.
**Facebook Login is not yet available for mobile apps.** We are working on this feature. Currently, Facebook Login only works for web apps published to custom domains. Per Apple's App Store guidelines, Facebook SSO cannot be present in iOS mobile builds until the "Sign in with Apple" feature is released.
You'll need to set up a few things in Facebook first, then add those settings to Anything.
## Before you start
Make sure you have:
An Anything project with [User Accounts](/apps/auth) turned on
Your app running on a custom domain through [Anything's domain setup](/launch/domains)
## Overview
Set up Facebook OAuth
Add credentials to Anything
Customize the login button
Make sure login works
## Facebook Setup
1. Go to [Facebook for Developers](https://developers.facebook.com)
2. Sign in with your Facebook account
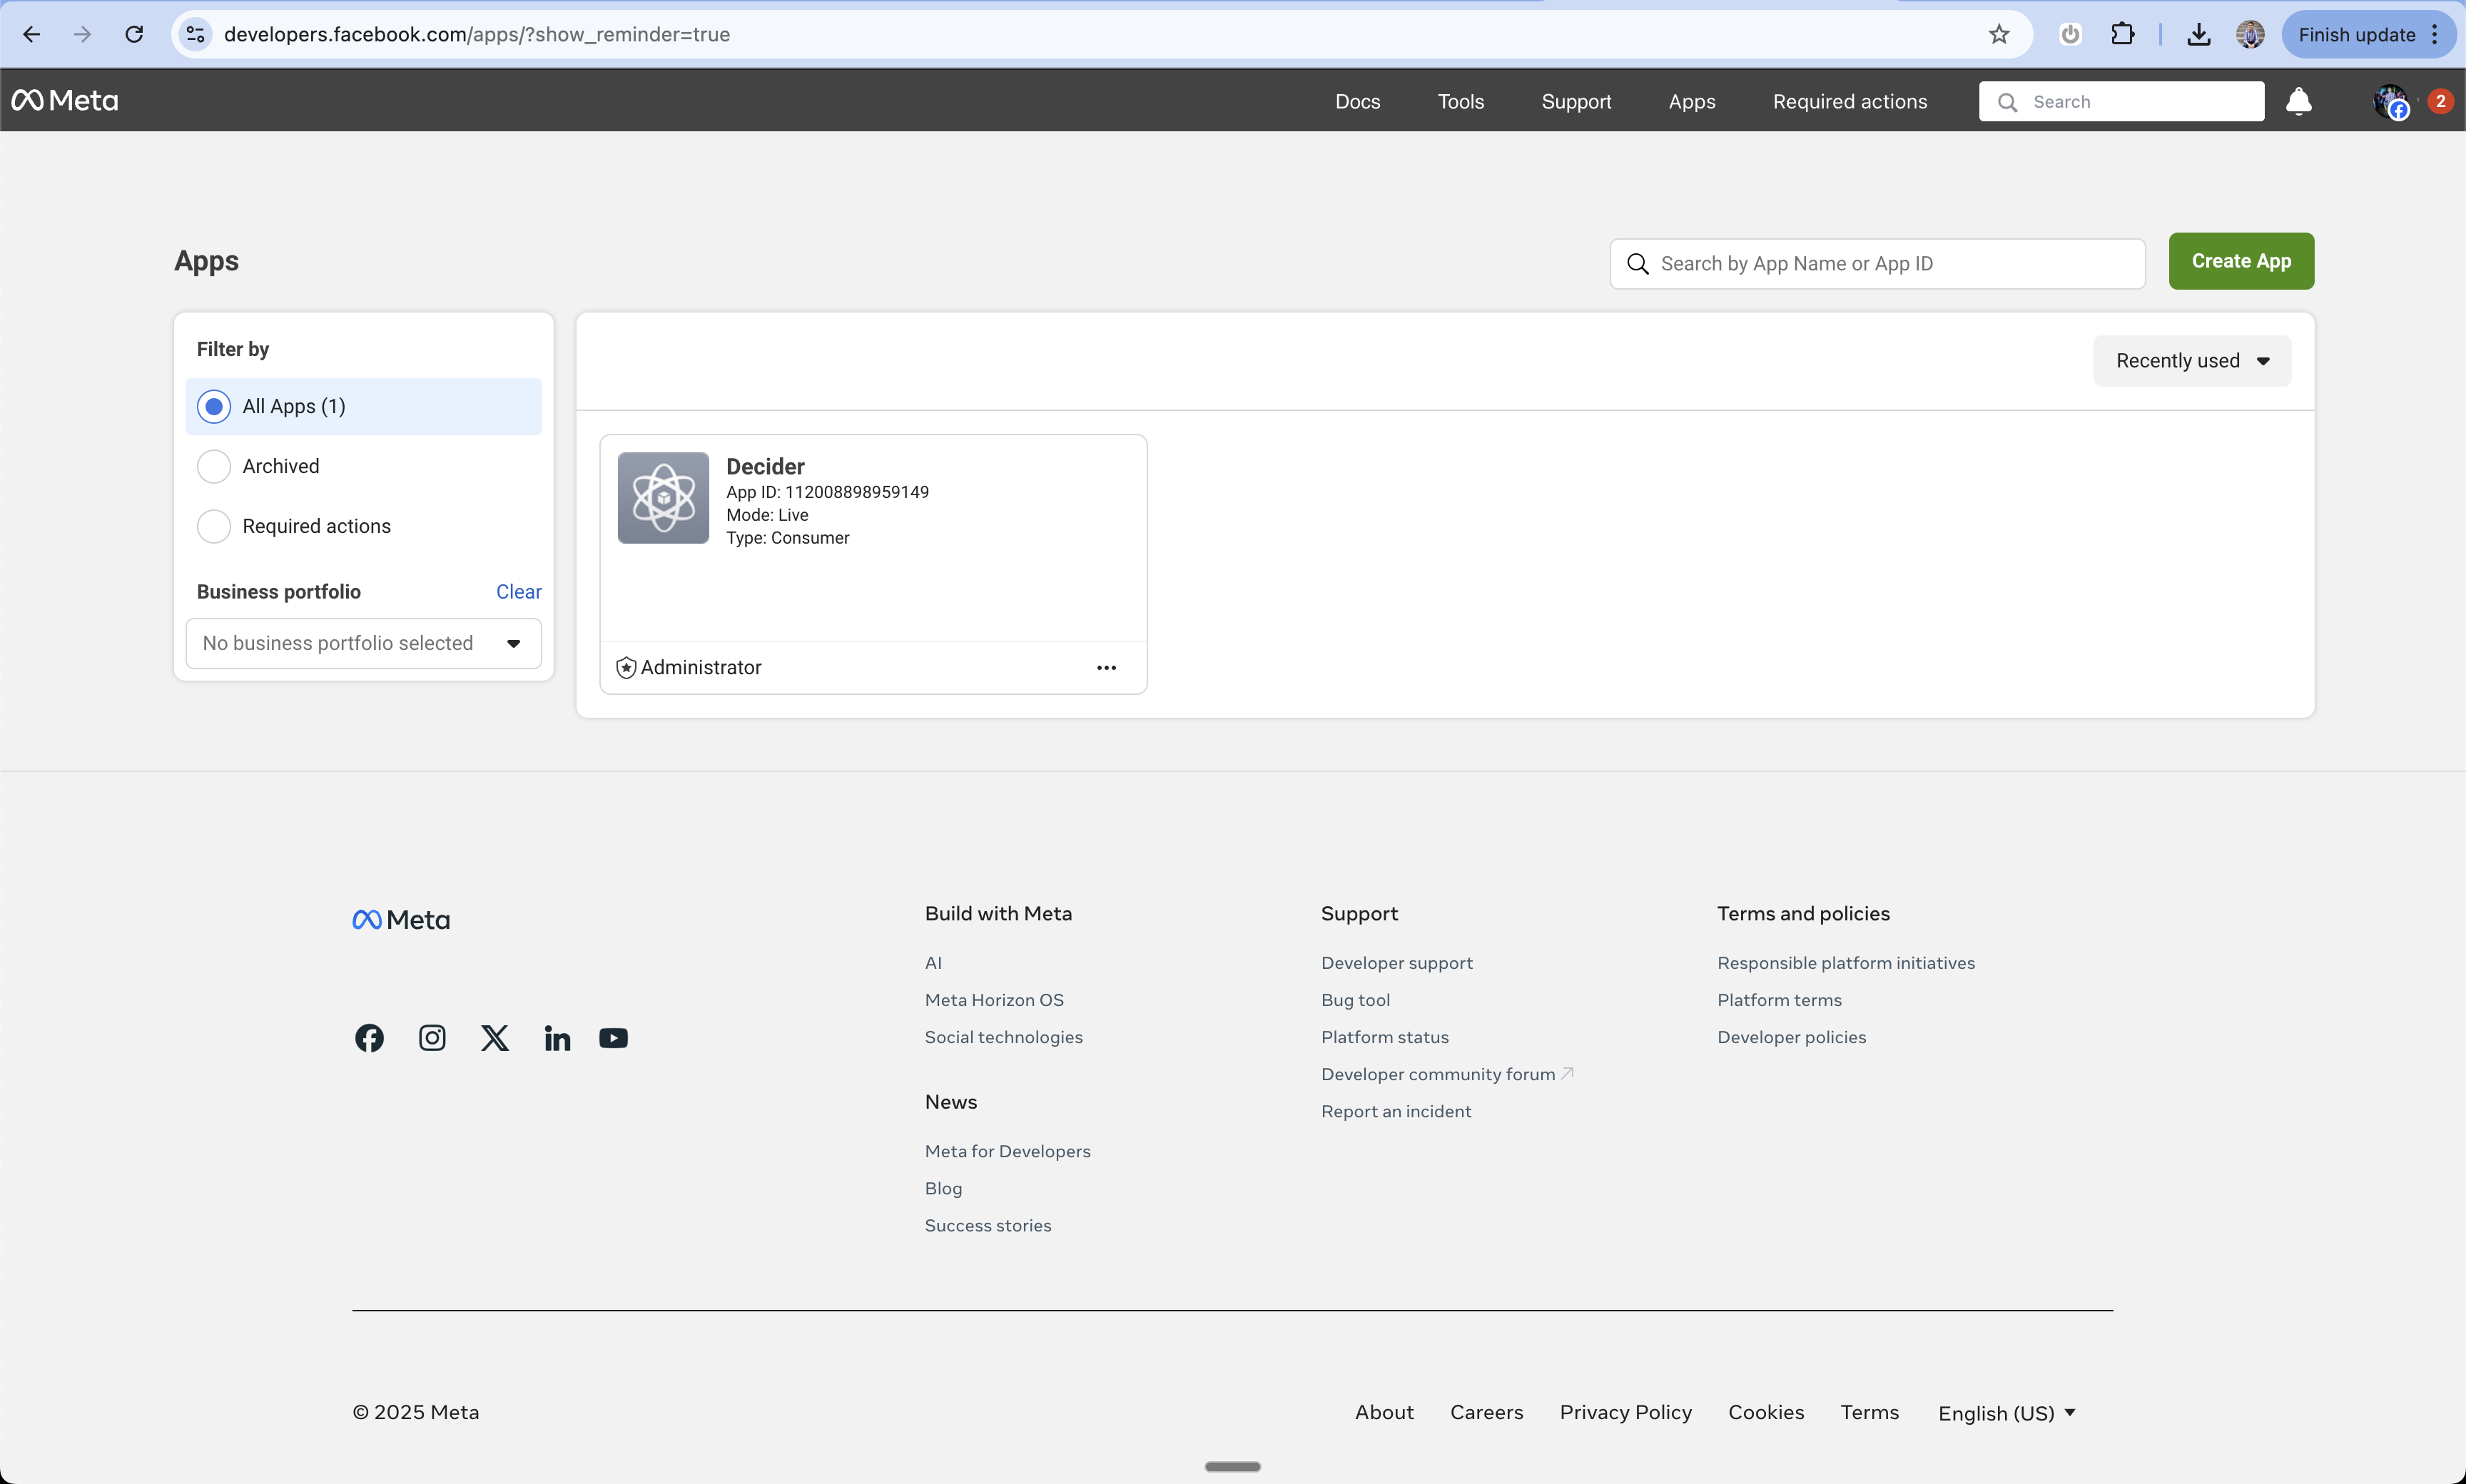
3. Click "My Apps" in the top right
 1. Click "Create App" from the dashboard
2. You'll be taken to the app creation screen
1. Click "Create App" from the dashboard
2. You'll be taken to the app creation screen
 1. Enter your app name
2. Add your contact email
3. Click "Create App"
1. Enter your app name
2. Add your contact email
3. Click "Create App"
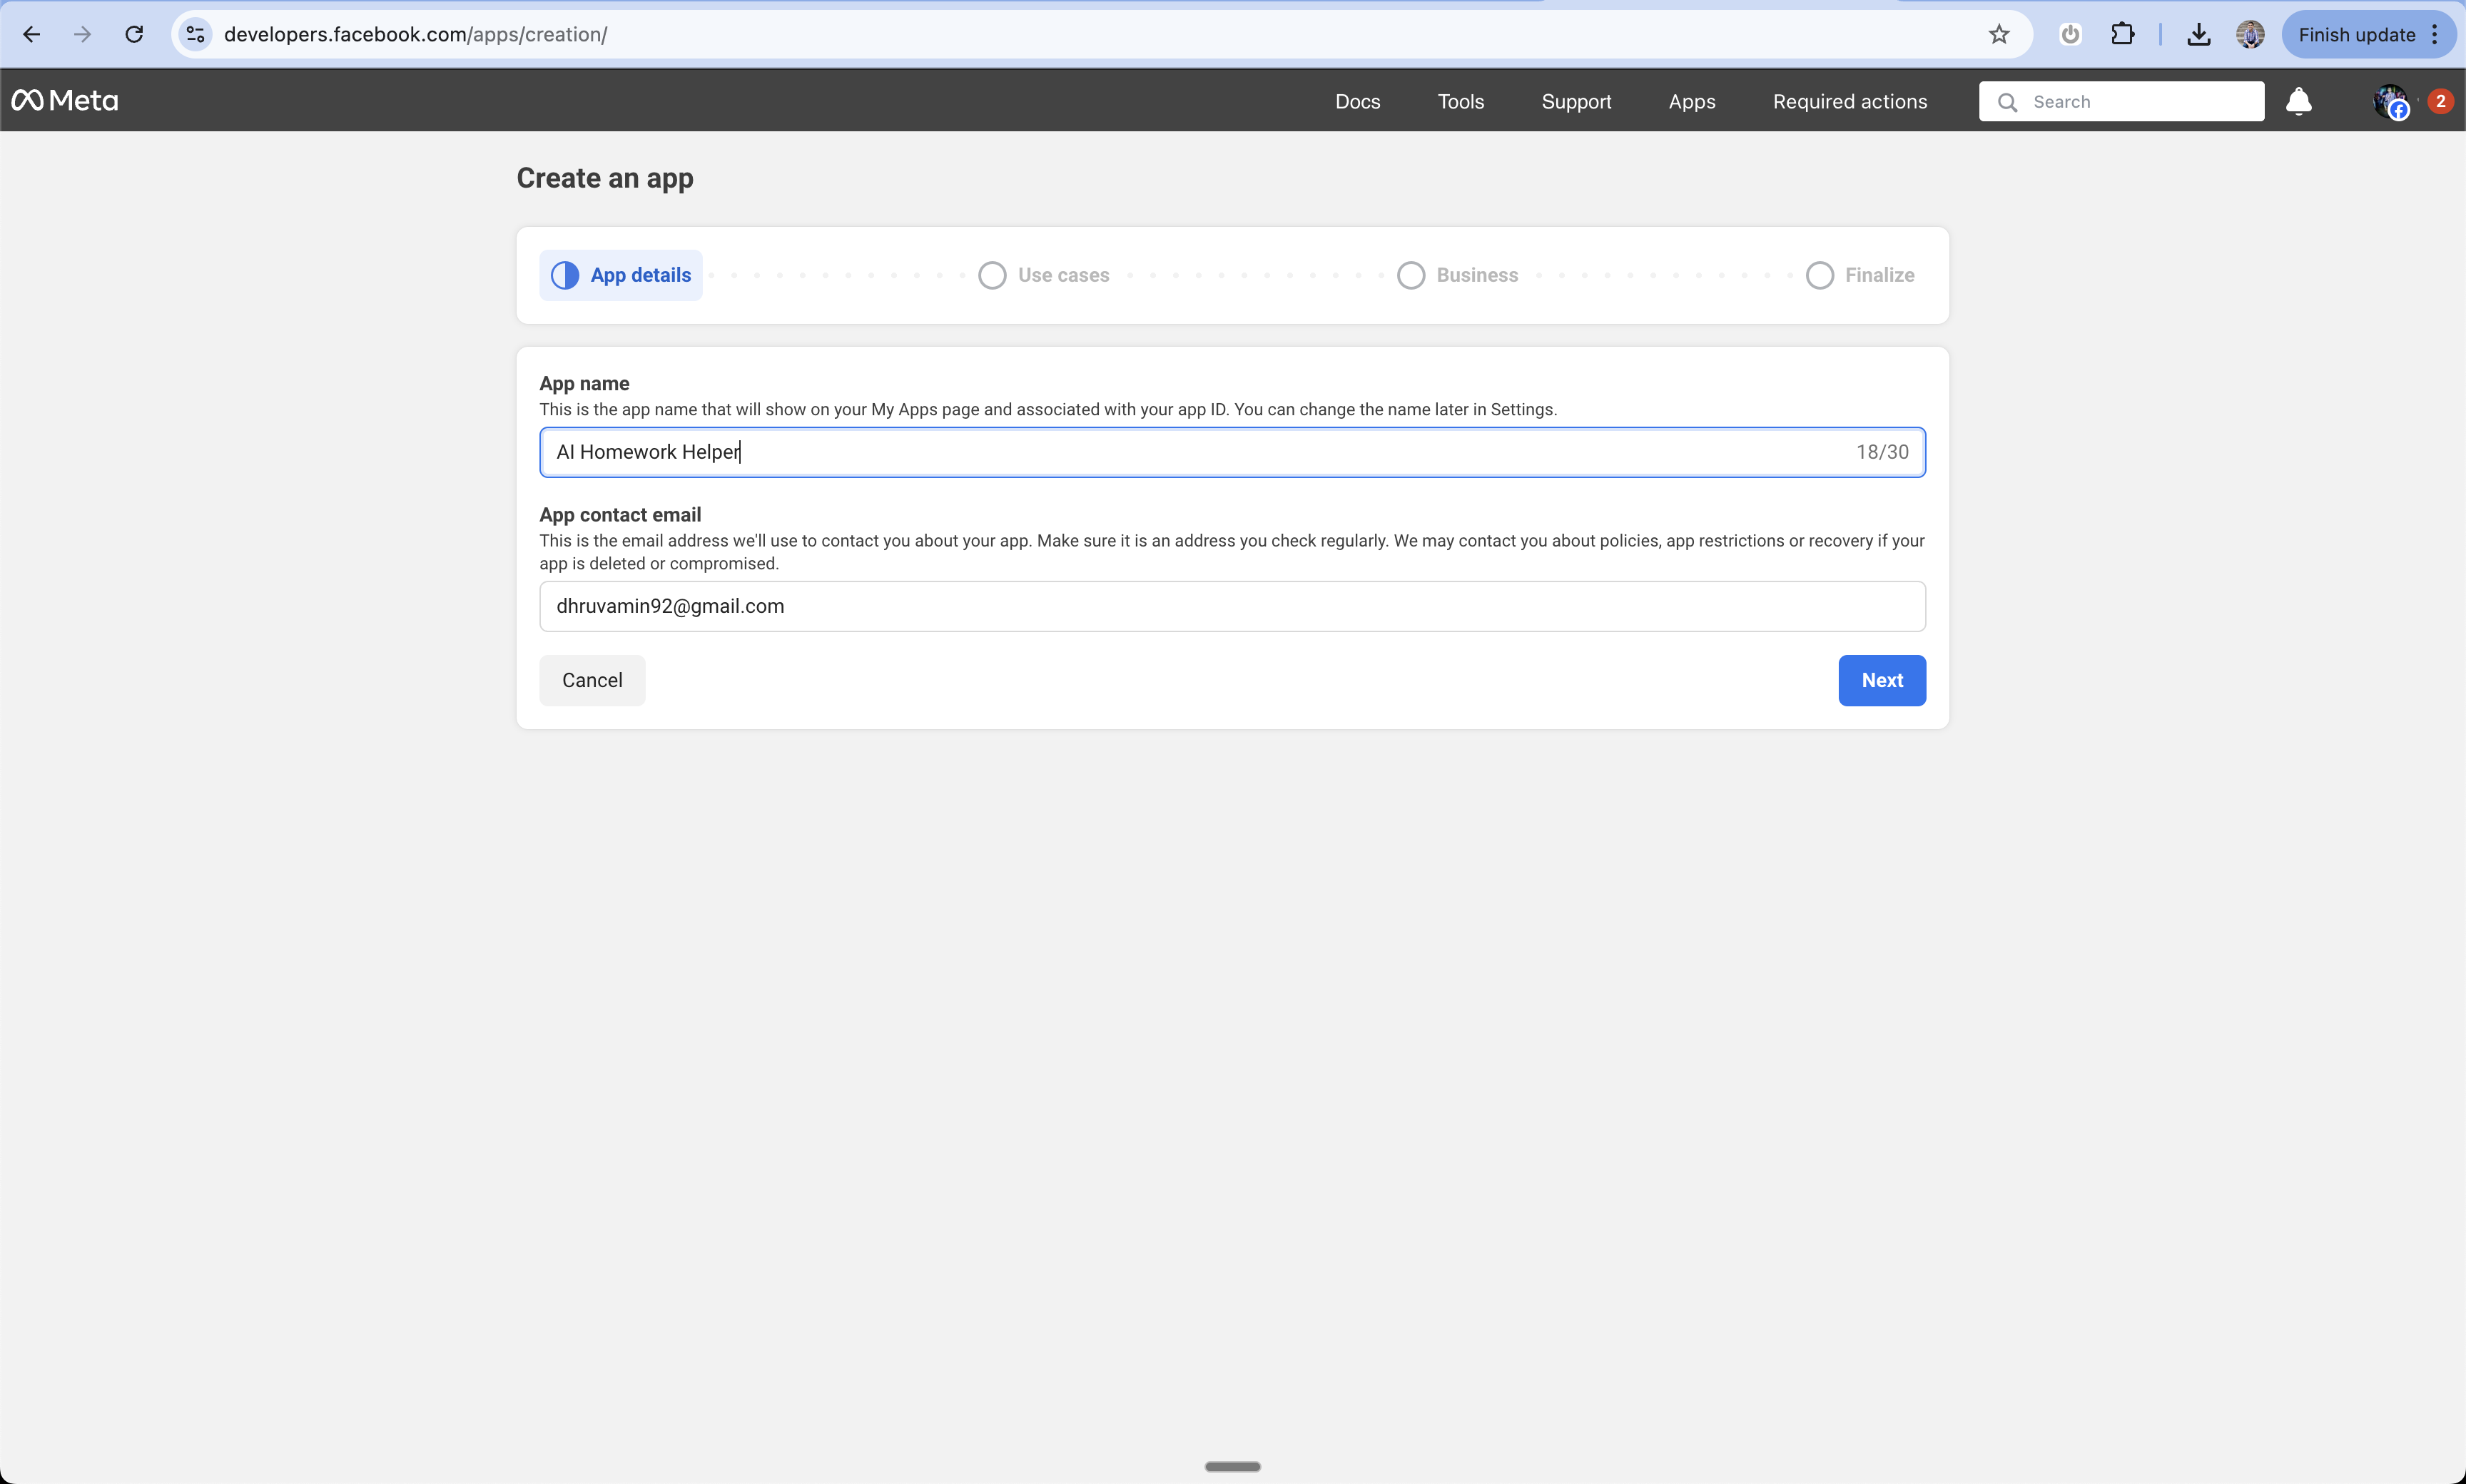 Choose an app name that clearly represents your business or service - this will be visible to users
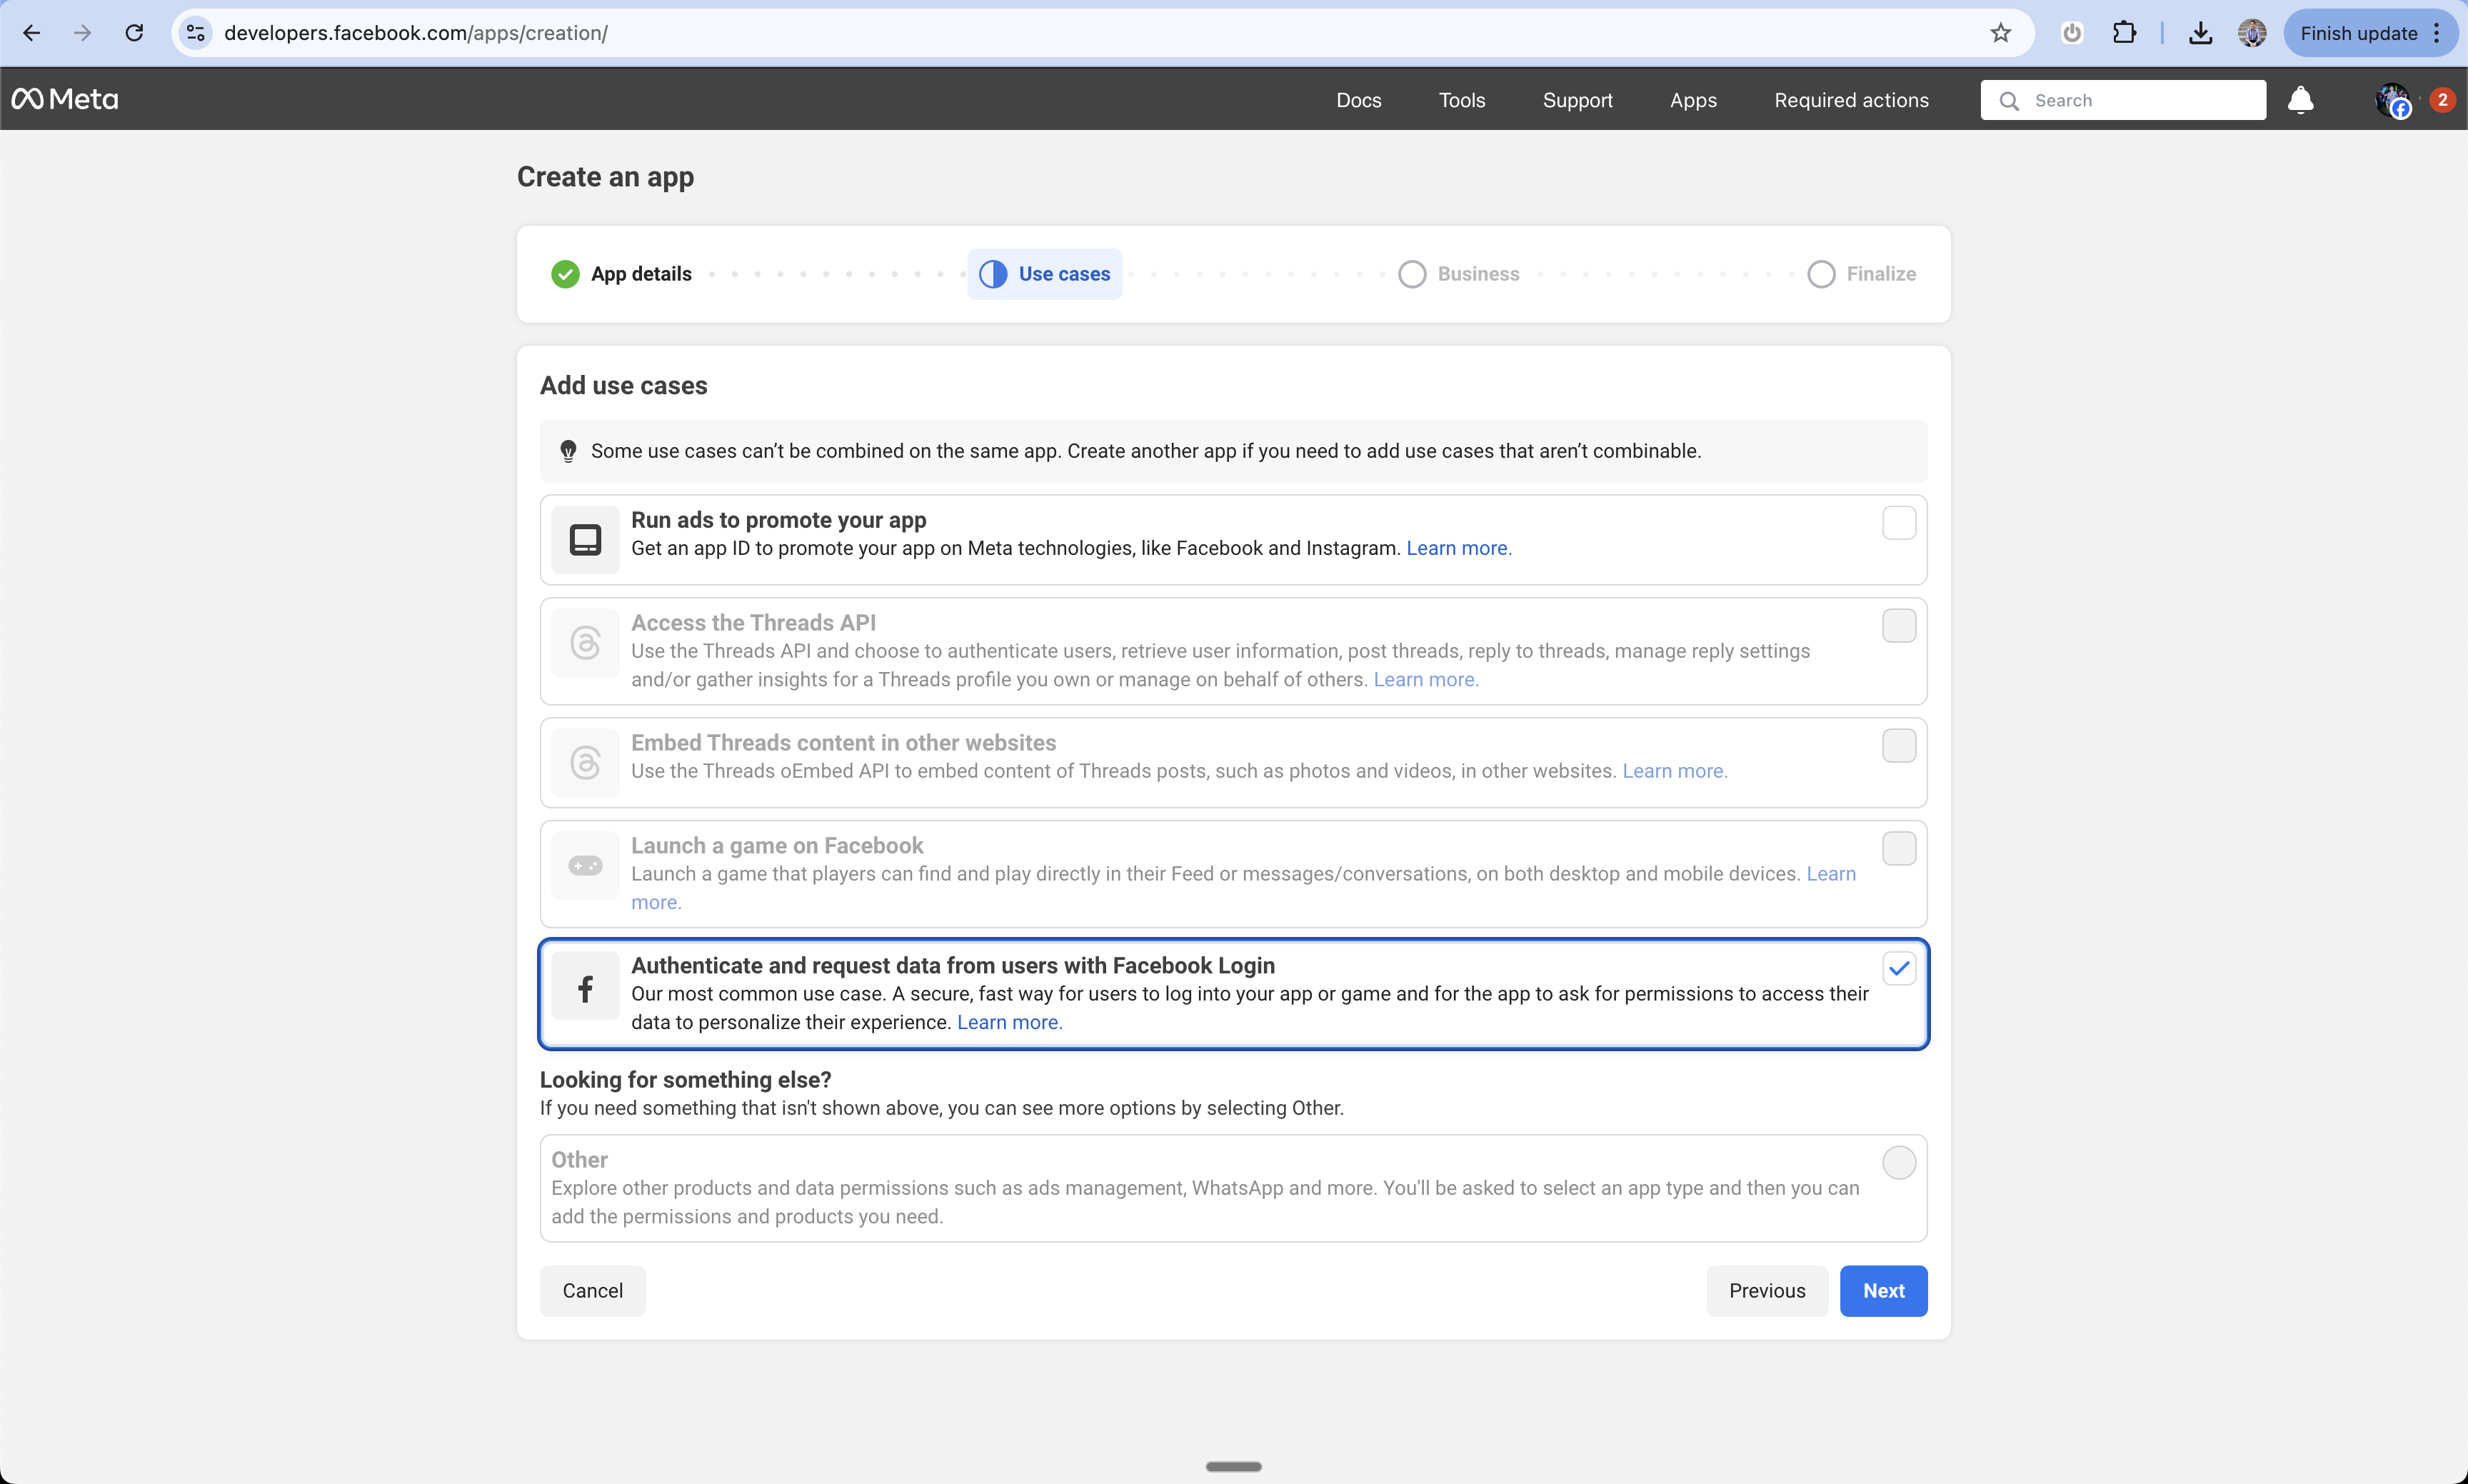
1. On the product selection screen
2. Find and select "Facebook Login"
3. This will add the login capability to your app
Choose an app name that clearly represents your business or service - this will be visible to users
1. On the product selection screen
2. Find and select "Facebook Login"
3. This will add the login capability to your app
 1. Choose whether to add your app to a business portfolio
2. You can skip this step for now during development
3. You'll need to complete this before launching
1. Choose whether to add your app to a business portfolio
2. You can skip this step for now during development
3. You'll need to complete this before launching
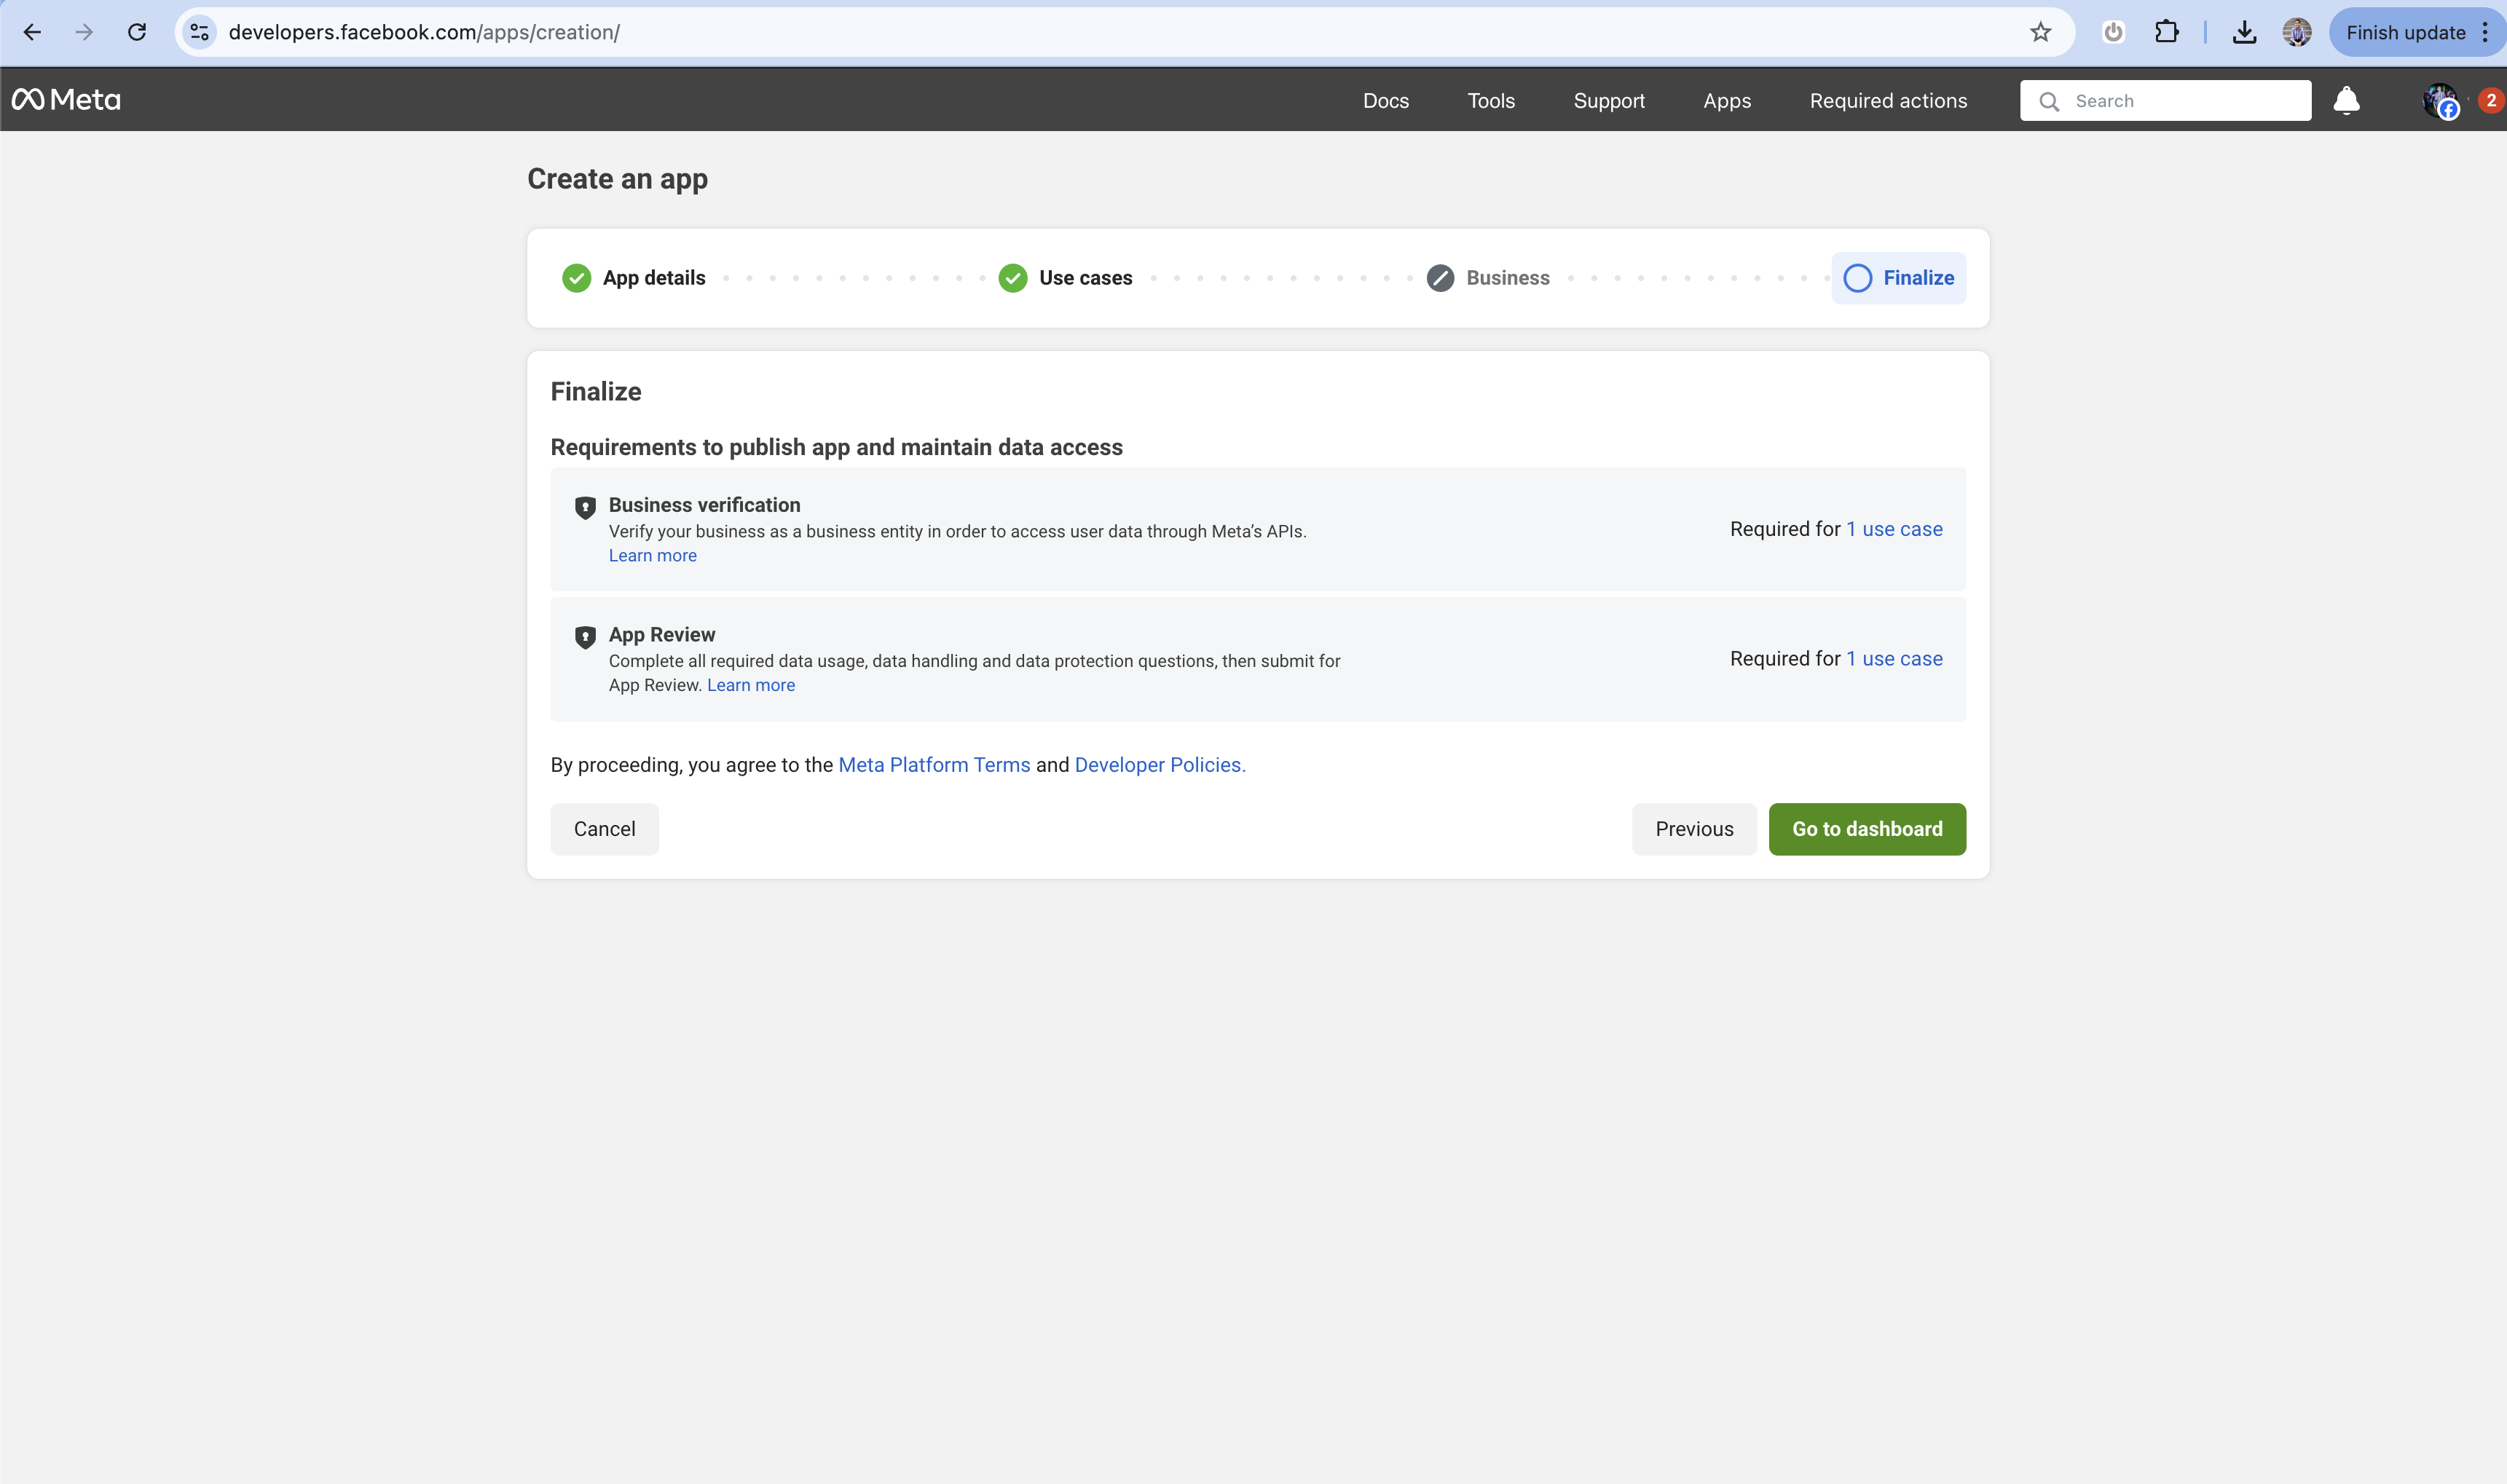
 1. Click "Go to Dashboard" to finalize the initial setup
2. This will take you to your app's main dashboard
1. Click "Go to Dashboard" to finalize the initial setup
2. This will take you to your app's main dashboard
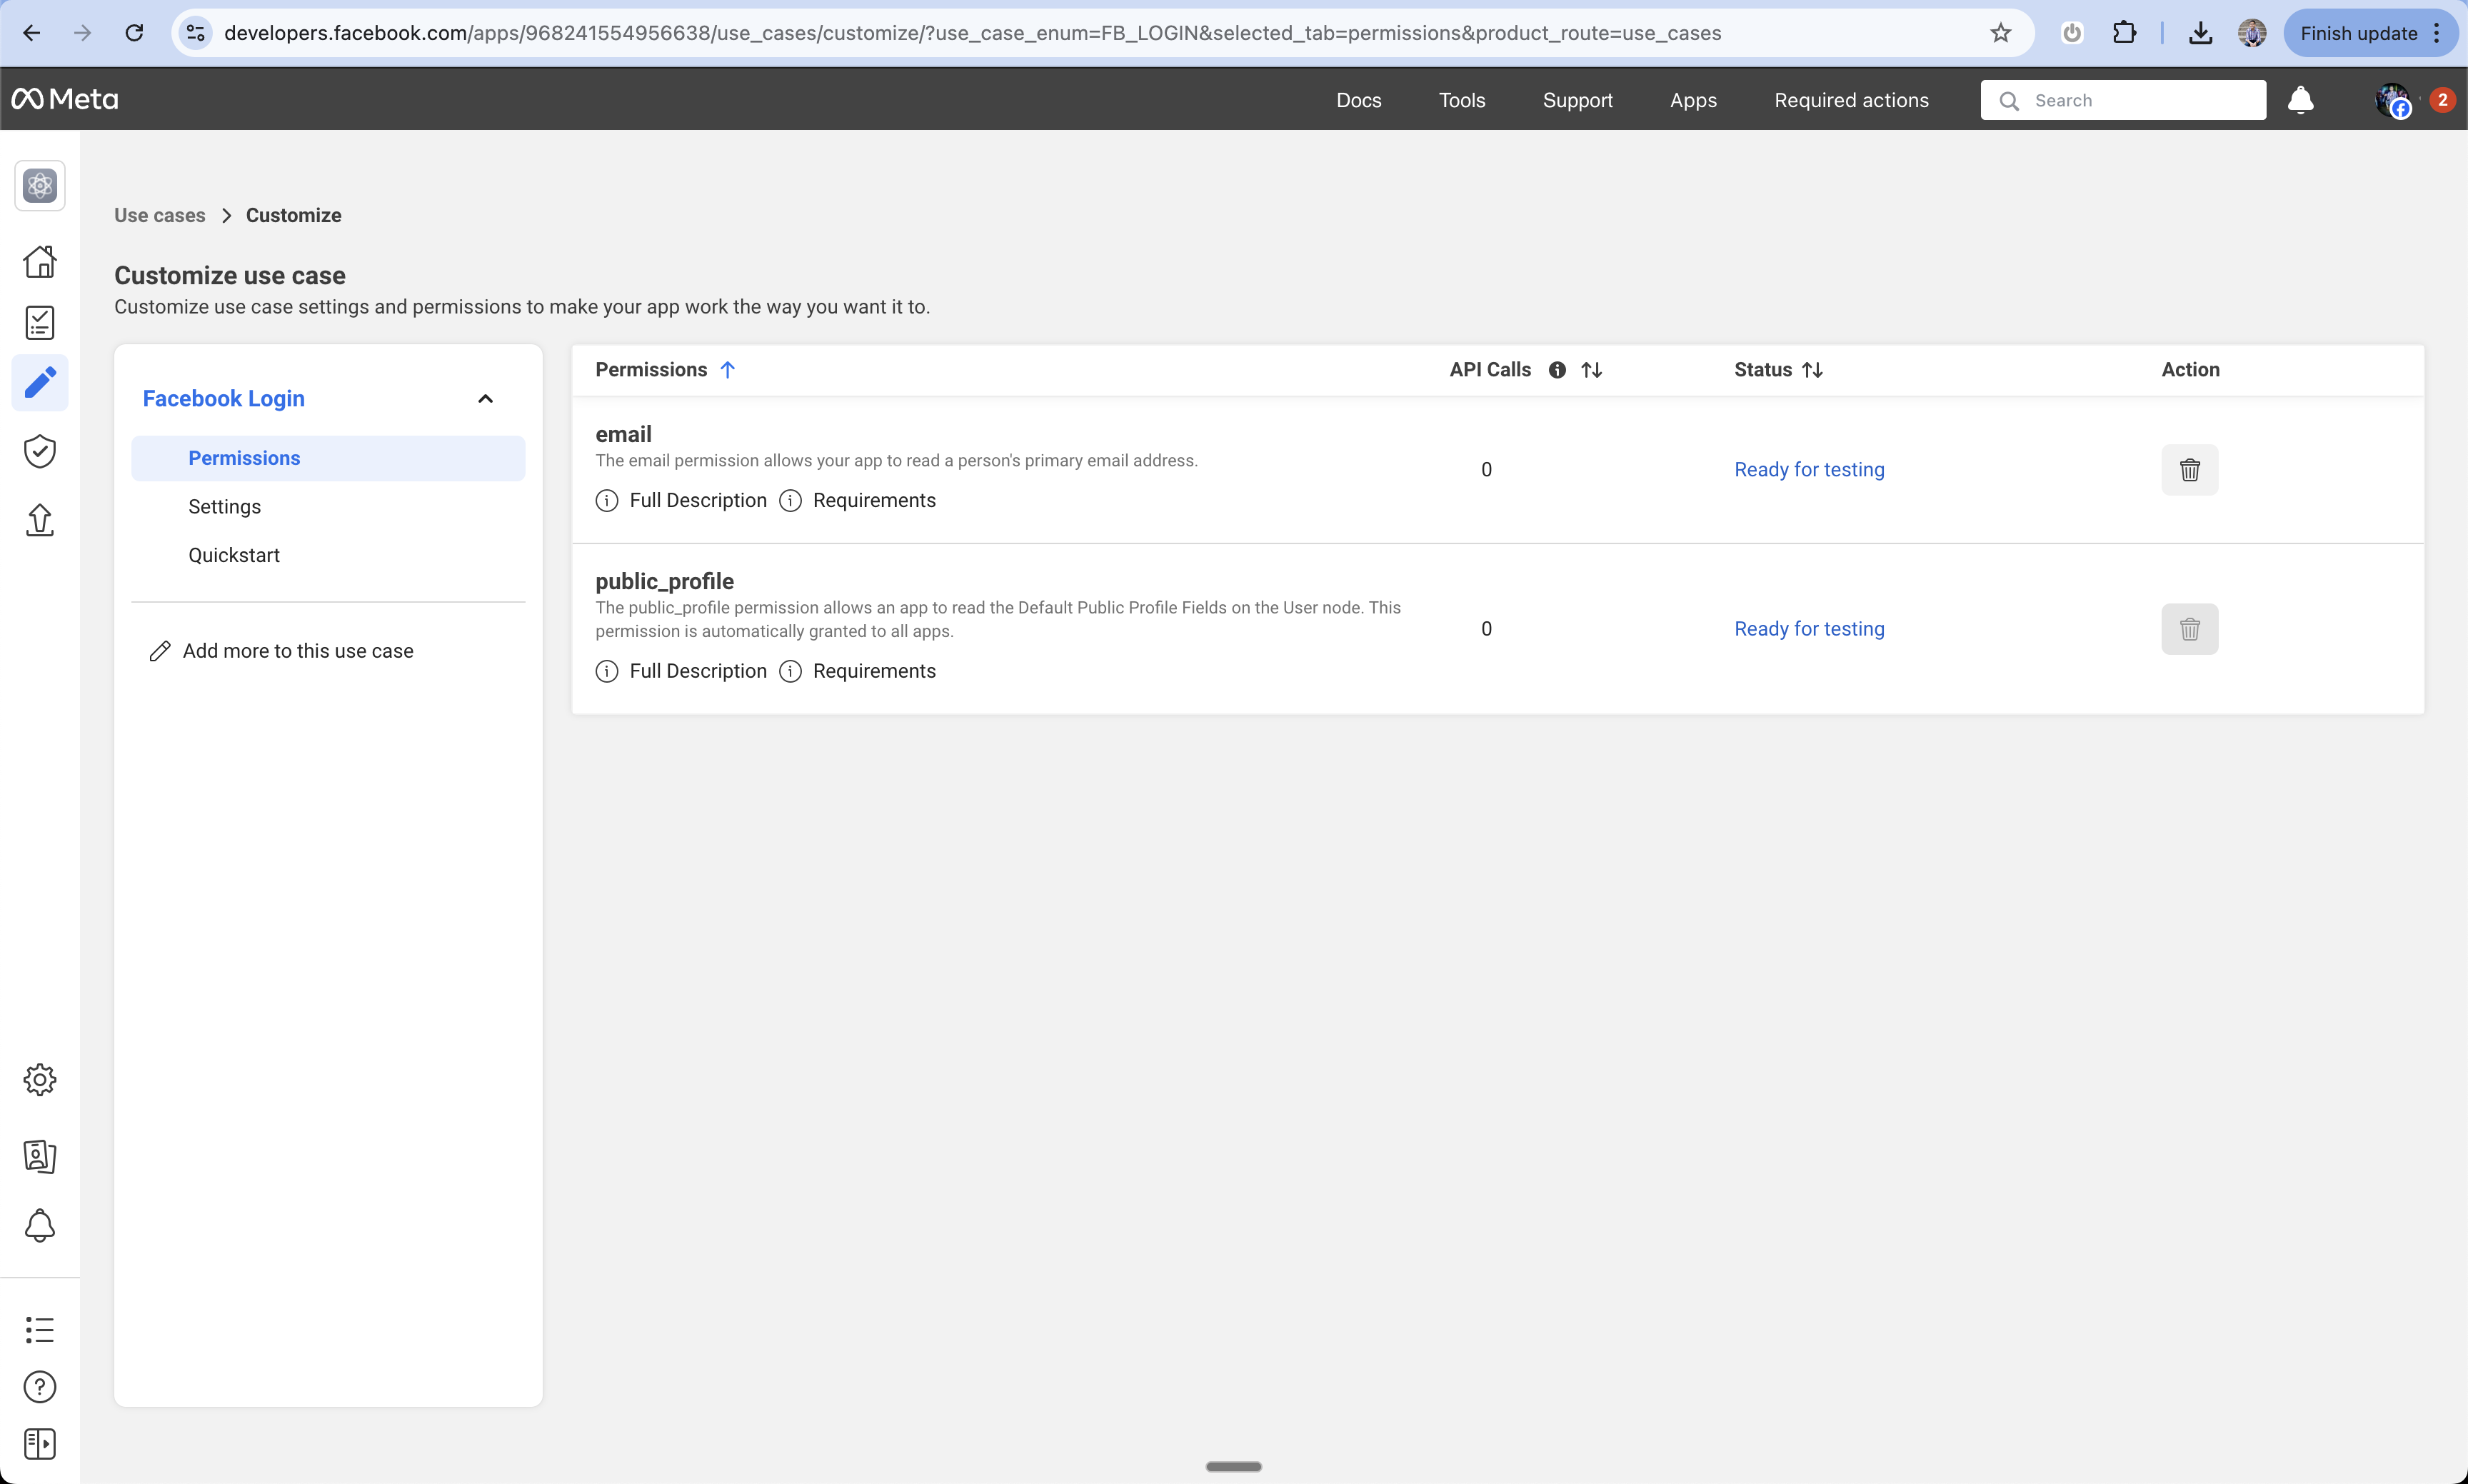
 1. Navigate to App Settings > Permissions
2. Add the email permission if you want to receive user email addresses
3. This is optional but recommended if your app needs to email users
1. Navigate to App Settings > Permissions
2. Add the email permission if you want to receive user email addresses
3. This is optional but recommended if your app needs to email users
 1. In the left sidebar, click "Facebook Login > Settings"
2. This is where you'll configure the OAuth settings
1. In the left sidebar, click "Facebook Login > Settings"
2. This is where you'll configure the OAuth settings
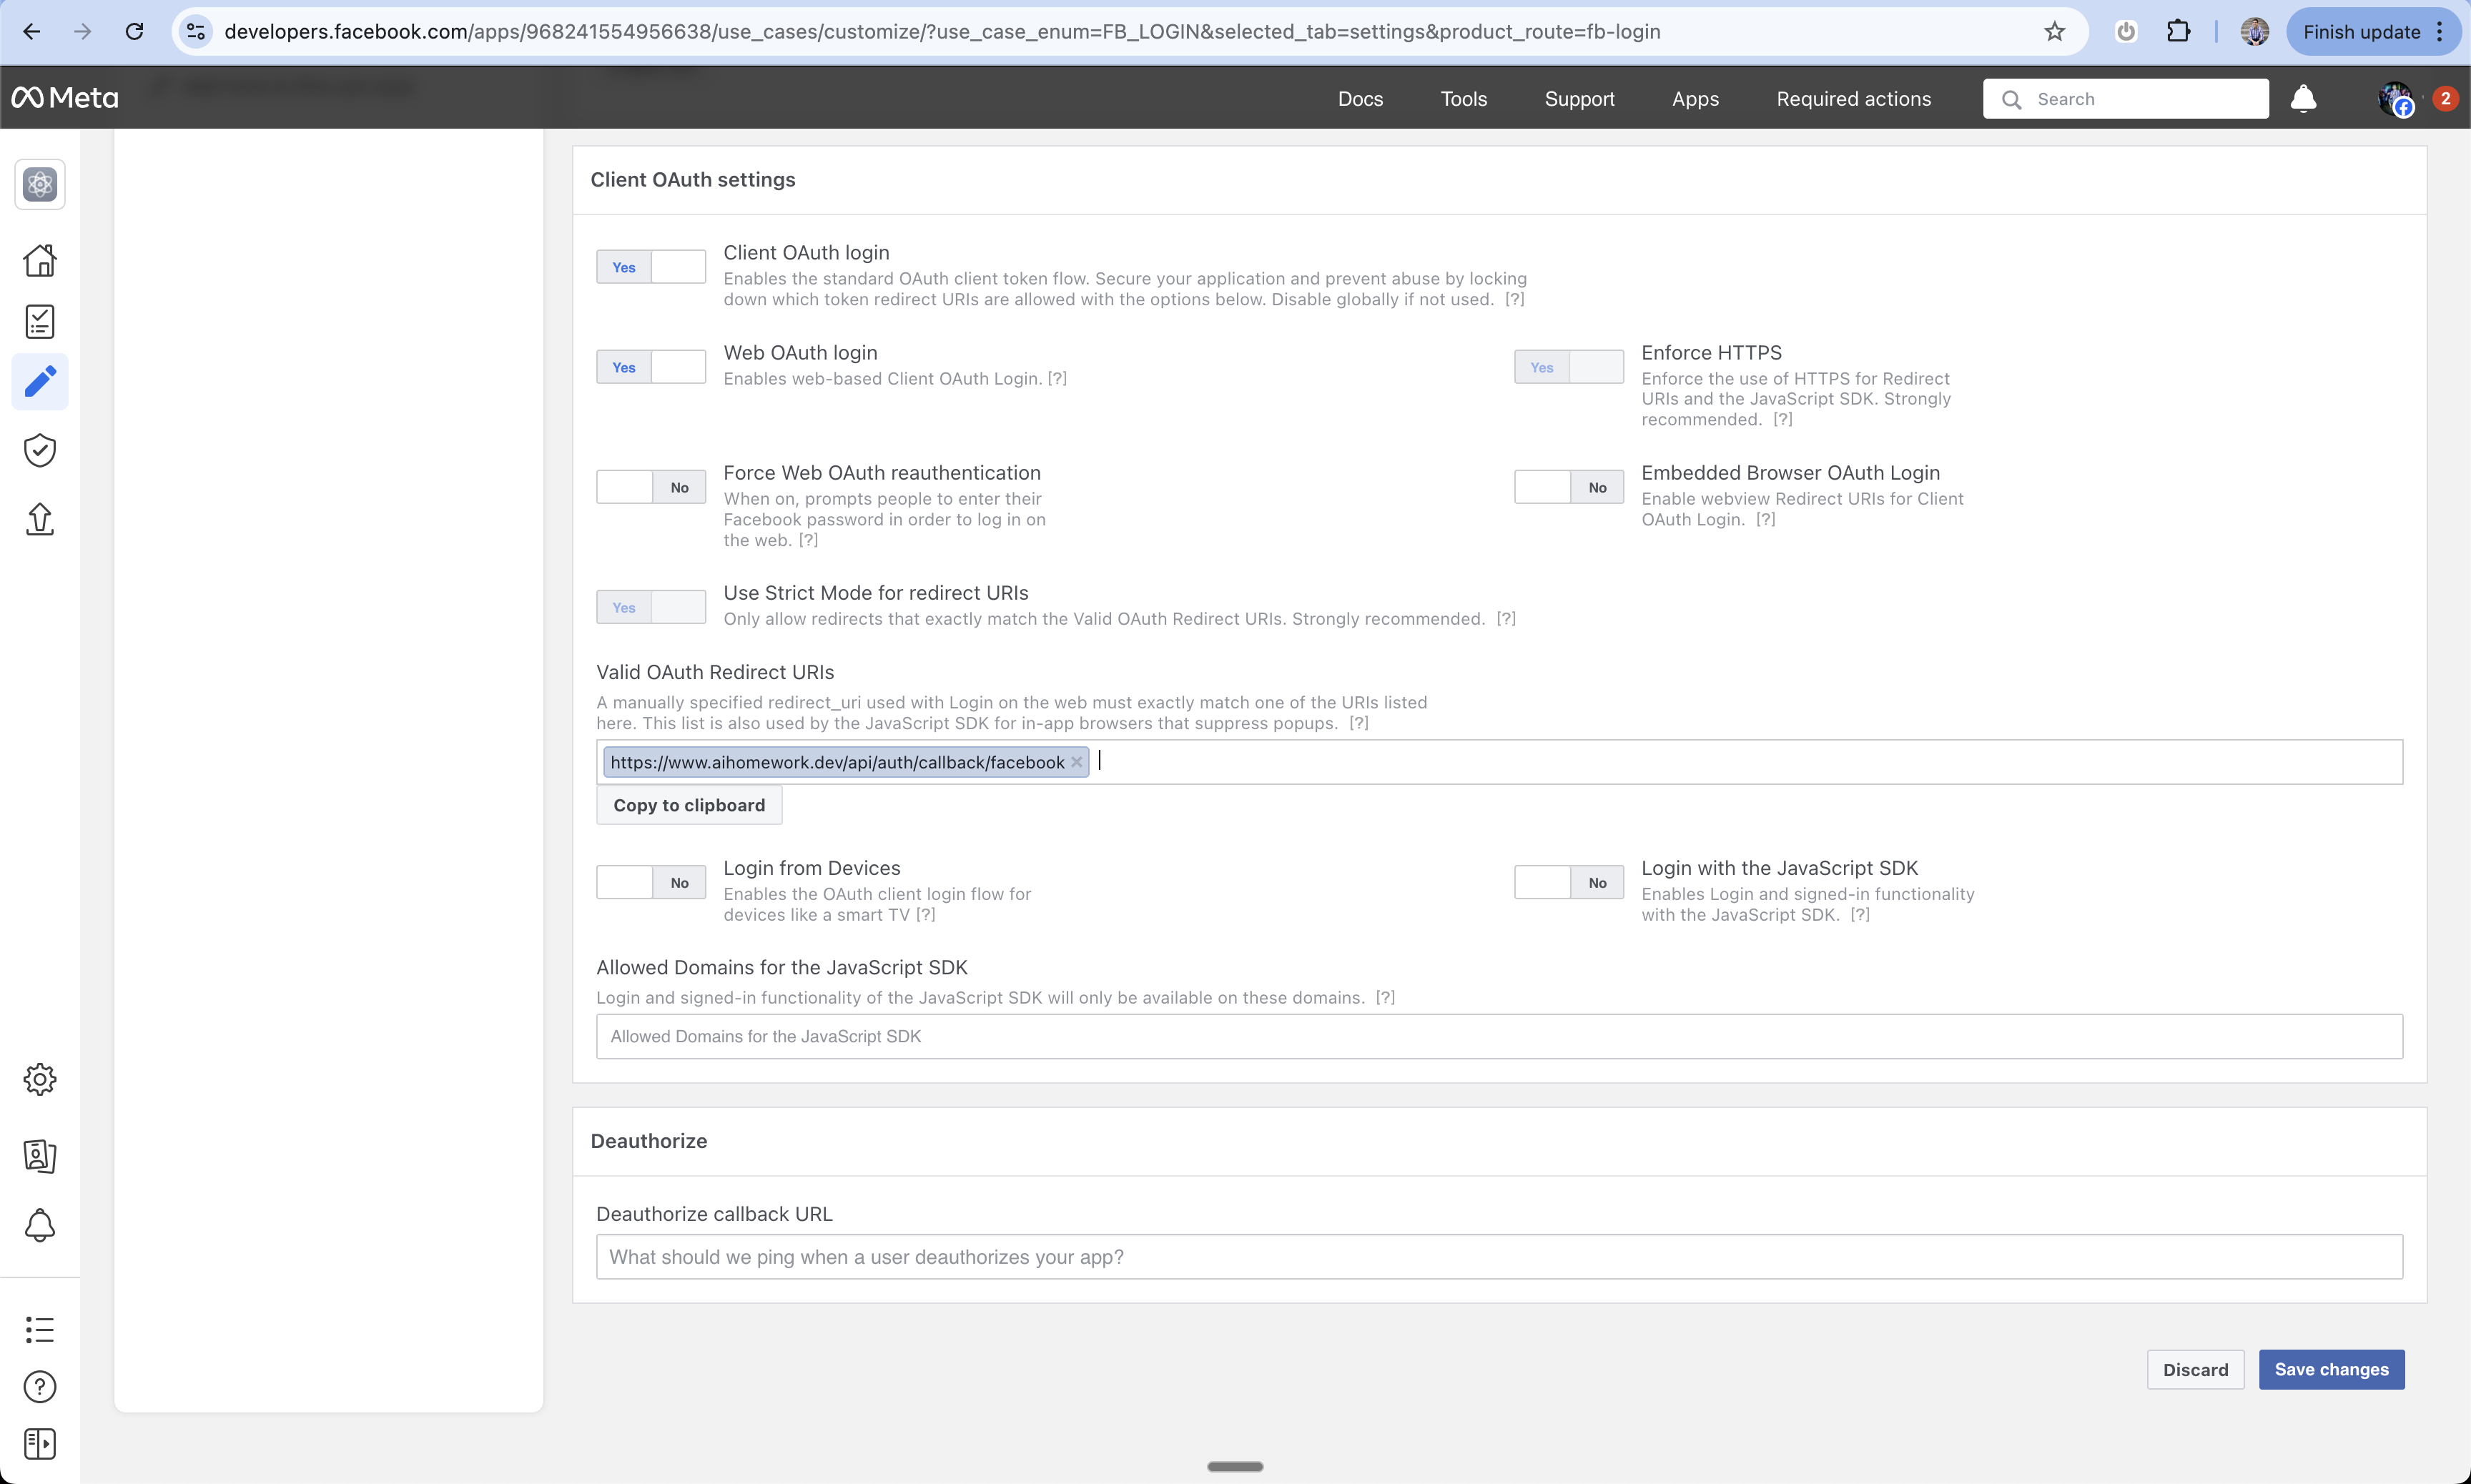
 1. Under "Valid OAuth Redirect URIs"
2. Add: `https://www.your-domain.com/api/auth/callback/facebook`
3. Replace "your-domain.com" with your actual domain
1. Under "Valid OAuth Redirect URIs"
2. Add: `https://www.your-domain.com/api/auth/callback/facebook`
3. Replace "your-domain.com" with your actual domain
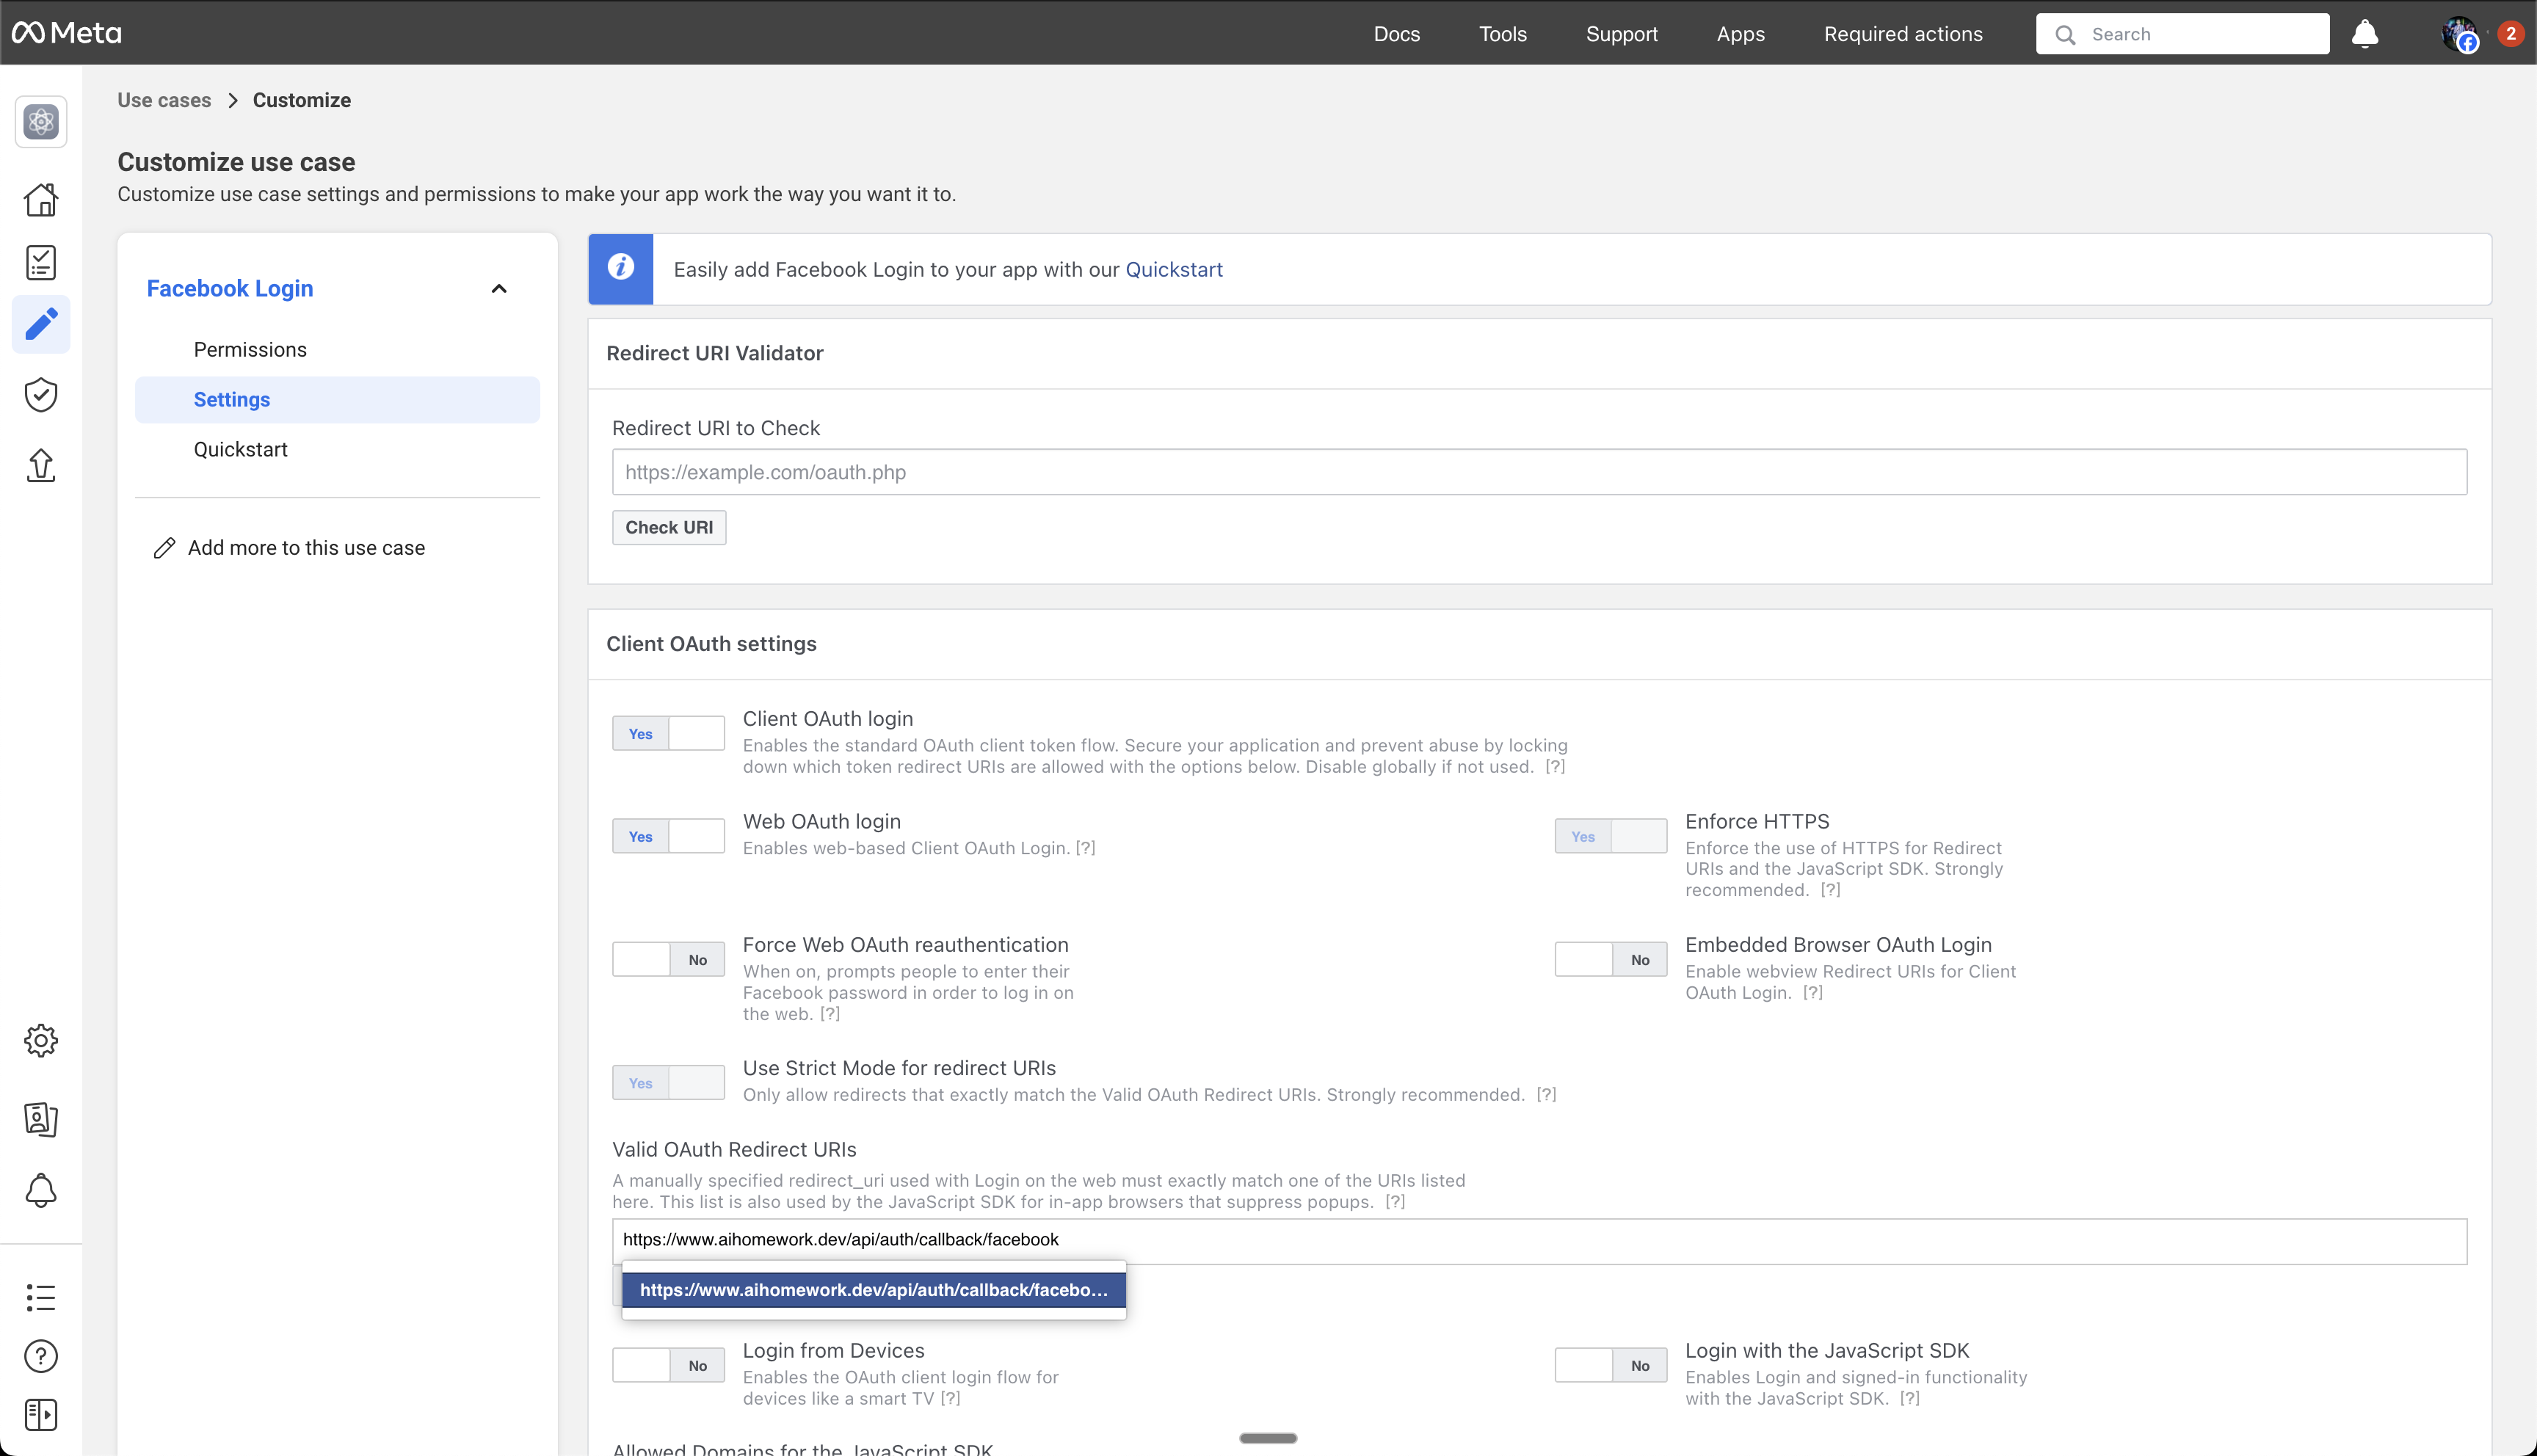 Must include:
* `https://` protocol
* `www` prefix in the domain
* Exact domain used in Anything's custom domain settings
* Valid CNAME record for `www` subdomain in DNS
1. Scroll to the bottom of the settings page
2. Click "Save Changes" to store your OAuth configuration
Must include:
* `https://` protocol
* `www` prefix in the domain
* Exact domain used in Anything's custom domain settings
* Valid CNAME record for `www` subdomain in DNS
1. Scroll to the bottom of the settings page
2. Click "Save Changes" to store your OAuth configuration
 1. Navigate to Settings > Basic in the left sidebar
2. This section contains your app credentials and core settings
1. Navigate to Settings > Basic in the left sidebar
2. This section contains your app credentials and core settings
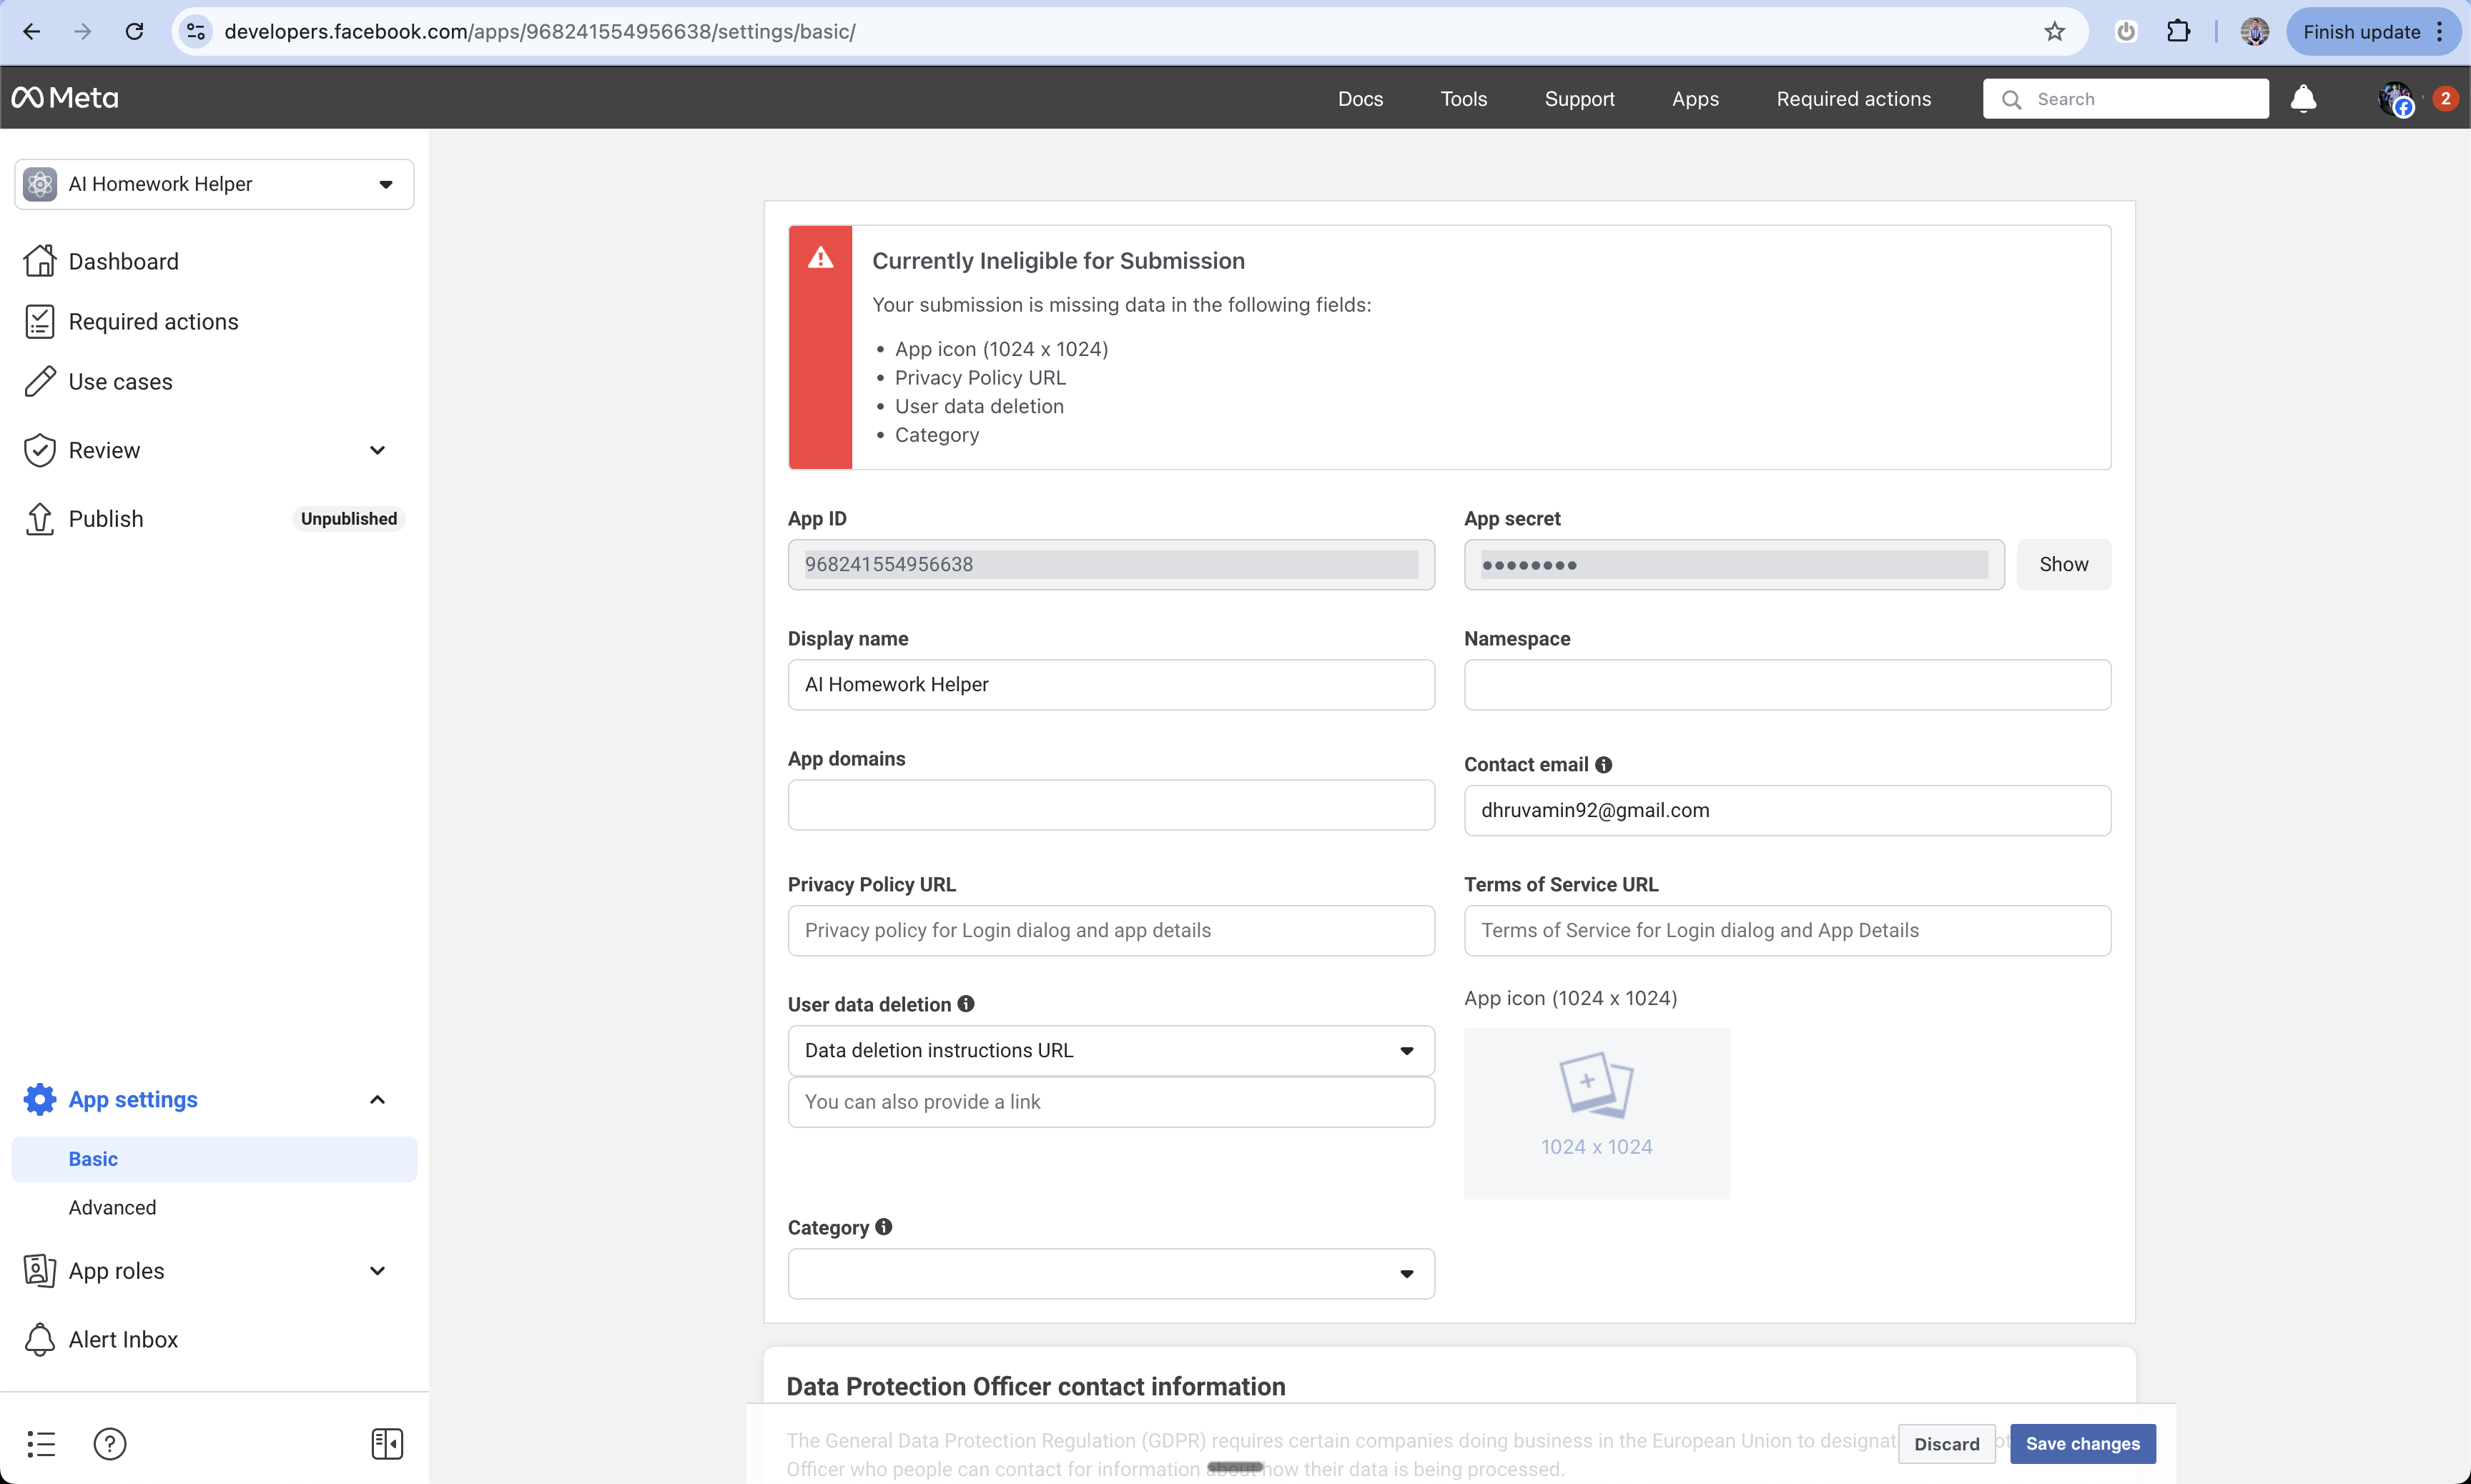 1. Find your App ID
2. Click "Show" to reveal your App Secret
3. Save both values - you'll need them for Anything setup
1. Find your App ID
2. Click "Show" to reveal your App Secret
3. Save both values - you'll need them for Anything setup
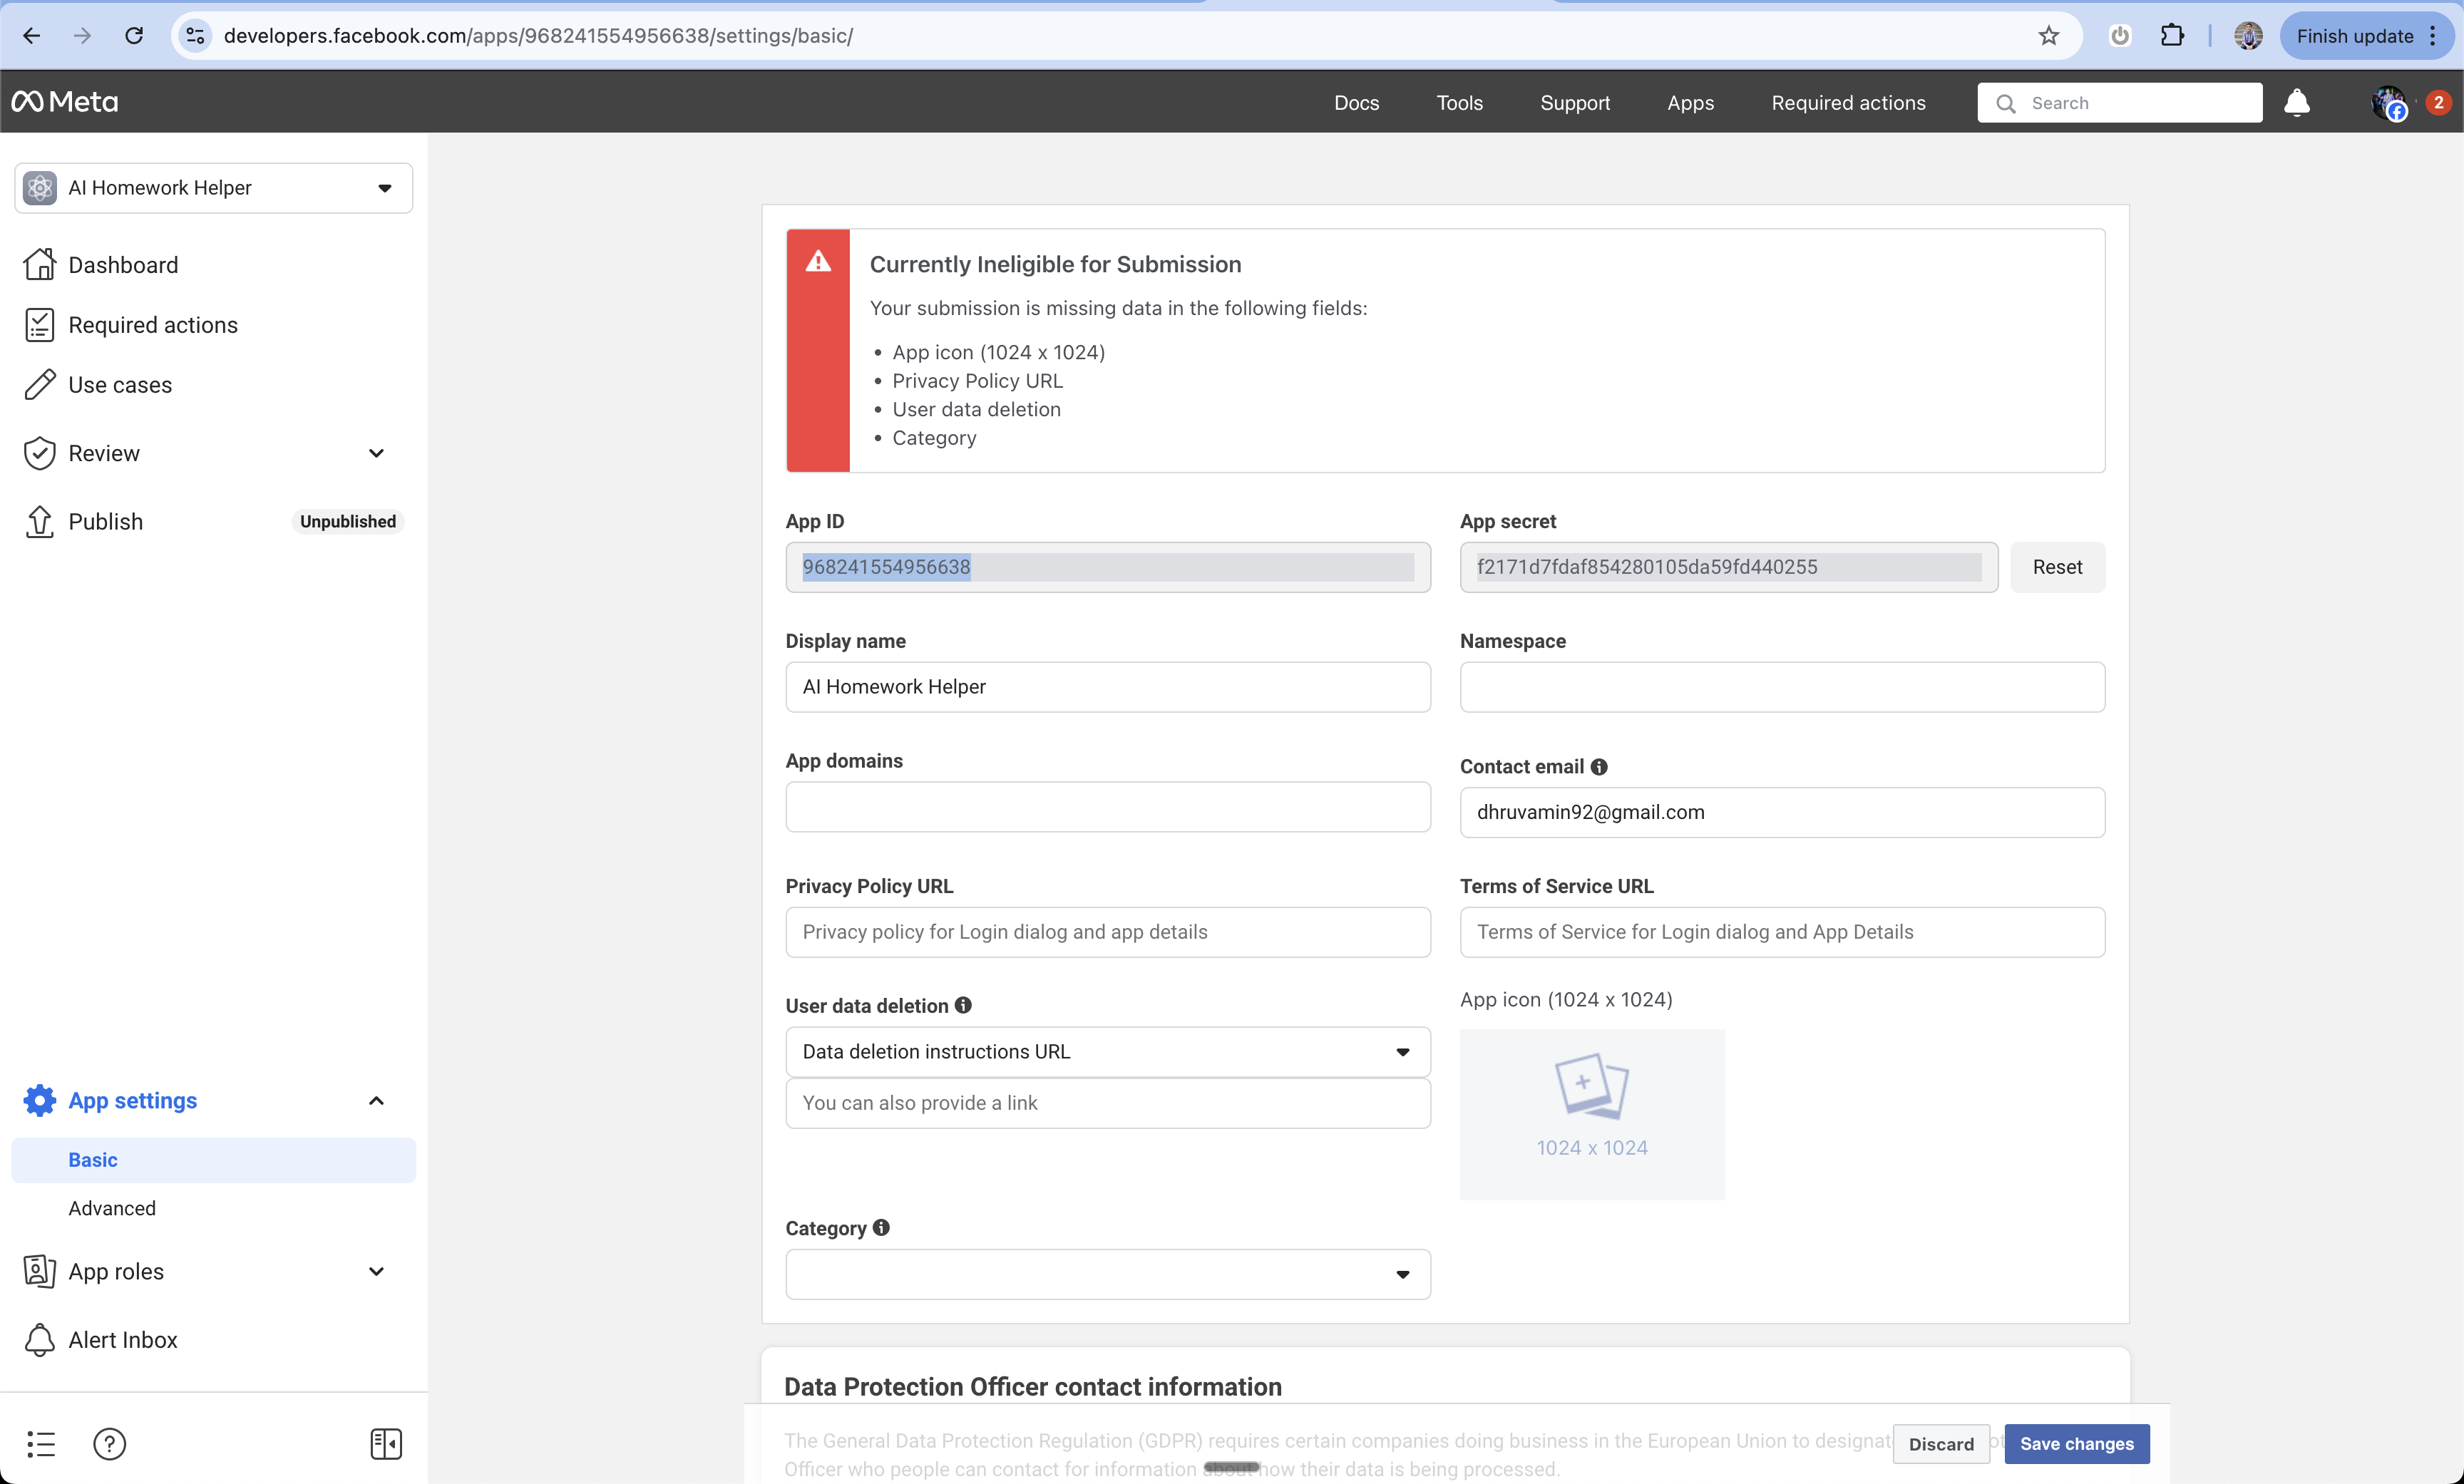 Keep your App Secret secure - never share it publicly
Before launching, you'll need to complete these additional settings:
1. Add your domain with `www` prefix
2. Add Privacy Policy URL
3. Add User Data Deletion Policy URL
4. Add Terms of Service URL
Keep your App Secret secure - never share it publicly
Before launching, you'll need to complete these additional settings:
1. Add your domain with `www` prefix
2. Add Privacy Policy URL
3. Add User Data Deletion Policy URL
4. Add Terms of Service URL
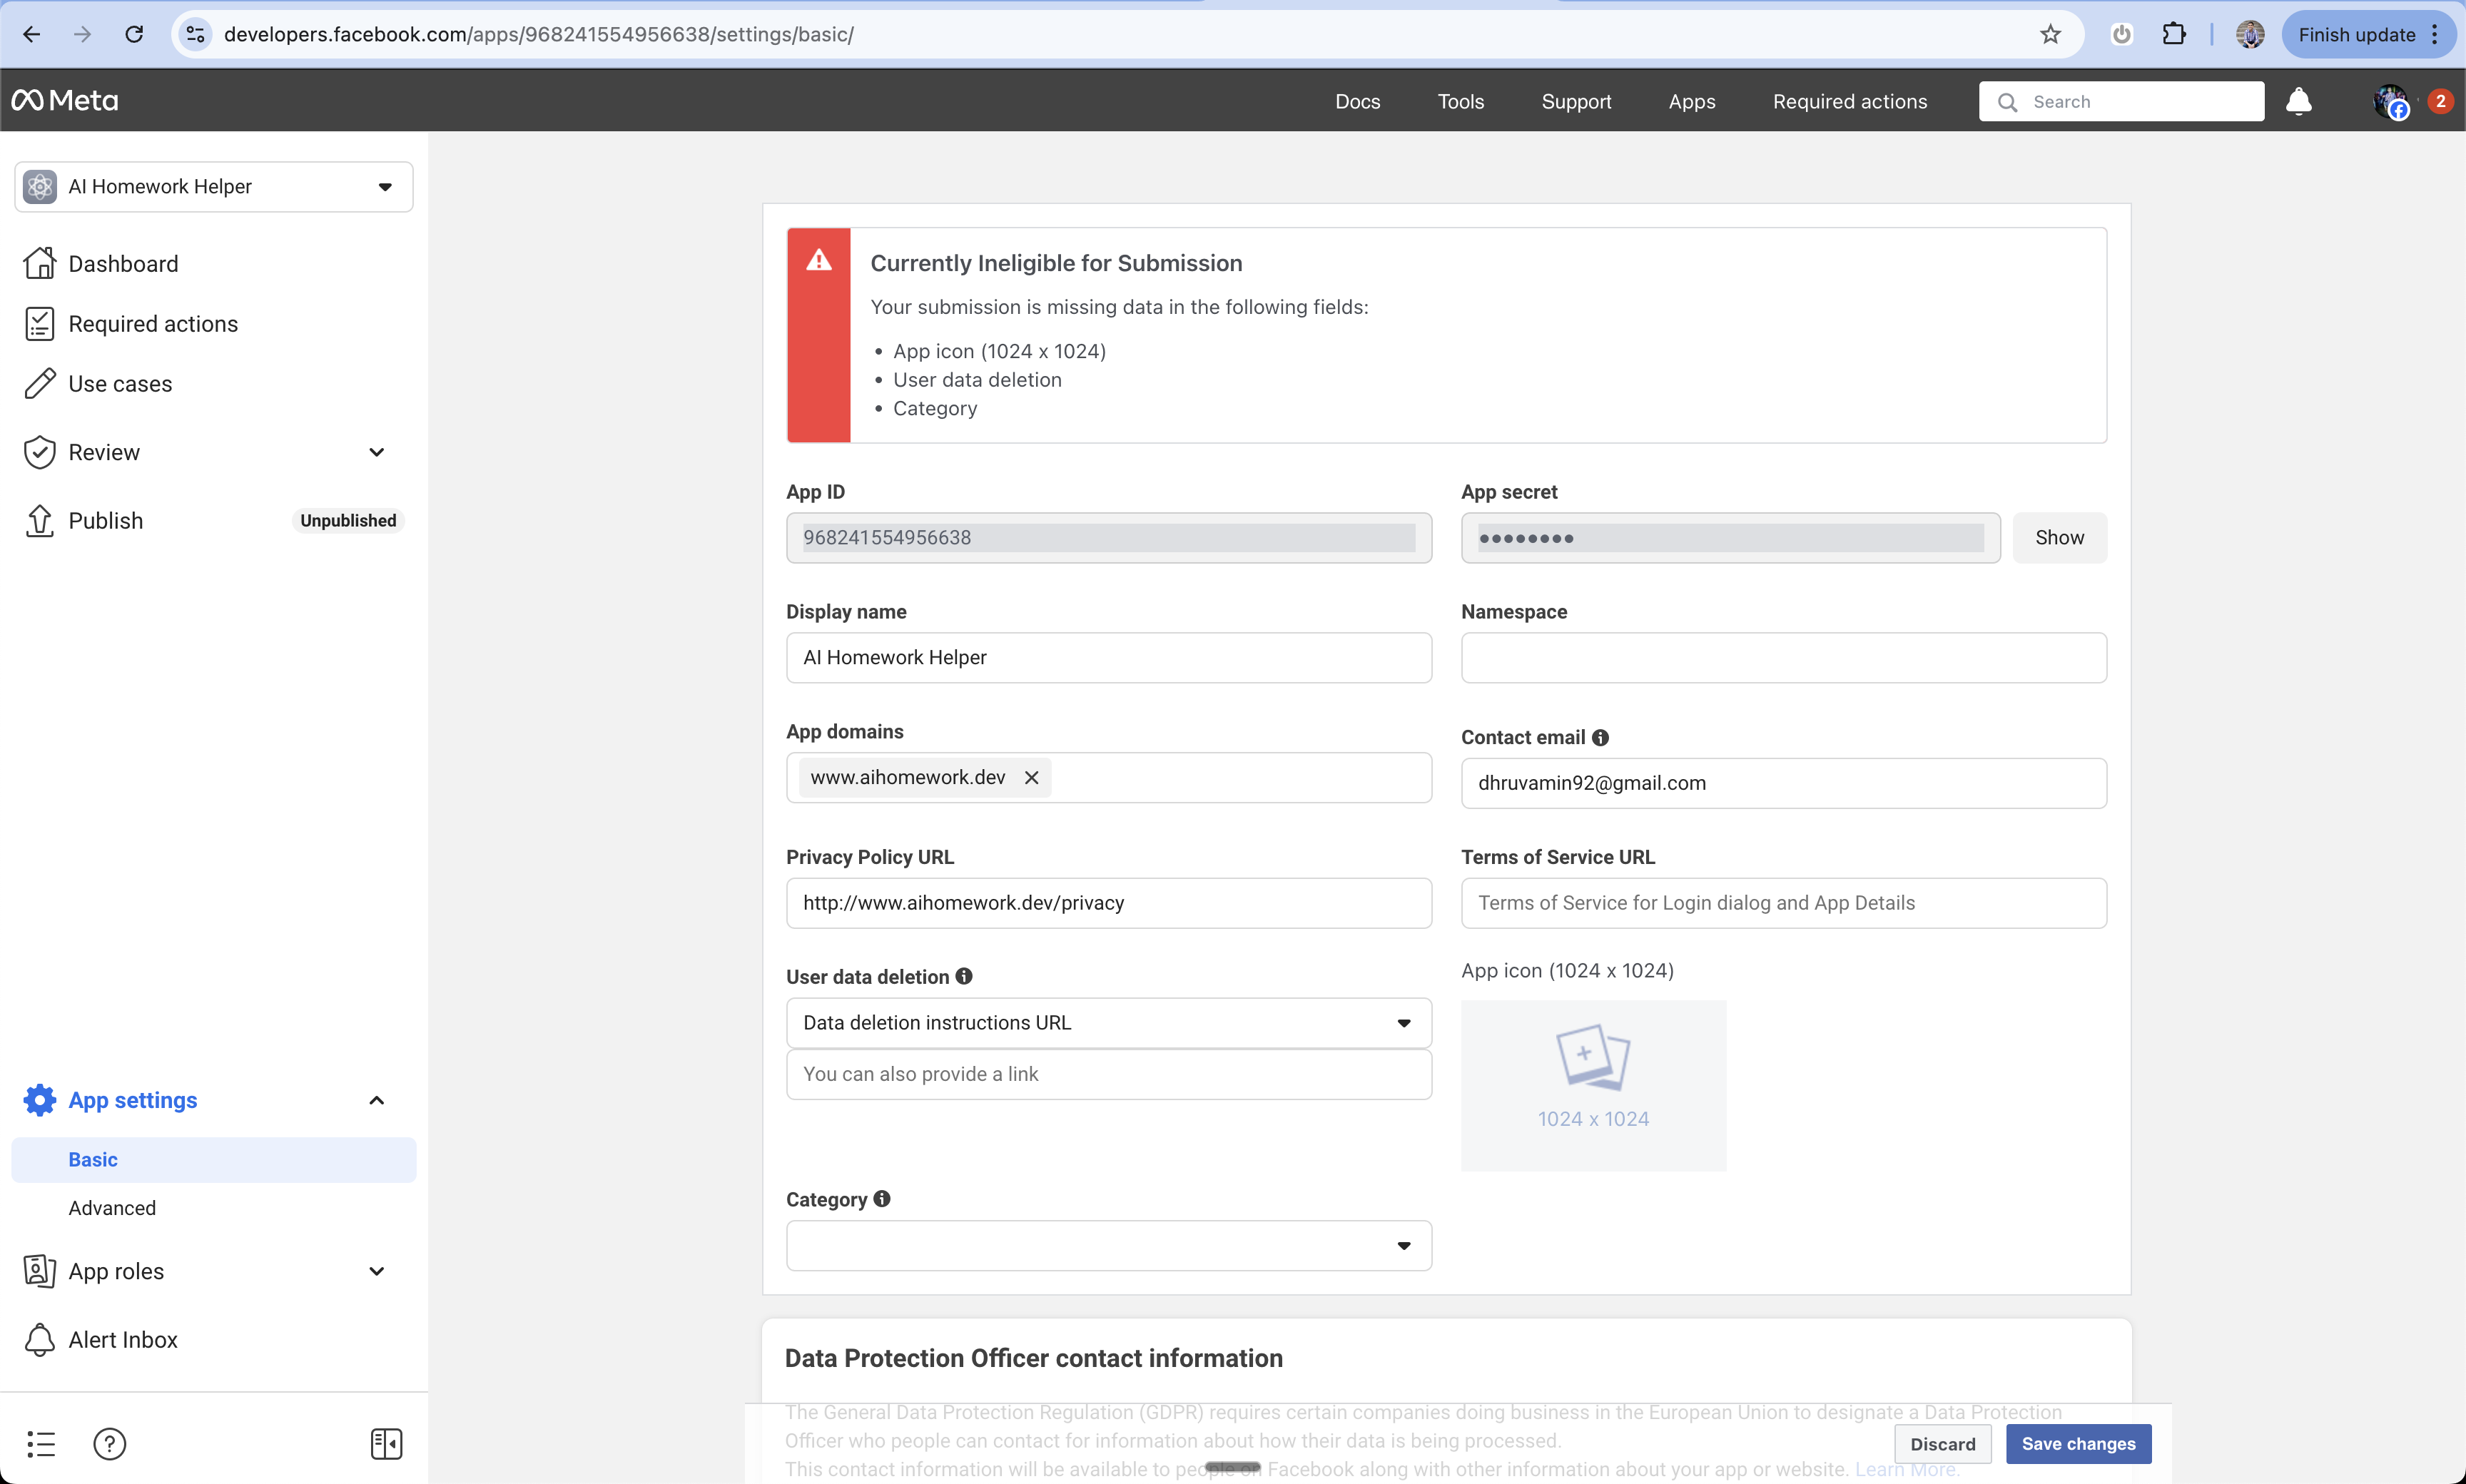 You can use services like Termly to generate these required policy documents and then host them on pages in your Anything app.
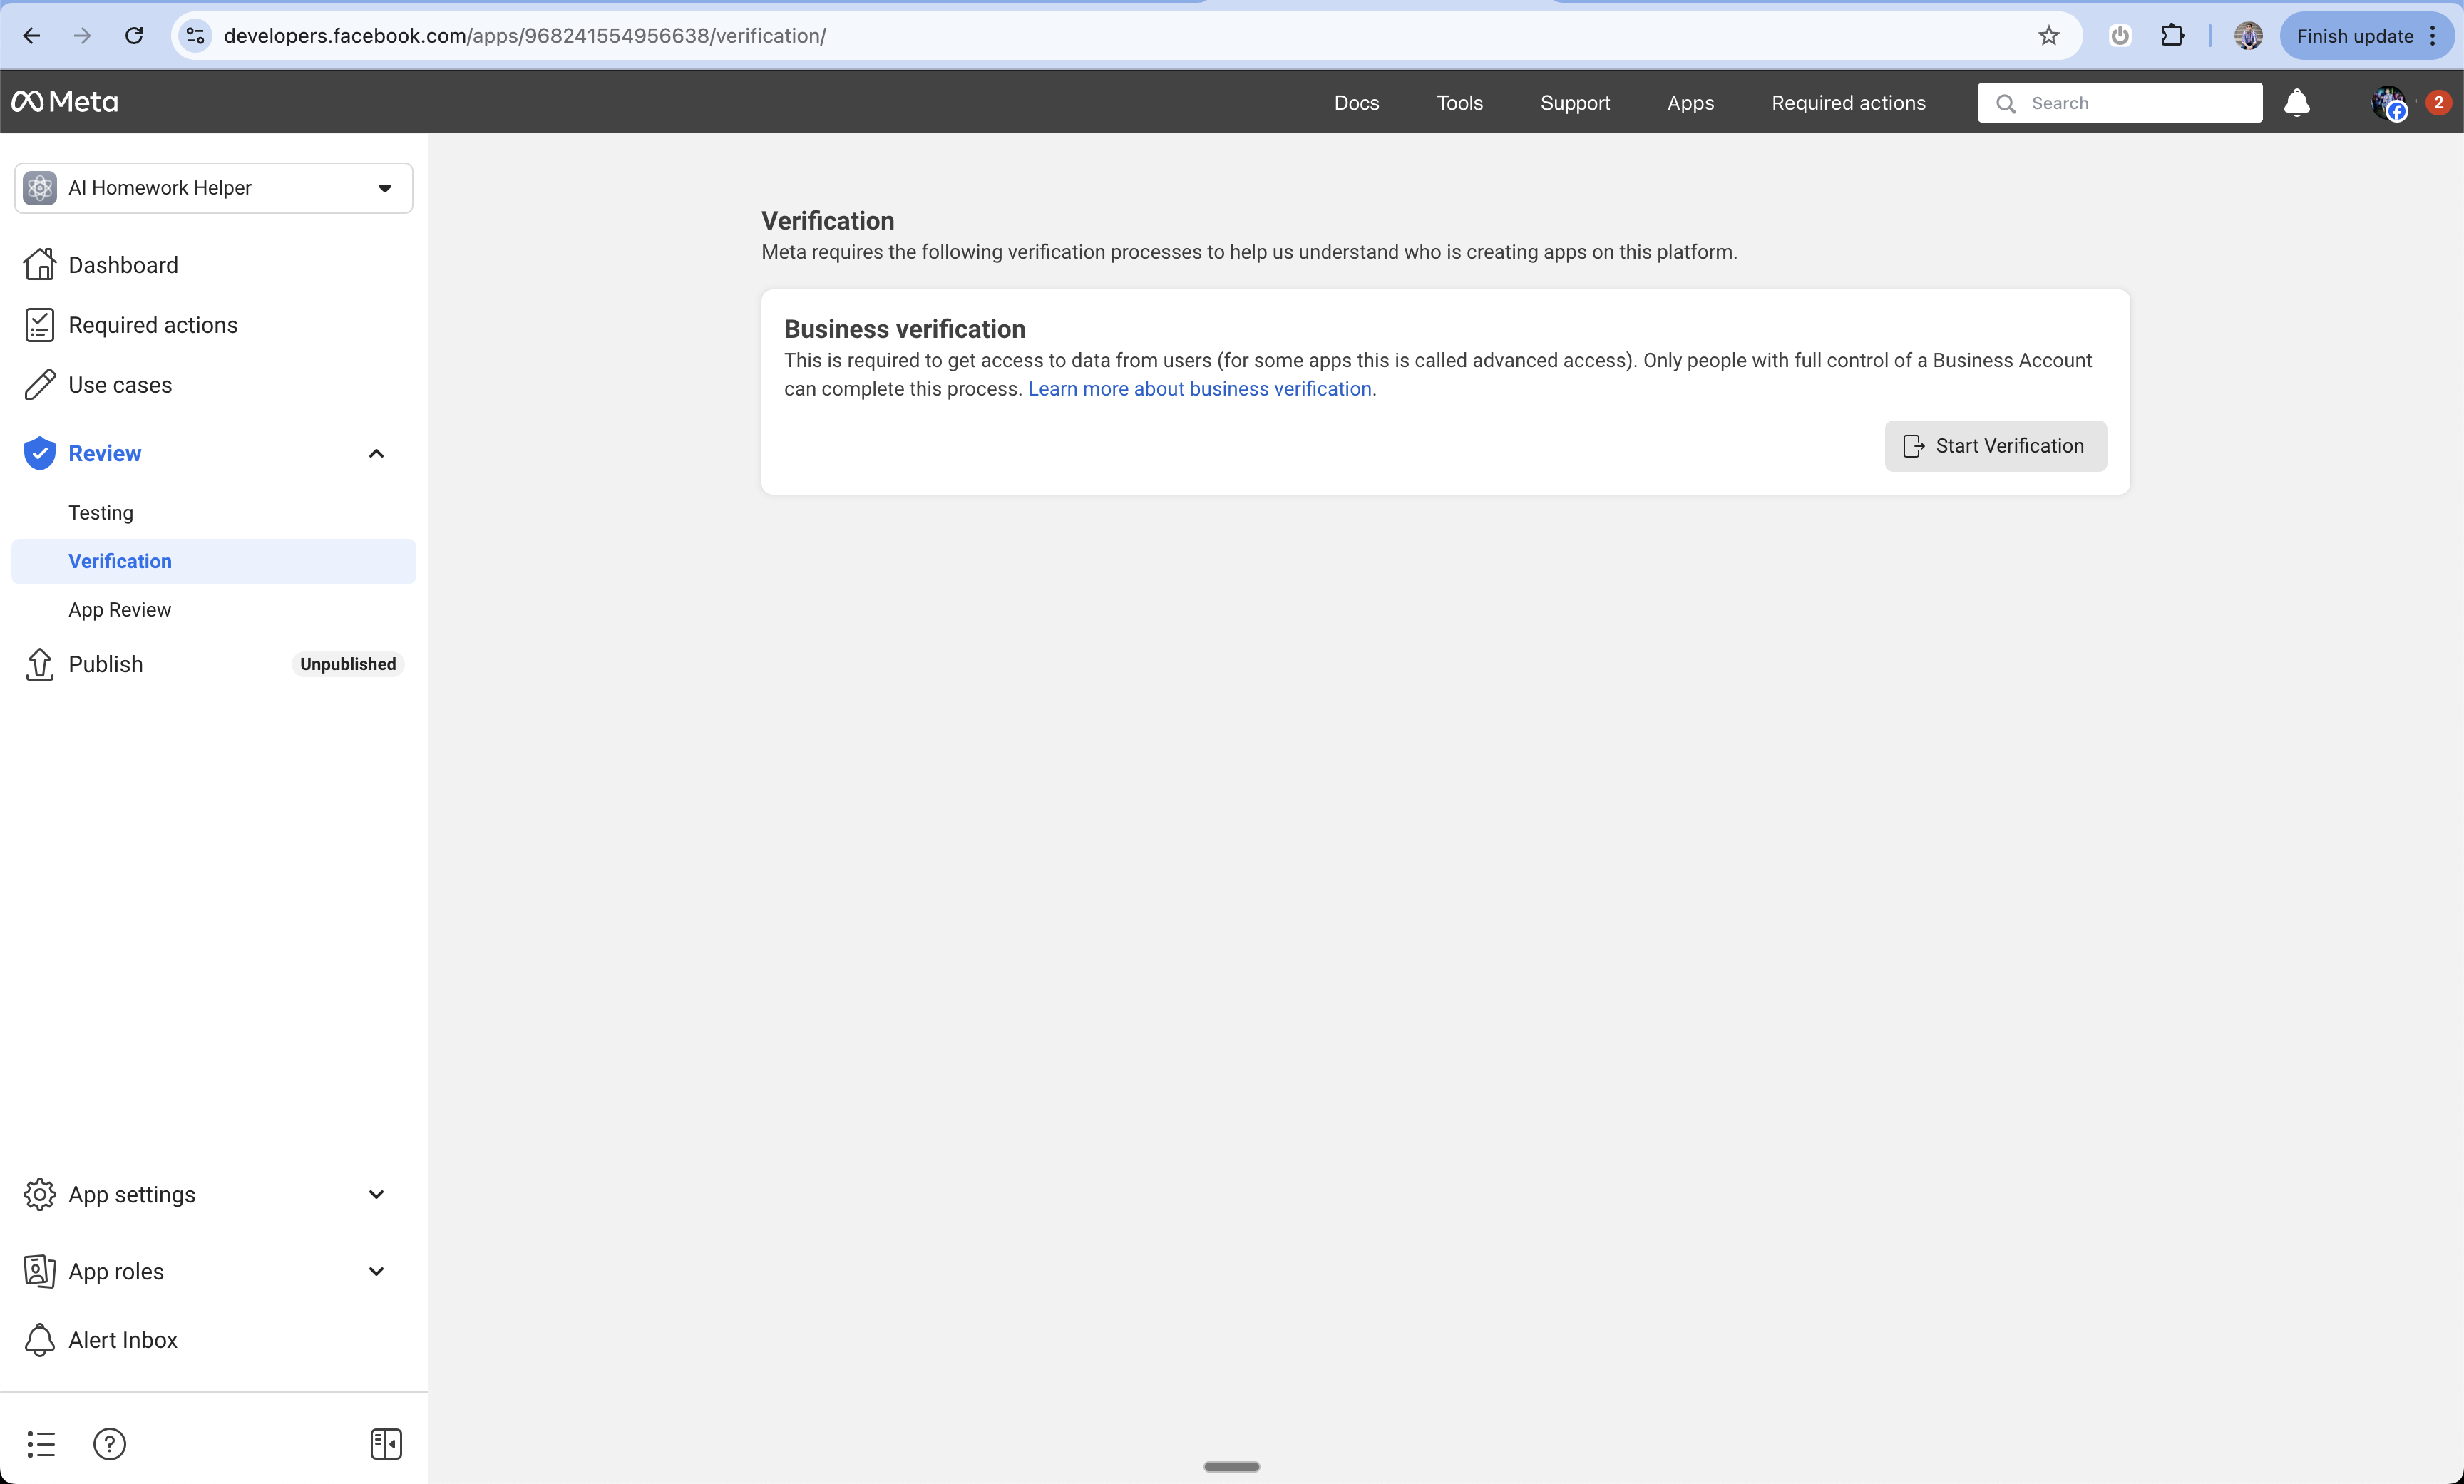
Required before launching your app:
1. Complete the business verification process
2. Provide required documentation
3. Wait for Facebook's review
You can use services like Termly to generate these required policy documents and then host them on pages in your Anything app.
Required before launching your app:
1. Complete the business verification process
2. Provide required documentation
3. Wait for Facebook's review
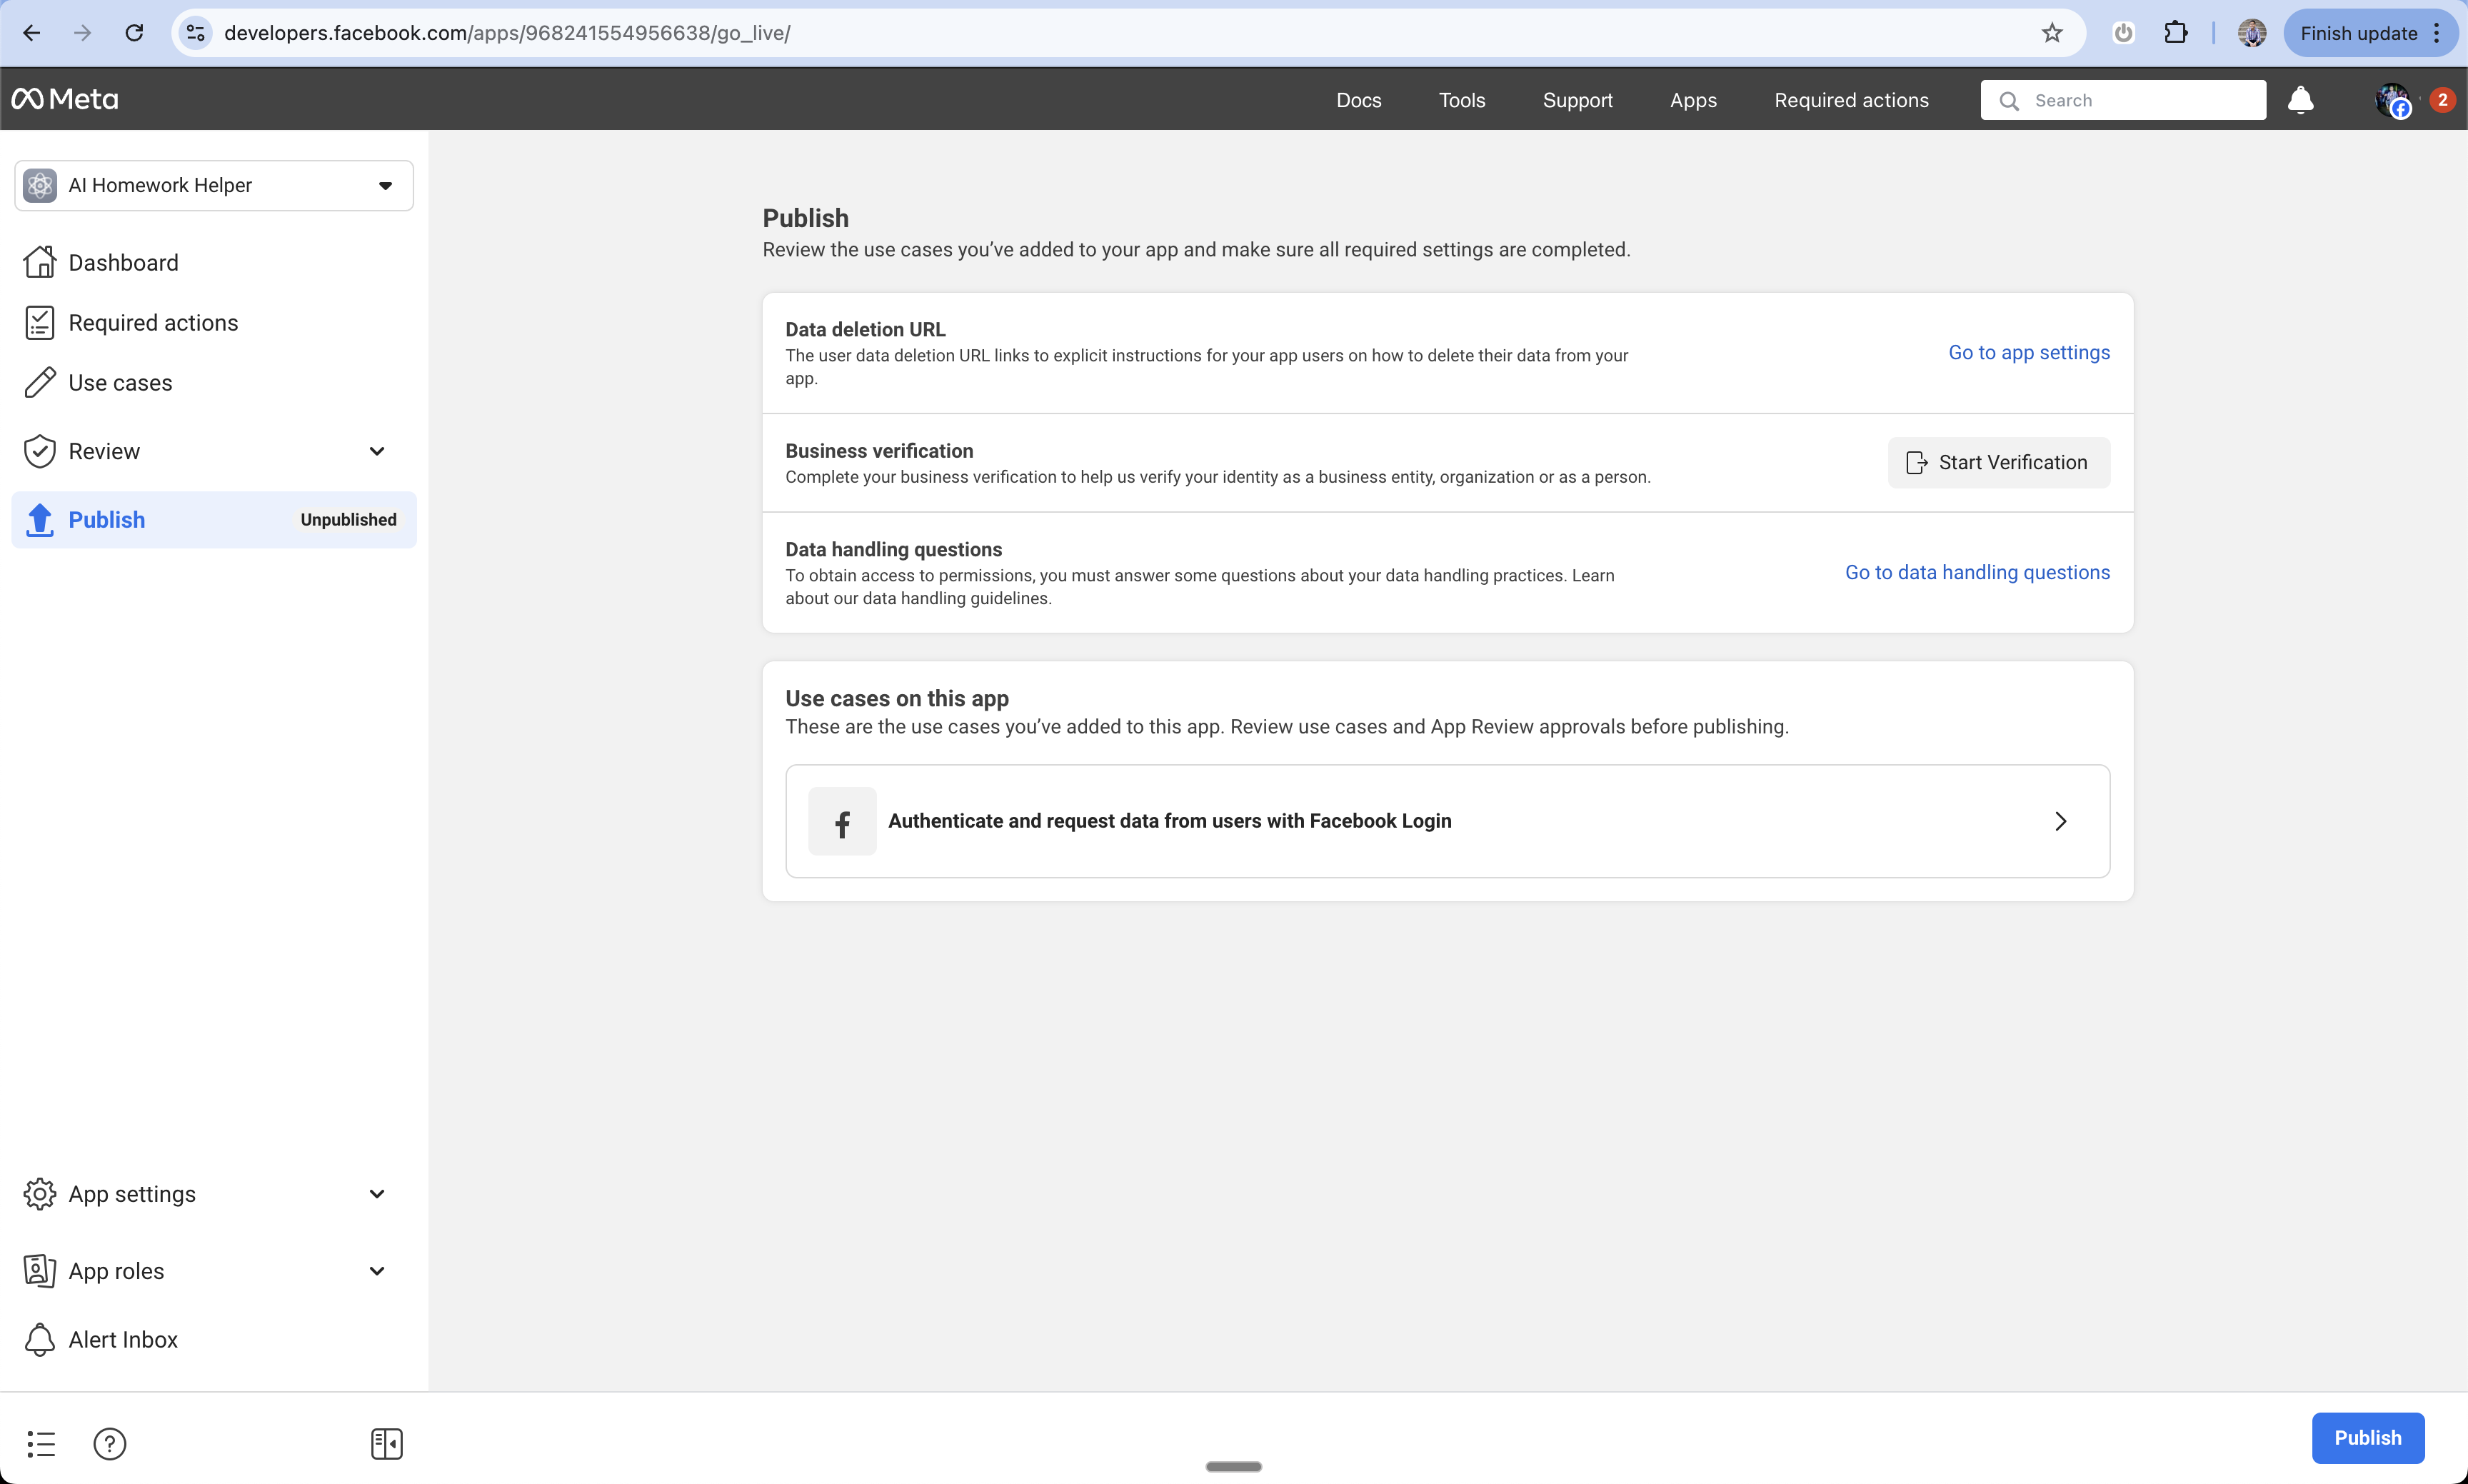
 Final step before going live:
1. Navigate to the App Dashboard
2. Switch your app from Development to Live mode
3. Complete any remaining verification steps
Final step before going live:
1. Navigate to the App Dashboard
2. Switch your app from Development to Live mode
3. Complete any remaining verification steps
 ## Add to Anything project
You have two options:
1. Prompt Anything with "Let users sign in"
2. Enable User Accounts from the logo menu
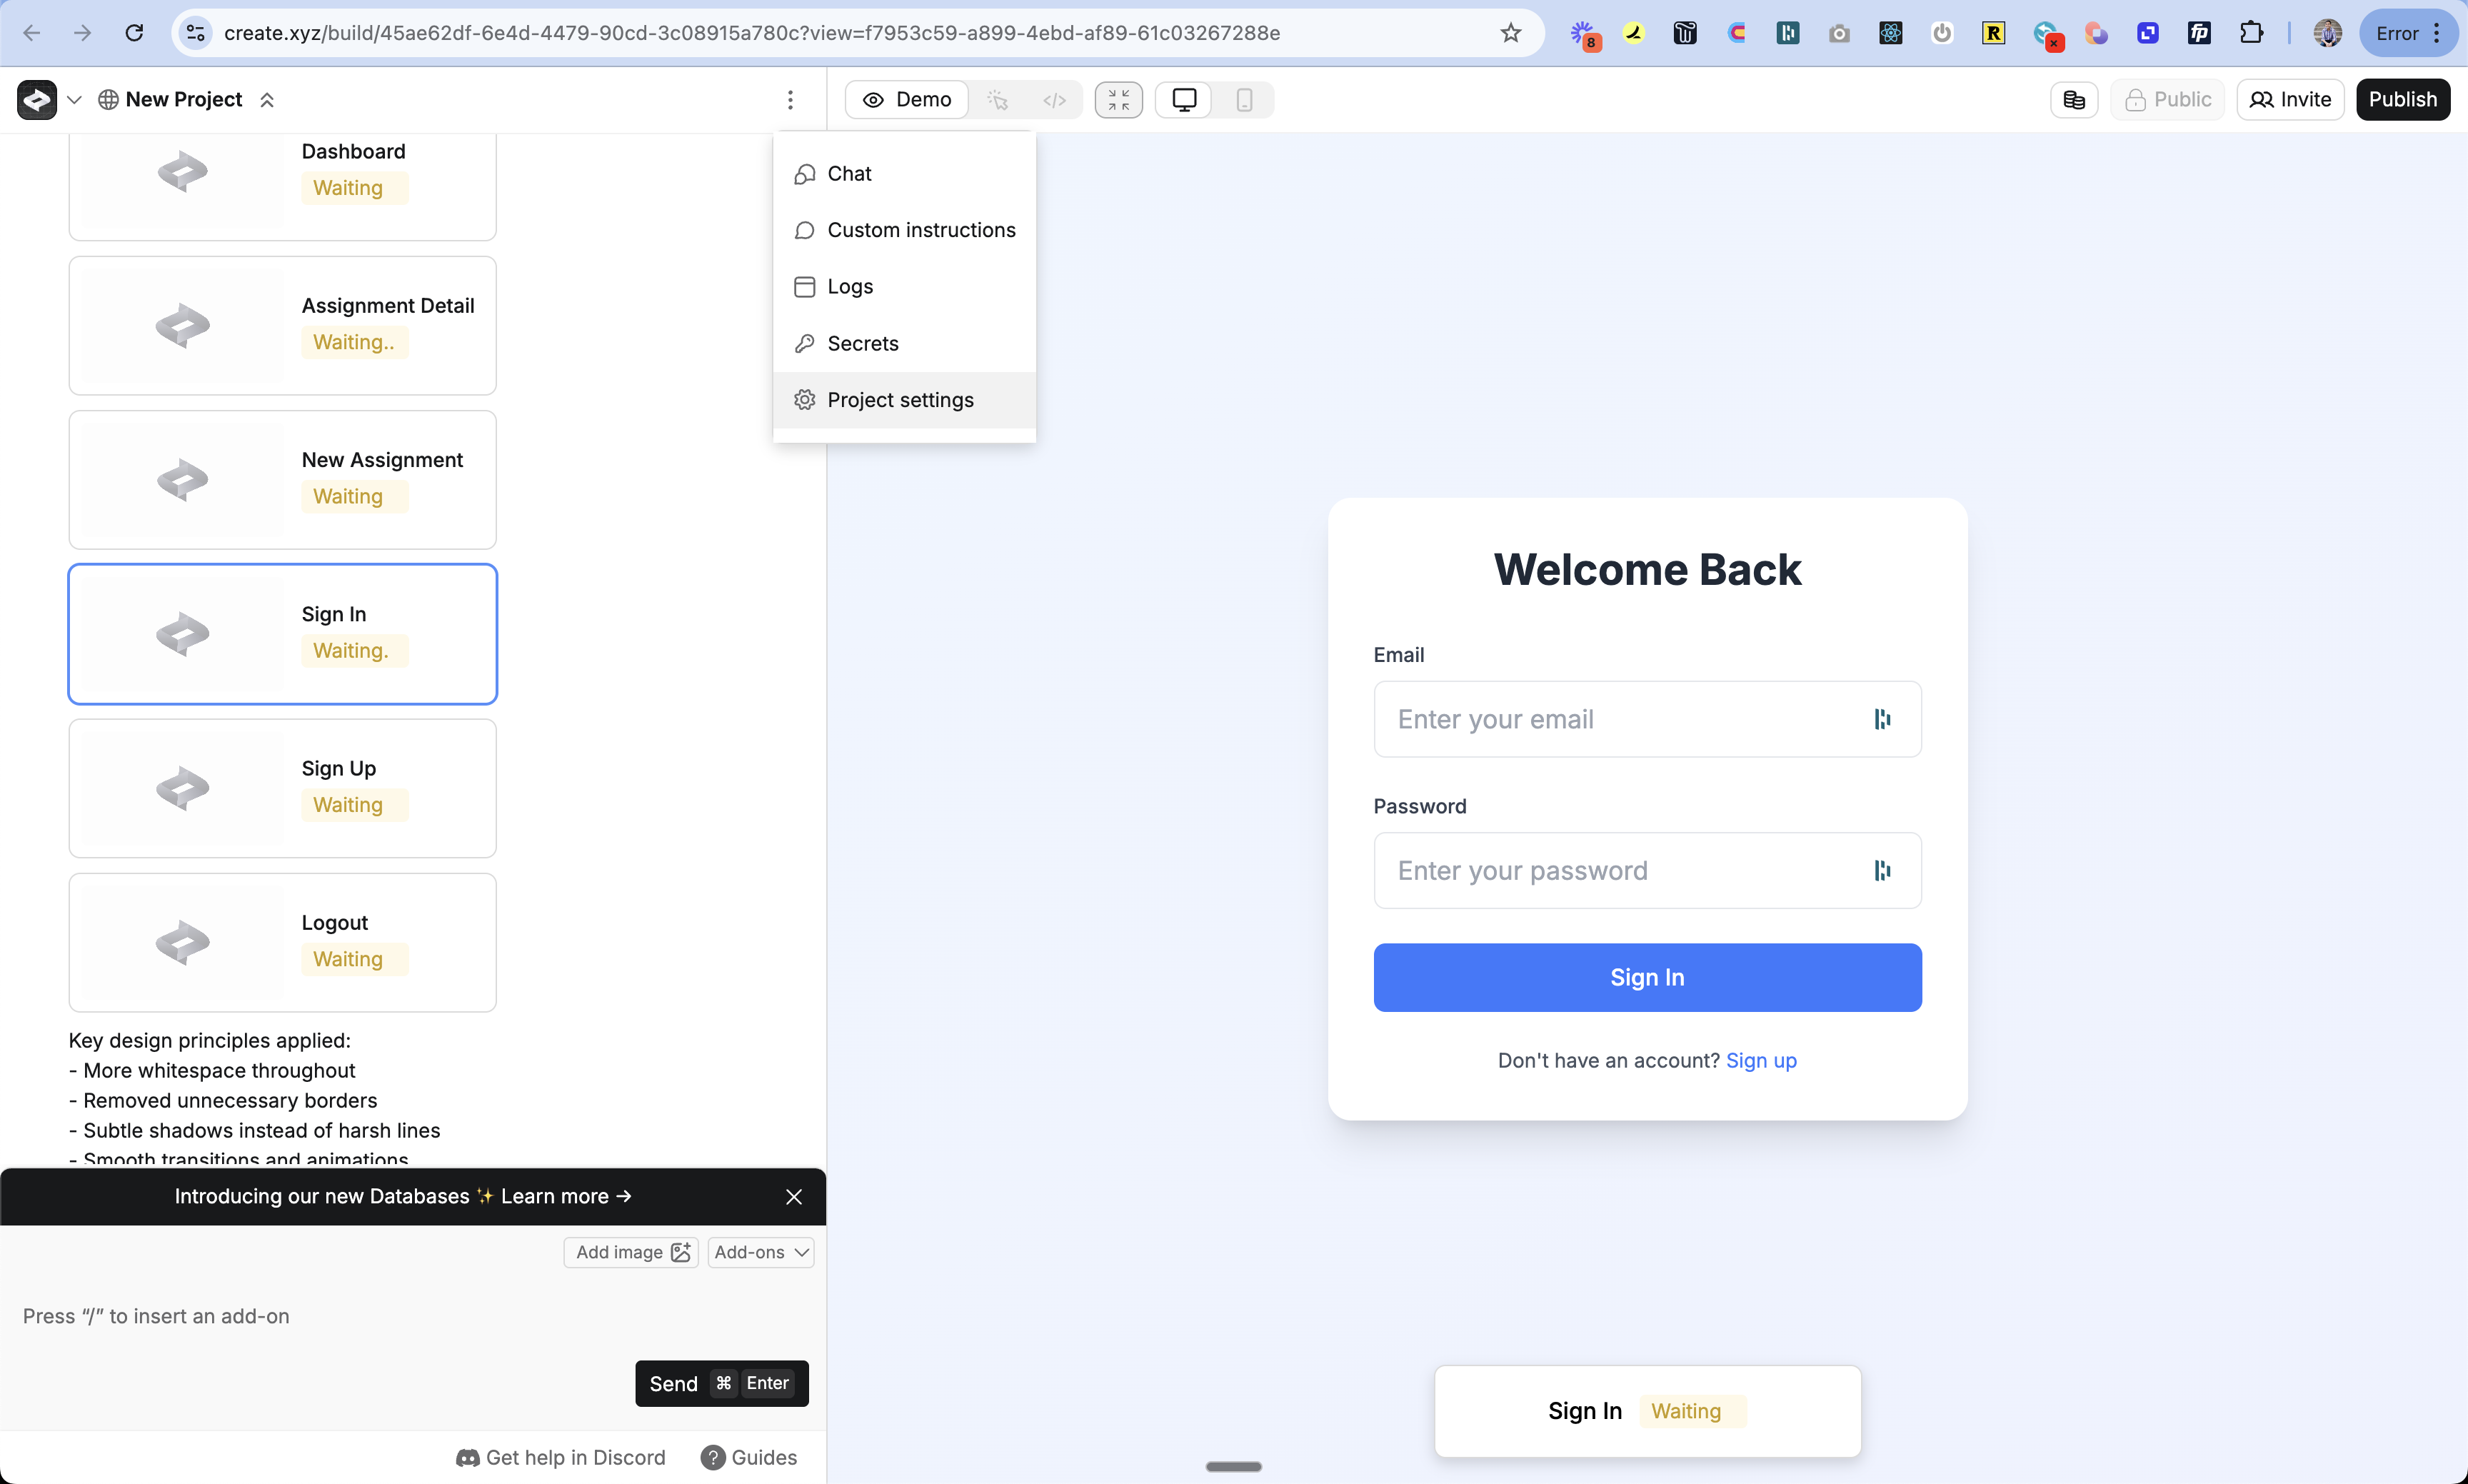
1. Click the 3-dot menu at the top of the chat
2. Select "Project Settings"
## Add to Anything project
You have two options:
1. Prompt Anything with "Let users sign in"
2. Enable User Accounts from the logo menu
1. Click the 3-dot menu at the top of the chat
2. Select "Project Settings"
 1. Navigate to the Authentication section
2. Find Facebook Login toggle
3. Turn it on
1. Navigate to the Authentication section
2. Find Facebook Login toggle
3. Turn it on
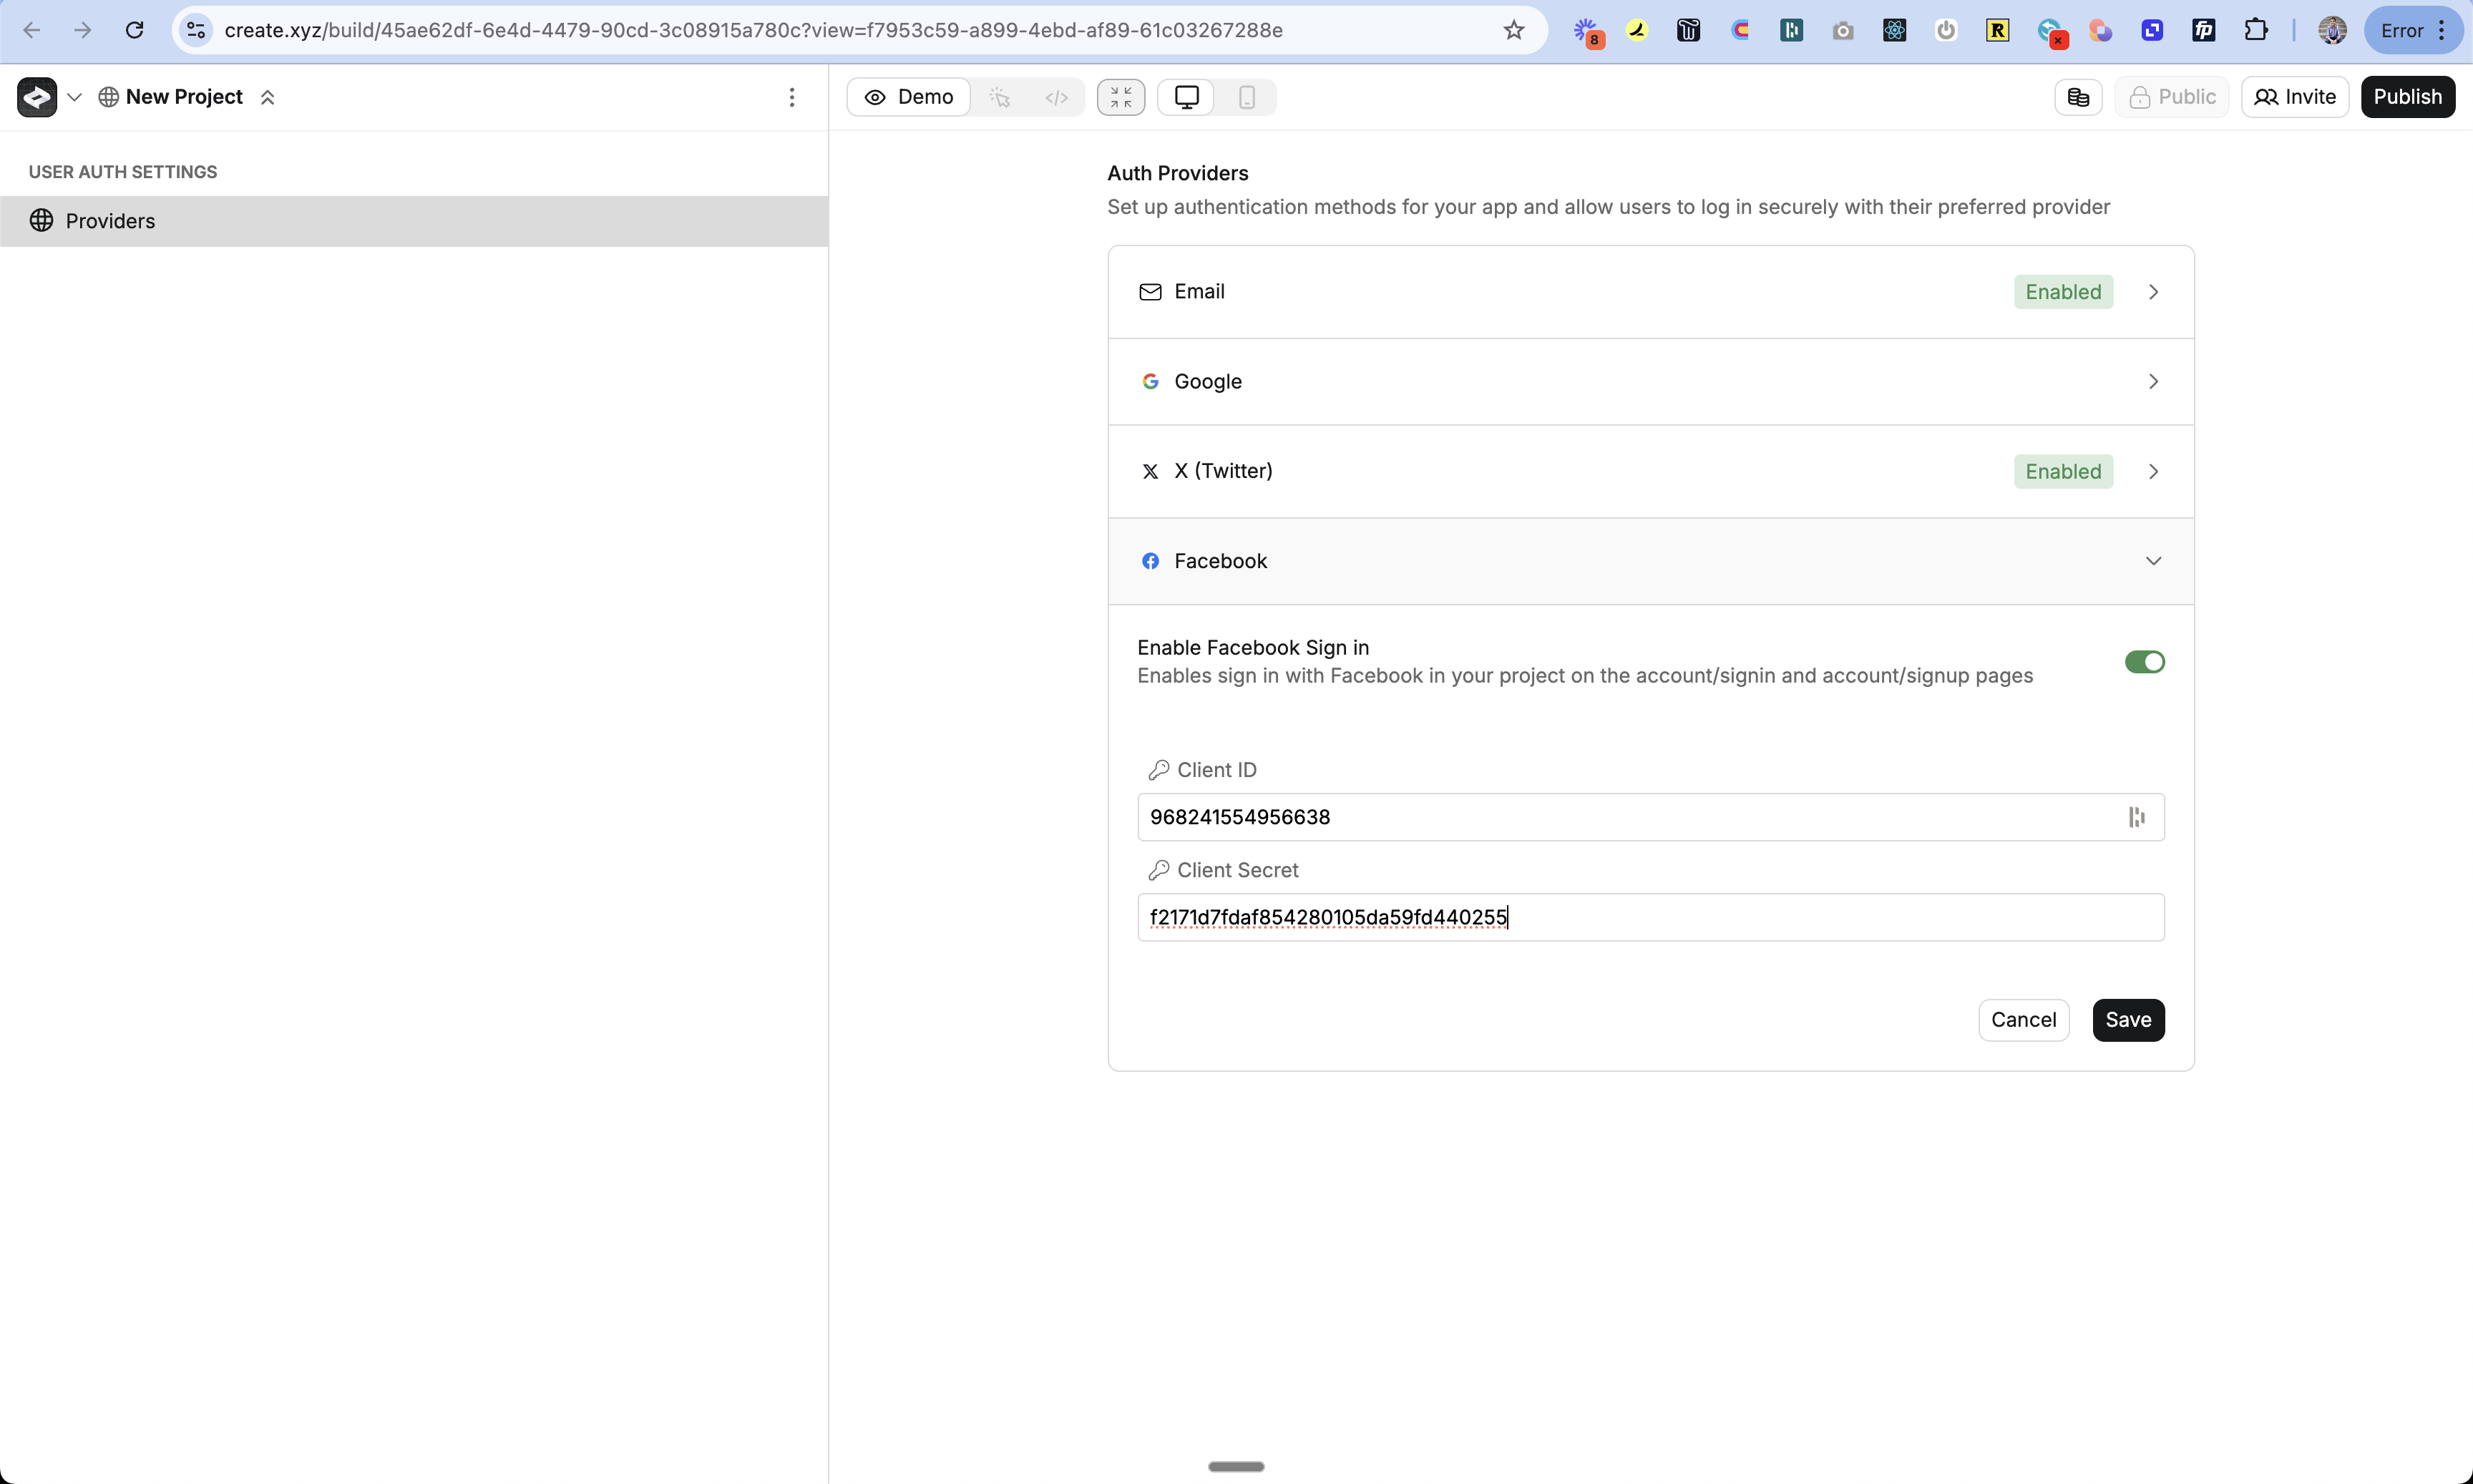 1. Paste in your App ID
2. Paste in your App Secret
3. Click Save
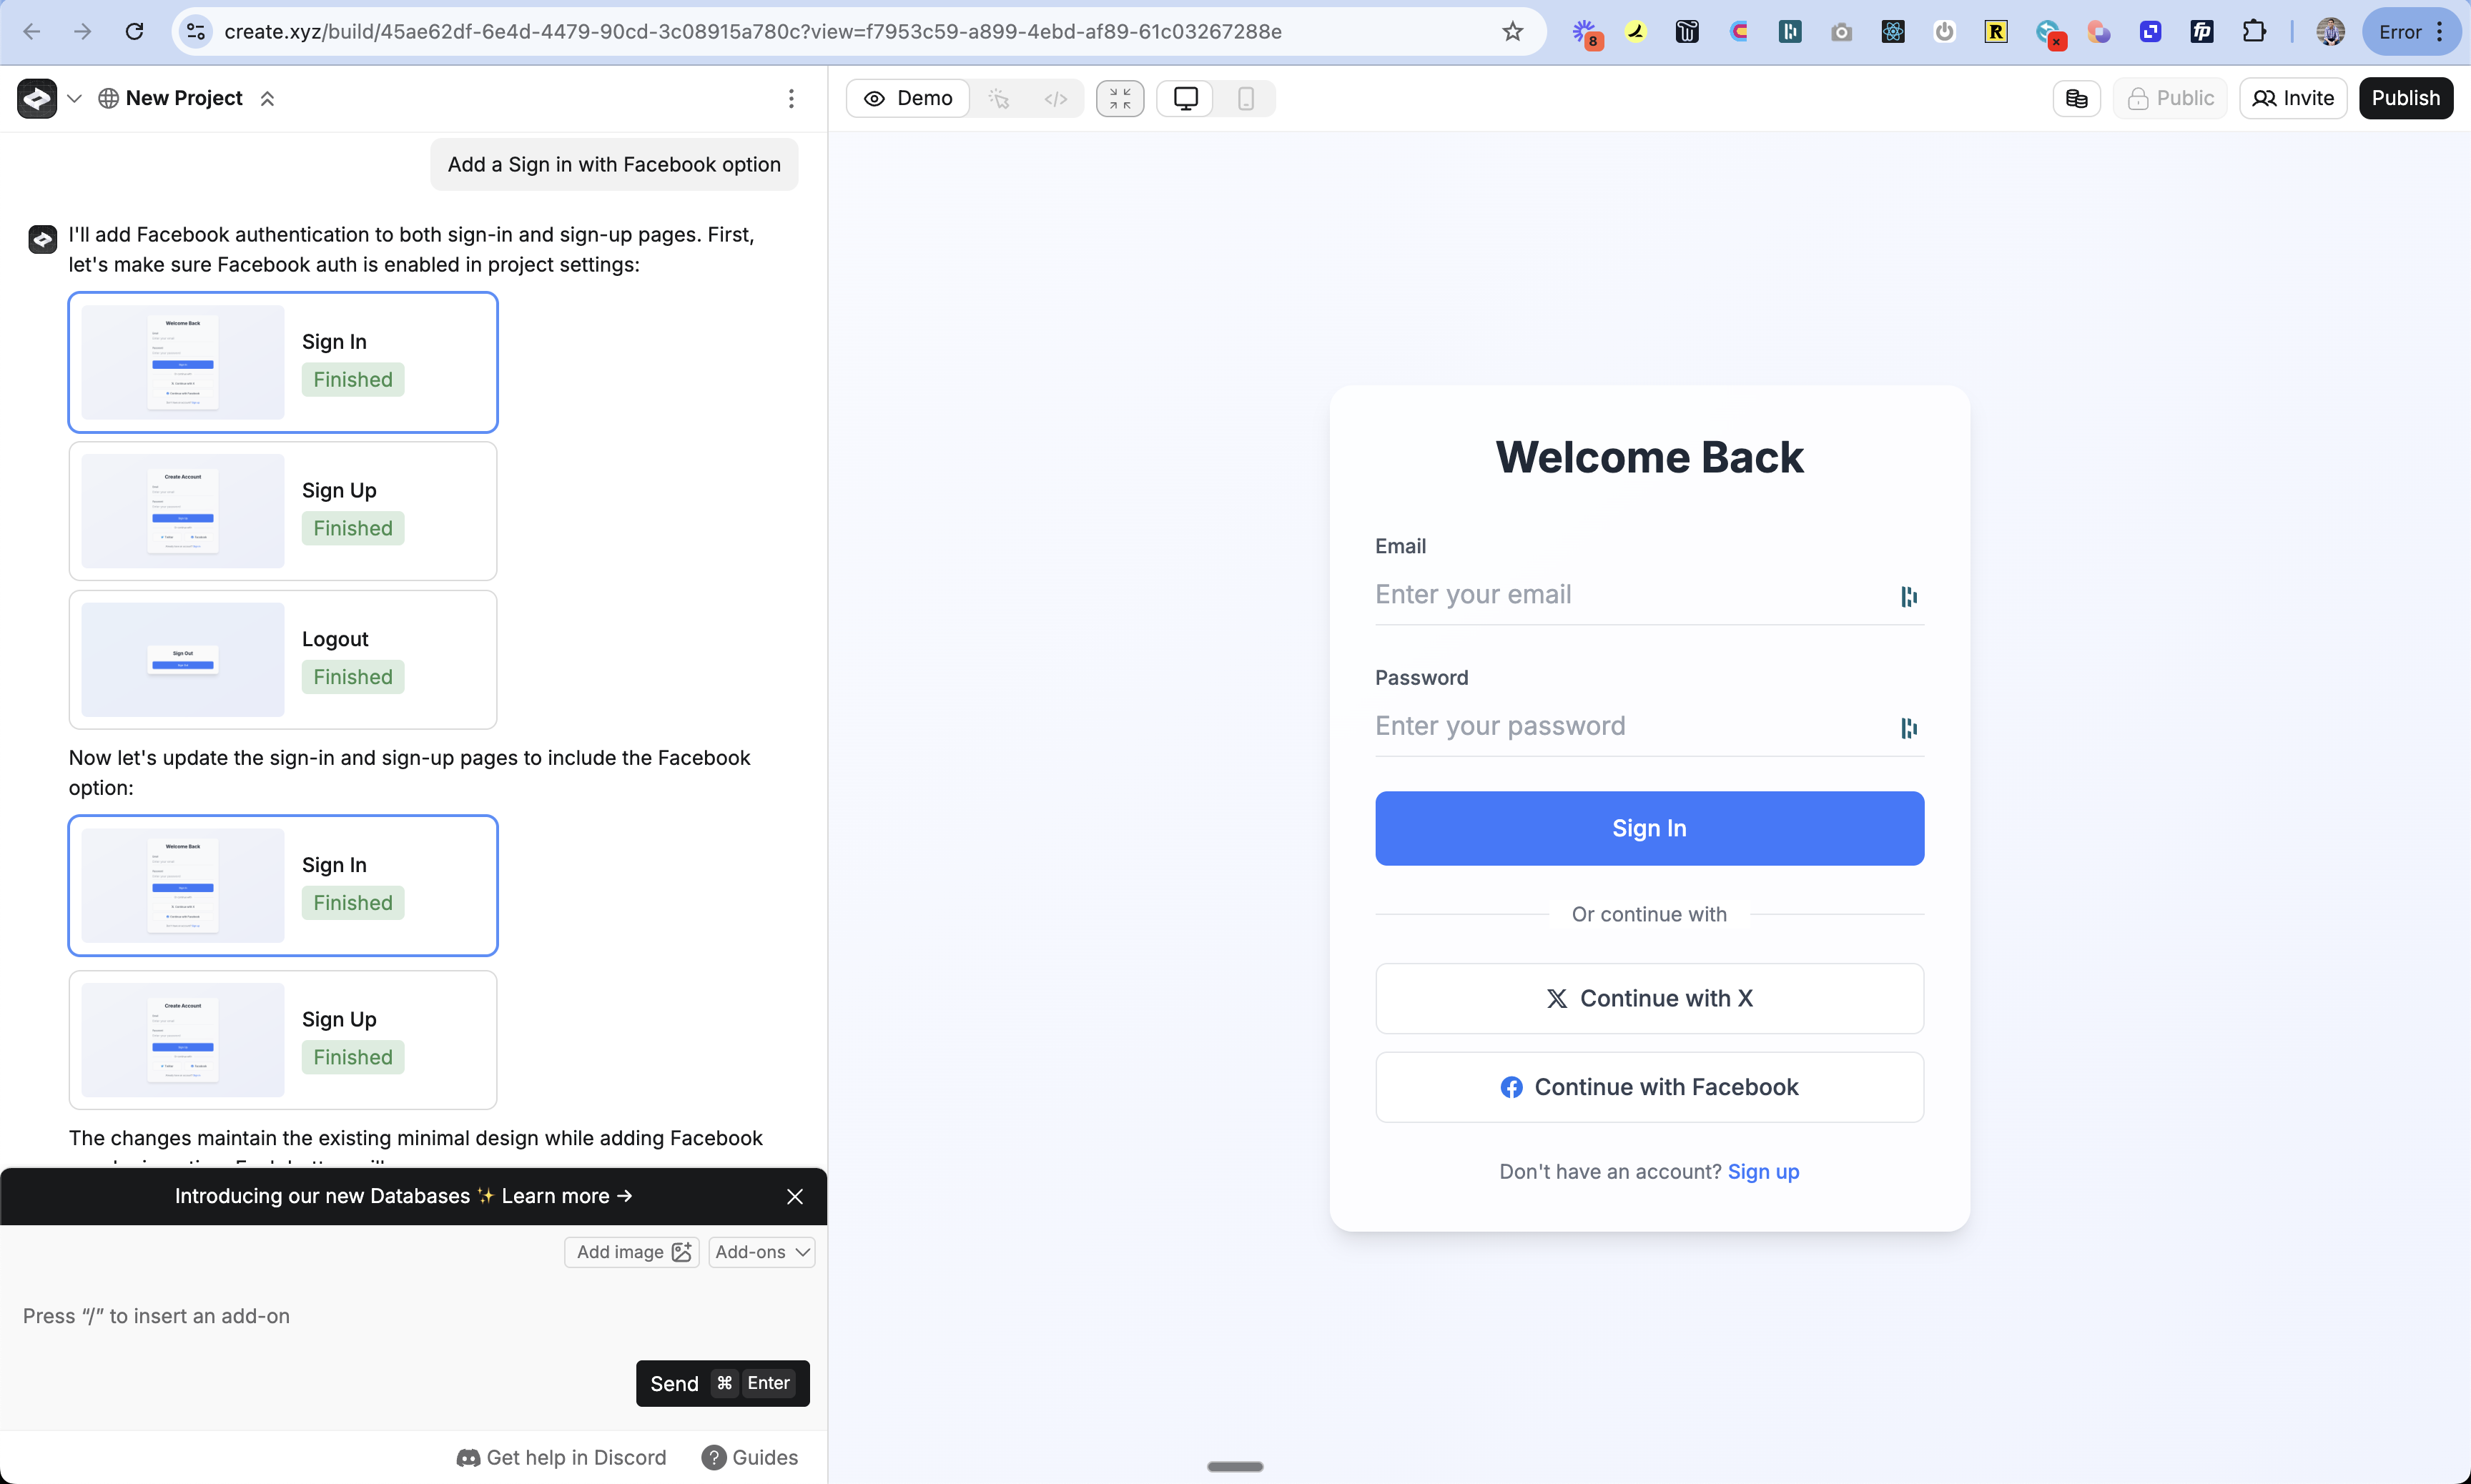
1. Return to the chat
2. Prompt Anything with "Add Facebook Login as an option"
3. Anything will update your sign-in pages automatically
1. Paste in your App ID
2. Paste in your App Secret
3. Click Save
1. Return to the chat
2. Prompt Anything with "Add Facebook Login as an option"
3. Anything will update your sign-in pages automatically
 1. Click the Publish button
2. Review your changes
3. Publish to make the Facebook Login feature live
## Testing
1. Publish your changes
2. Open your app in a new incognito window
3. Go to the sign in page
4. Try signing in with Facebook
5. Check the [auth\_users table](/apps/databases) to see your new user
## Troubleshooting
* Check if User Accounts is turned on
* Make sure Facebook Login is enabled in Project Settings
* Try publishing your changes again
* Clear your browser data and try in incognito mode
* Double check your domain is exactly the same in Anything and Facebook
* Make sure your callback URL is right: `www.your-domain.com/api/auth/callback/facebook`
* Check if your App ID and Secret are pasted correctly
* Verify your domain is set up in Facebook
* Make sure your app is live at your custom domain
* Update the OAuth Redirect URIs in Facebook
* Update your App Domains in Facebook
* Re-publish your app on the new domain
## FAQ
By default:
* Email address
* Name
* Profile picture (if they have one)
Additional information requires requesting extra permissions and may require Facebook app review.
Yes! Just:
1. Go back to chat
2. Tell Anything how you want it to look
3. Anything will help style it while following Facebook's rules
* For basic login: No
* For extra features: Yes
* You'll need to submit your app to Facebook for approval
## See Also
* [User Accounts](/apps/auth)
* [Customizing Login Pages](/apps/auth#customizing-auth-pages)
1. Click the Publish button
2. Review your changes
3. Publish to make the Facebook Login feature live
## Testing
1. Publish your changes
2. Open your app in a new incognito window
3. Go to the sign in page
4. Try signing in with Facebook
5. Check the [auth\_users table](/apps/databases) to see your new user
## Troubleshooting
* Check if User Accounts is turned on
* Make sure Facebook Login is enabled in Project Settings
* Try publishing your changes again
* Clear your browser data and try in incognito mode
* Double check your domain is exactly the same in Anything and Facebook
* Make sure your callback URL is right: `www.your-domain.com/api/auth/callback/facebook`
* Check if your App ID and Secret are pasted correctly
* Verify your domain is set up in Facebook
* Make sure your app is live at your custom domain
* Update the OAuth Redirect URIs in Facebook
* Update your App Domains in Facebook
* Re-publish your app on the new domain
## FAQ
By default:
* Email address
* Name
* Profile picture (if they have one)
Additional information requires requesting extra permissions and may require Facebook app review.
Yes! Just:
1. Go back to chat
2. Tell Anything how you want it to look
3. Anything will help style it while following Facebook's rules
* For basic login: No
* For extra features: Yes
* You'll need to submit your app to Facebook for approval
## See Also
* [User Accounts](/apps/auth)
* [Customizing Login Pages](/apps/auth#customizing-auth-pages)