Free domain
Every published app gets acreated.app URL. No setup, no cost.
Prerequisites
- Anything Pro or Max subscription (upgrade here)
- An app ready to publish
Buy a domain
We buy and configure the domain for you. No DNS setup.- Open your project and click Publish
- Click Get a custom domain
- Search for the domain you want
- Buy it
- Payment uses your Anything payment method
- DNS resolves in under 24 hours
- Manage your domains from Dashboard > Domains Menu
- Domains are purchased through Name.com
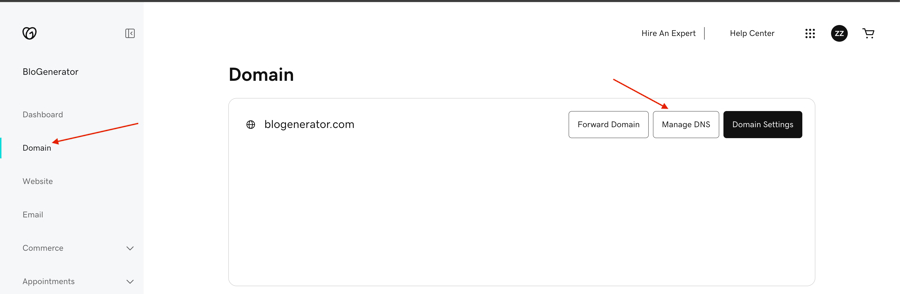
Bring your own domain
Already own a domain? Connect it in the publish dialog, then set up DNS either automatically or manually.Enter your domain
Click Get a custom domain, then Connect your domain and type your domain (like
yourdomain.com).Set up DNS
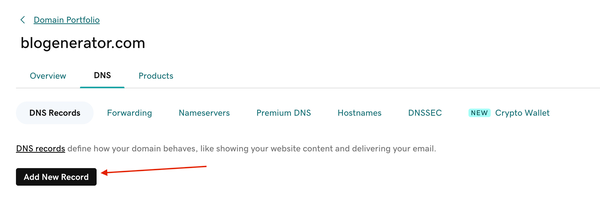
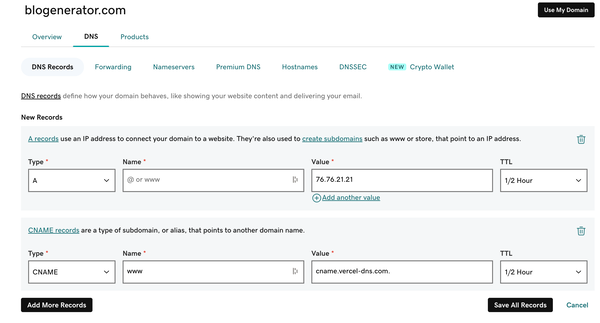
Choose automatic or manual setup. Both get you to the same result.Automatic DNS setupClick Automatic DNS setup in the publish dialog. A popup walks you through connecting to your domain provider — it detects where your domain is registered, asks you to log in, and configures the DNS records for you. The whole thing takes about a minute.Automatic setup works with most major providers, including GoDaddy, Namecheap, Cloudflare, Amazon Route 53, Hover, Bluehost, and many more. If your provider isn’t supported, the popup tells you, and you can set things up manually instead.Manual DNS setupIf you prefer to configure DNS yourself, click set up DNS manually in the publish dialog (below the automatic setup button).For a root domain (
For a subdomain (
See Provider instructions below for step-by-step guides for specific registrars.
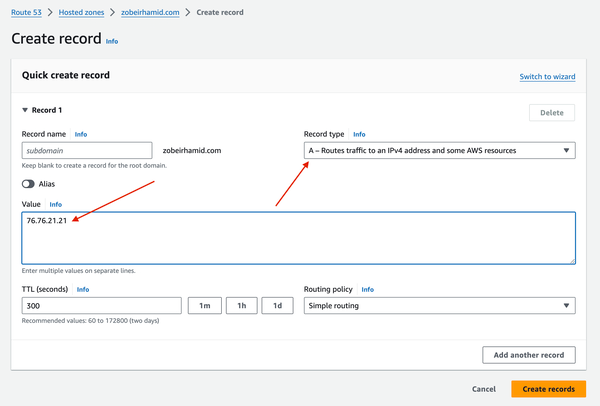
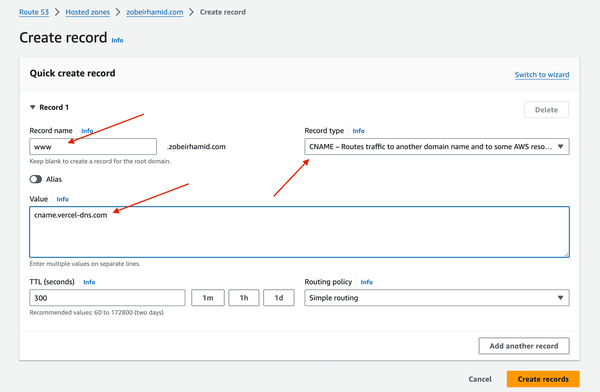
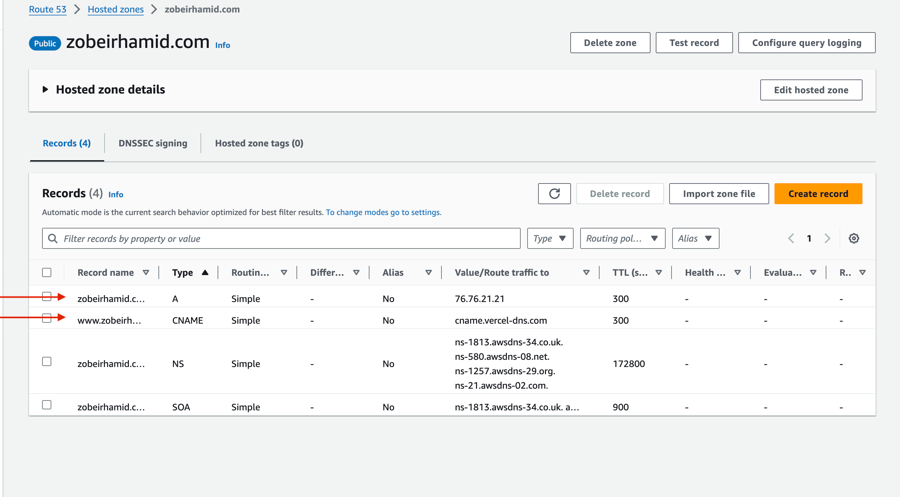
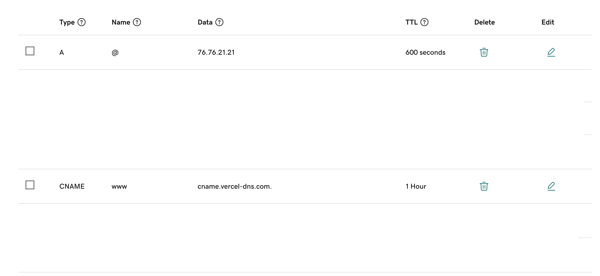
yourdomain.com), add these two records at your provider:| Type | Name | Value |
|---|---|---|
| A | @ | 76.76.21.21 |
| CNAME | www | cname.vercel-dns.com |
app.yourdomain.com), you only need one:| Type | Name | Value |
|---|---|---|
| A | your-subdomain (e.g., app) | 76.76.21.21 |
Provider instructions
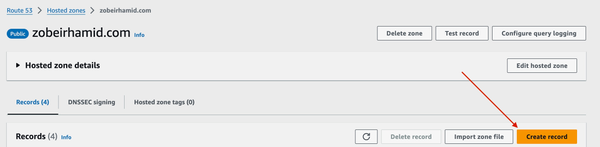
AWS Route 53
AWS Route 53
Troubleshooting
Domain shows 404
Domain shows 404
DNS changes take up to 48 hours to propagate. Double-check your A and CNAME records match the values in the tables above. Make sure your app is published: click Publish and confirm it’s live. If it’s been more than 48 hours, email hello@anything.com.
Site loads but shows a blank page
Site loads but shows a blank page
This usually means the publish didn’t complete. Go back to your project, click Publish, and confirm all pages are selected. See the Publish guide for the full steps. Try a hard refresh in your browser (Cmd+Shift+R on Mac, Ctrl+Shift+R on Windows).
Domain not connecting
Domain not connecting
Check for conflicting DNS records at your provider. There should be only one A record pointing to
76.76.21.21. Remove any old A records before adding the new one. Also make sure you published your app after connecting the domain.