
Before you start
Make sure you have:An Anything project with User Accounts turned on
Your app running on a custom domain through Anything’s domain setup
Overview
Set Up an X App
Create an app in X
Add to Anything
Add credentials to Anything
Add sign-in UI
Customize the login button
Test flow
Make sure login works
X Setup
1
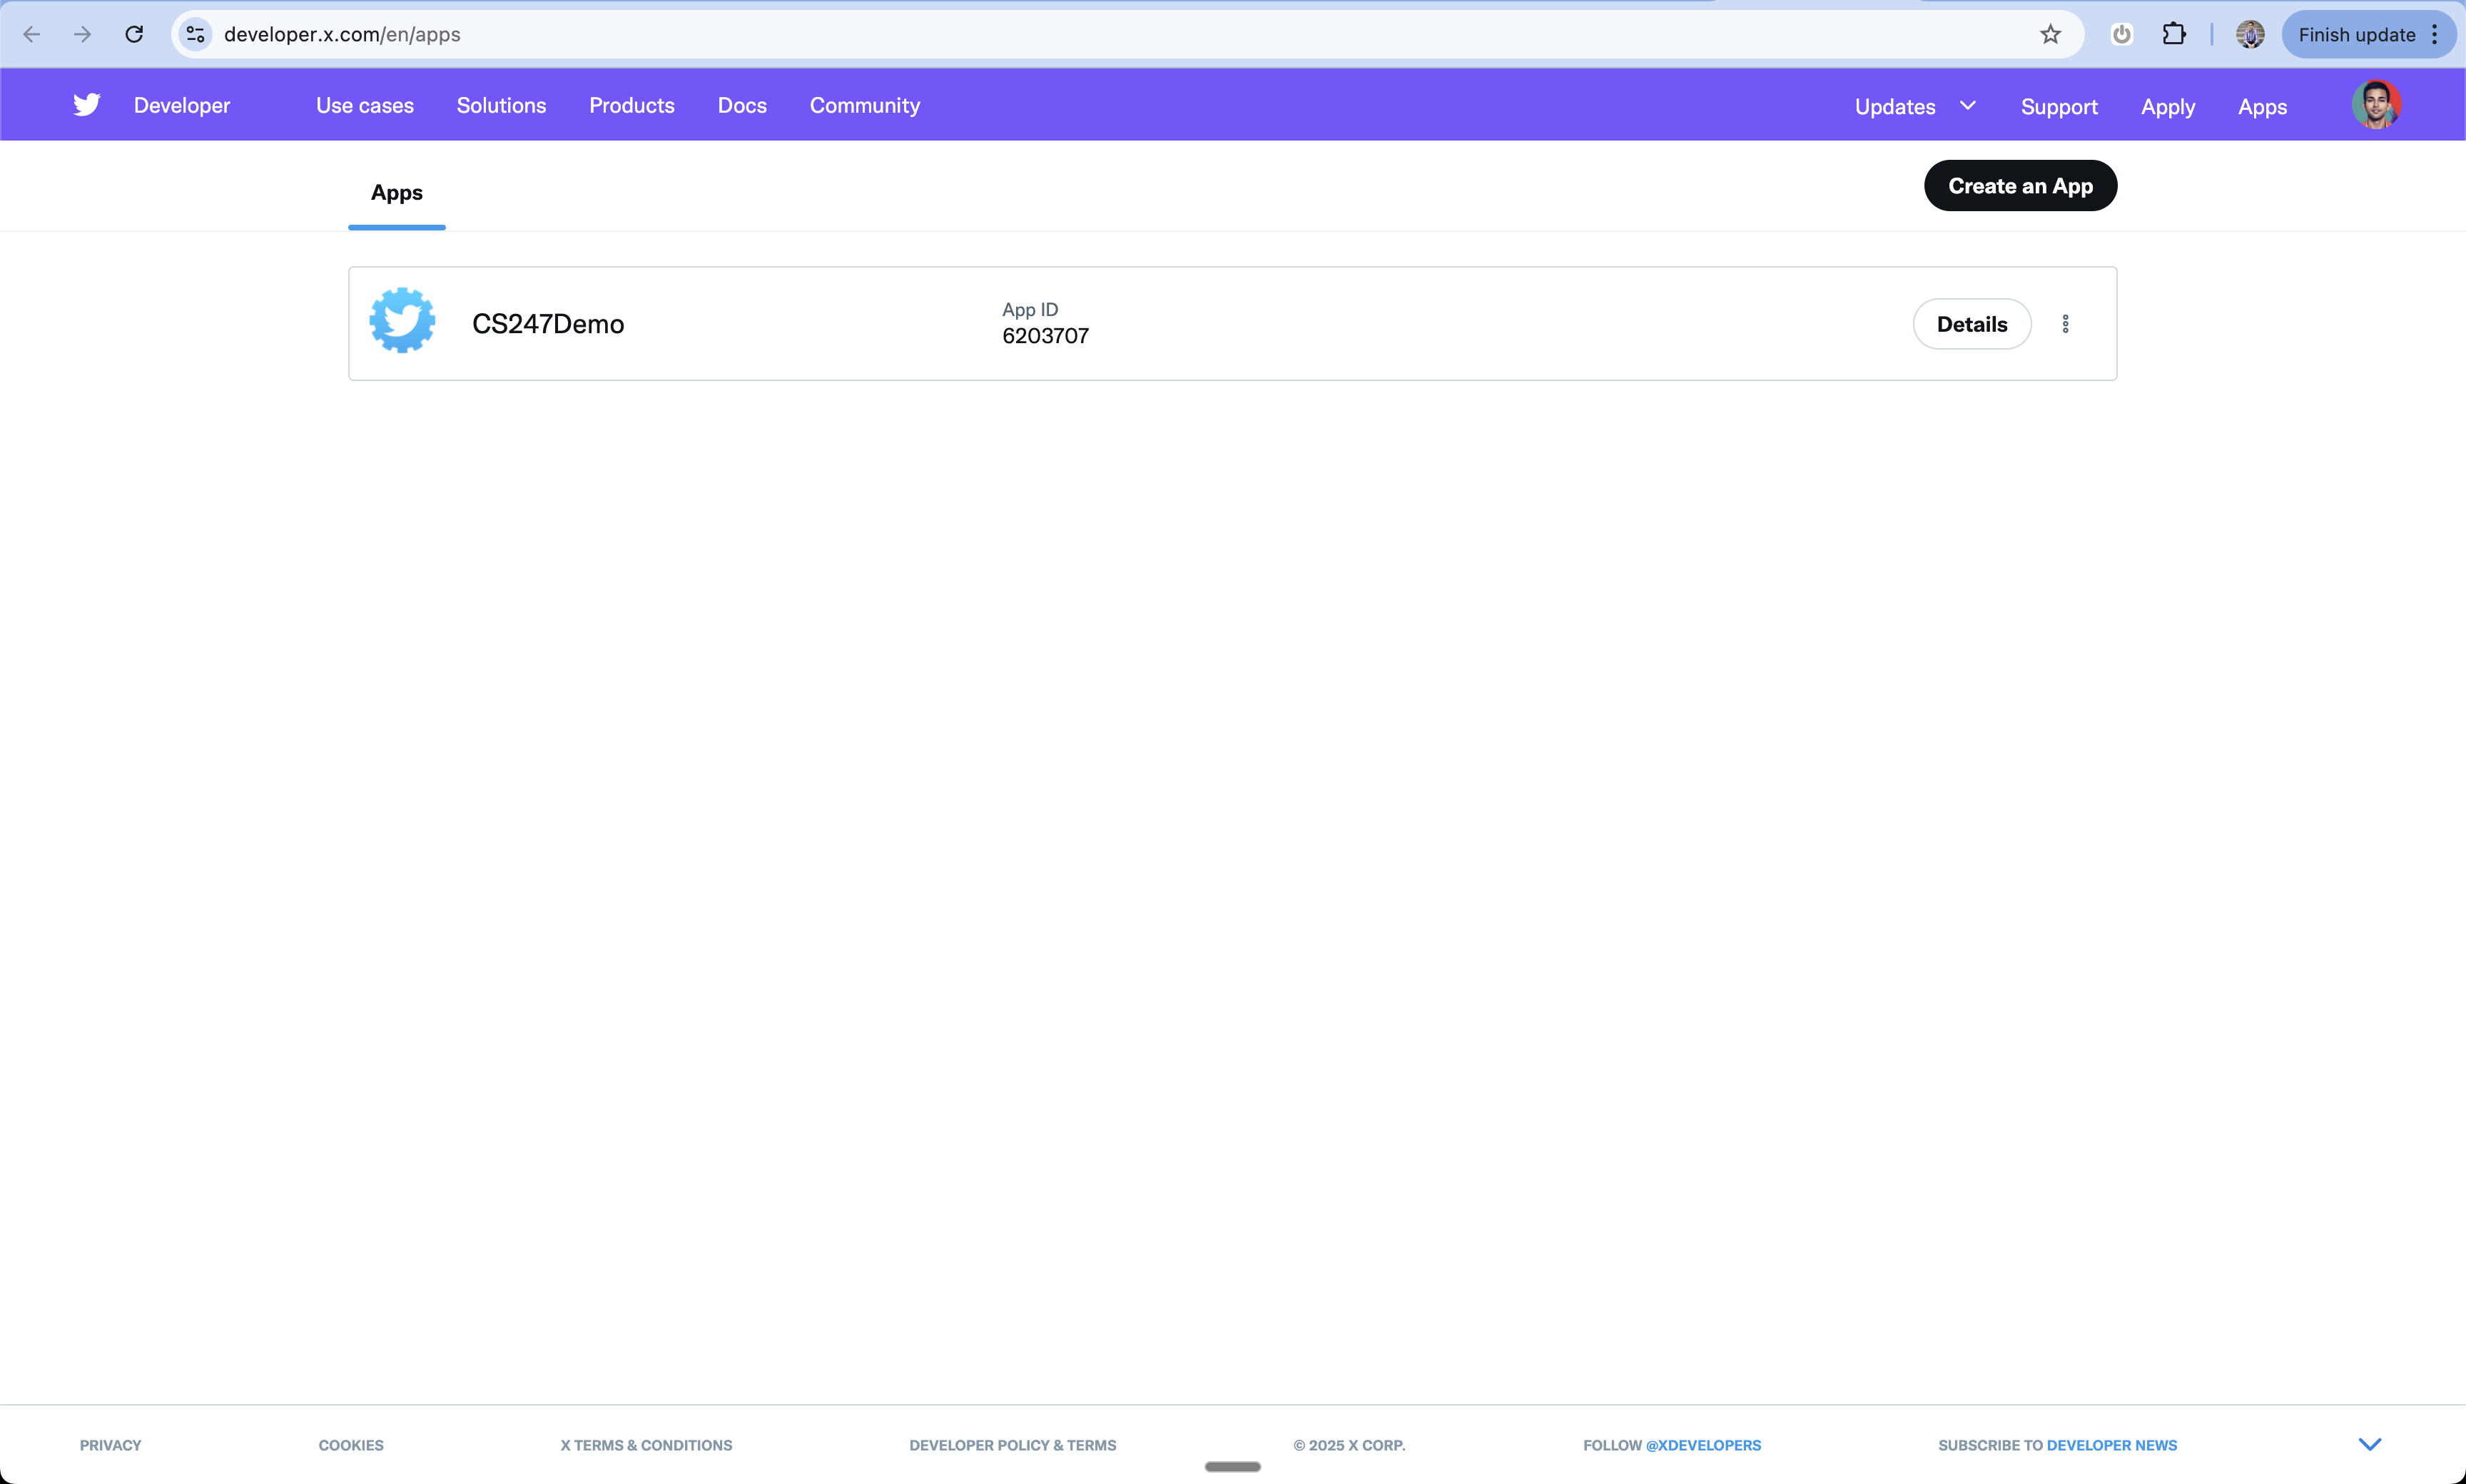
Access X Developer Portal
- Go to X Developer Portal
- Sign in with your X account
- Click “Create an App”
2
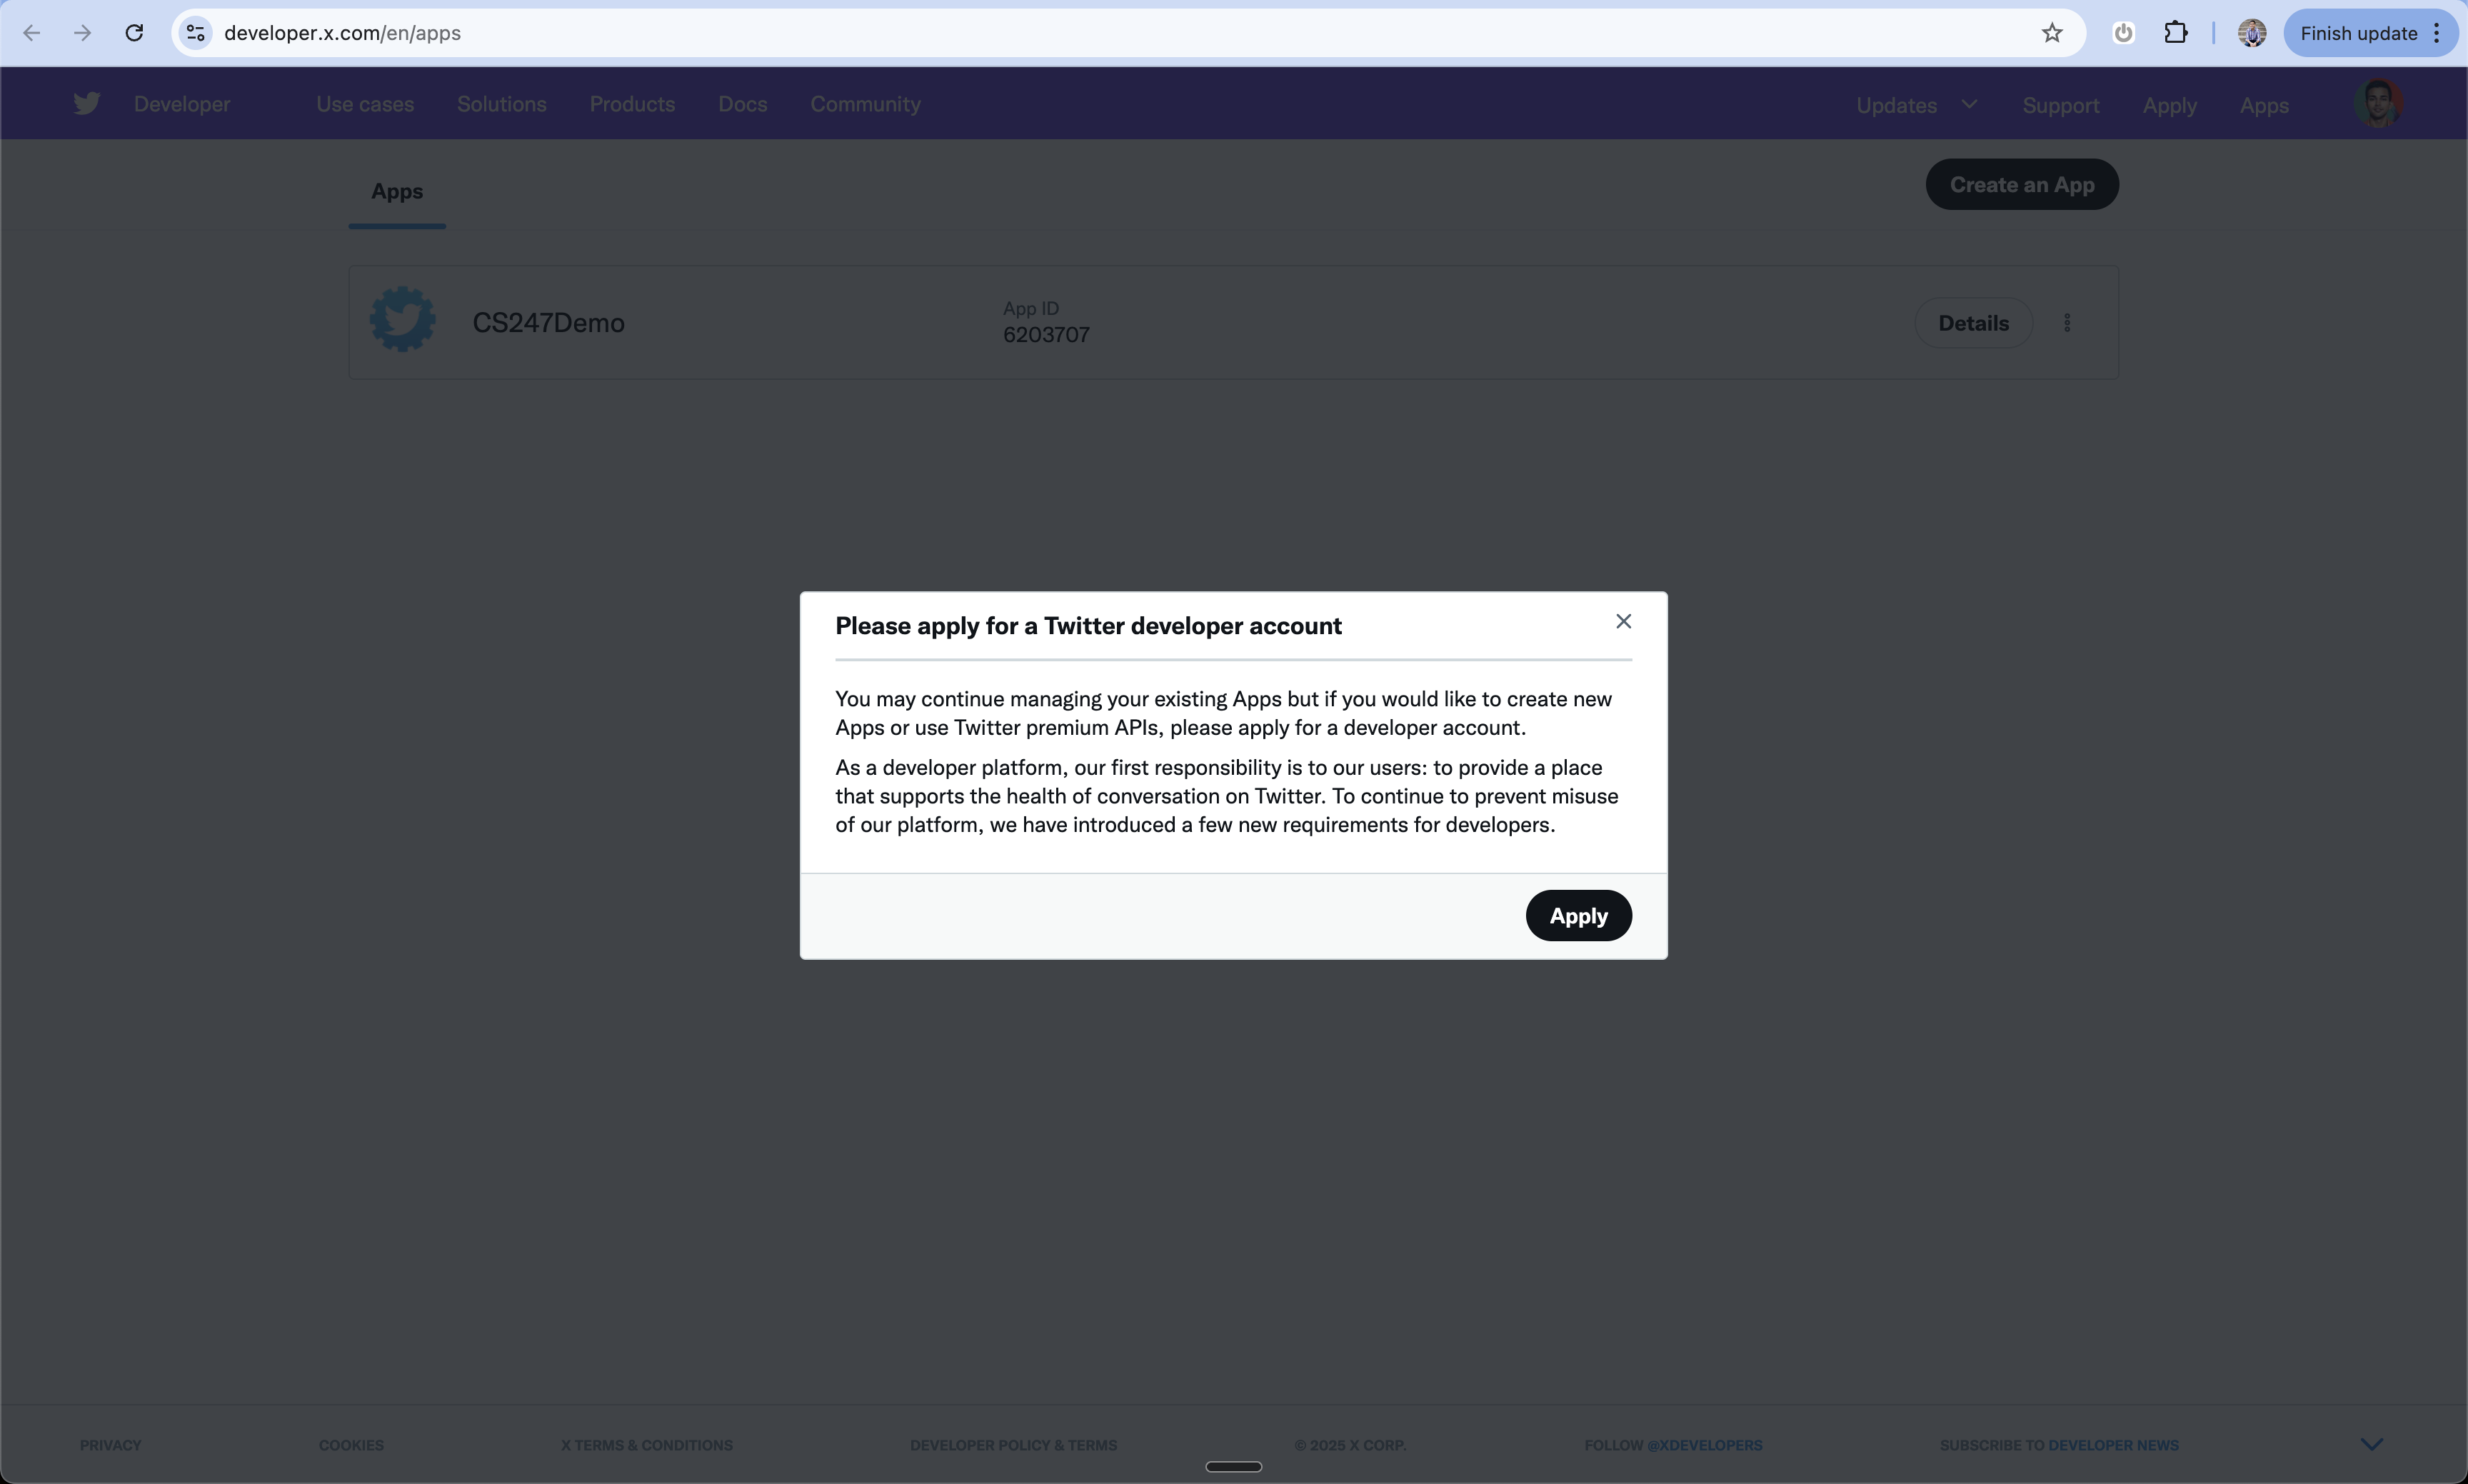
Apply for Developer Account
- If you don’t have a developer account, you’ll need to apply
- Fill out the required information about your use case
- Submit your application
3
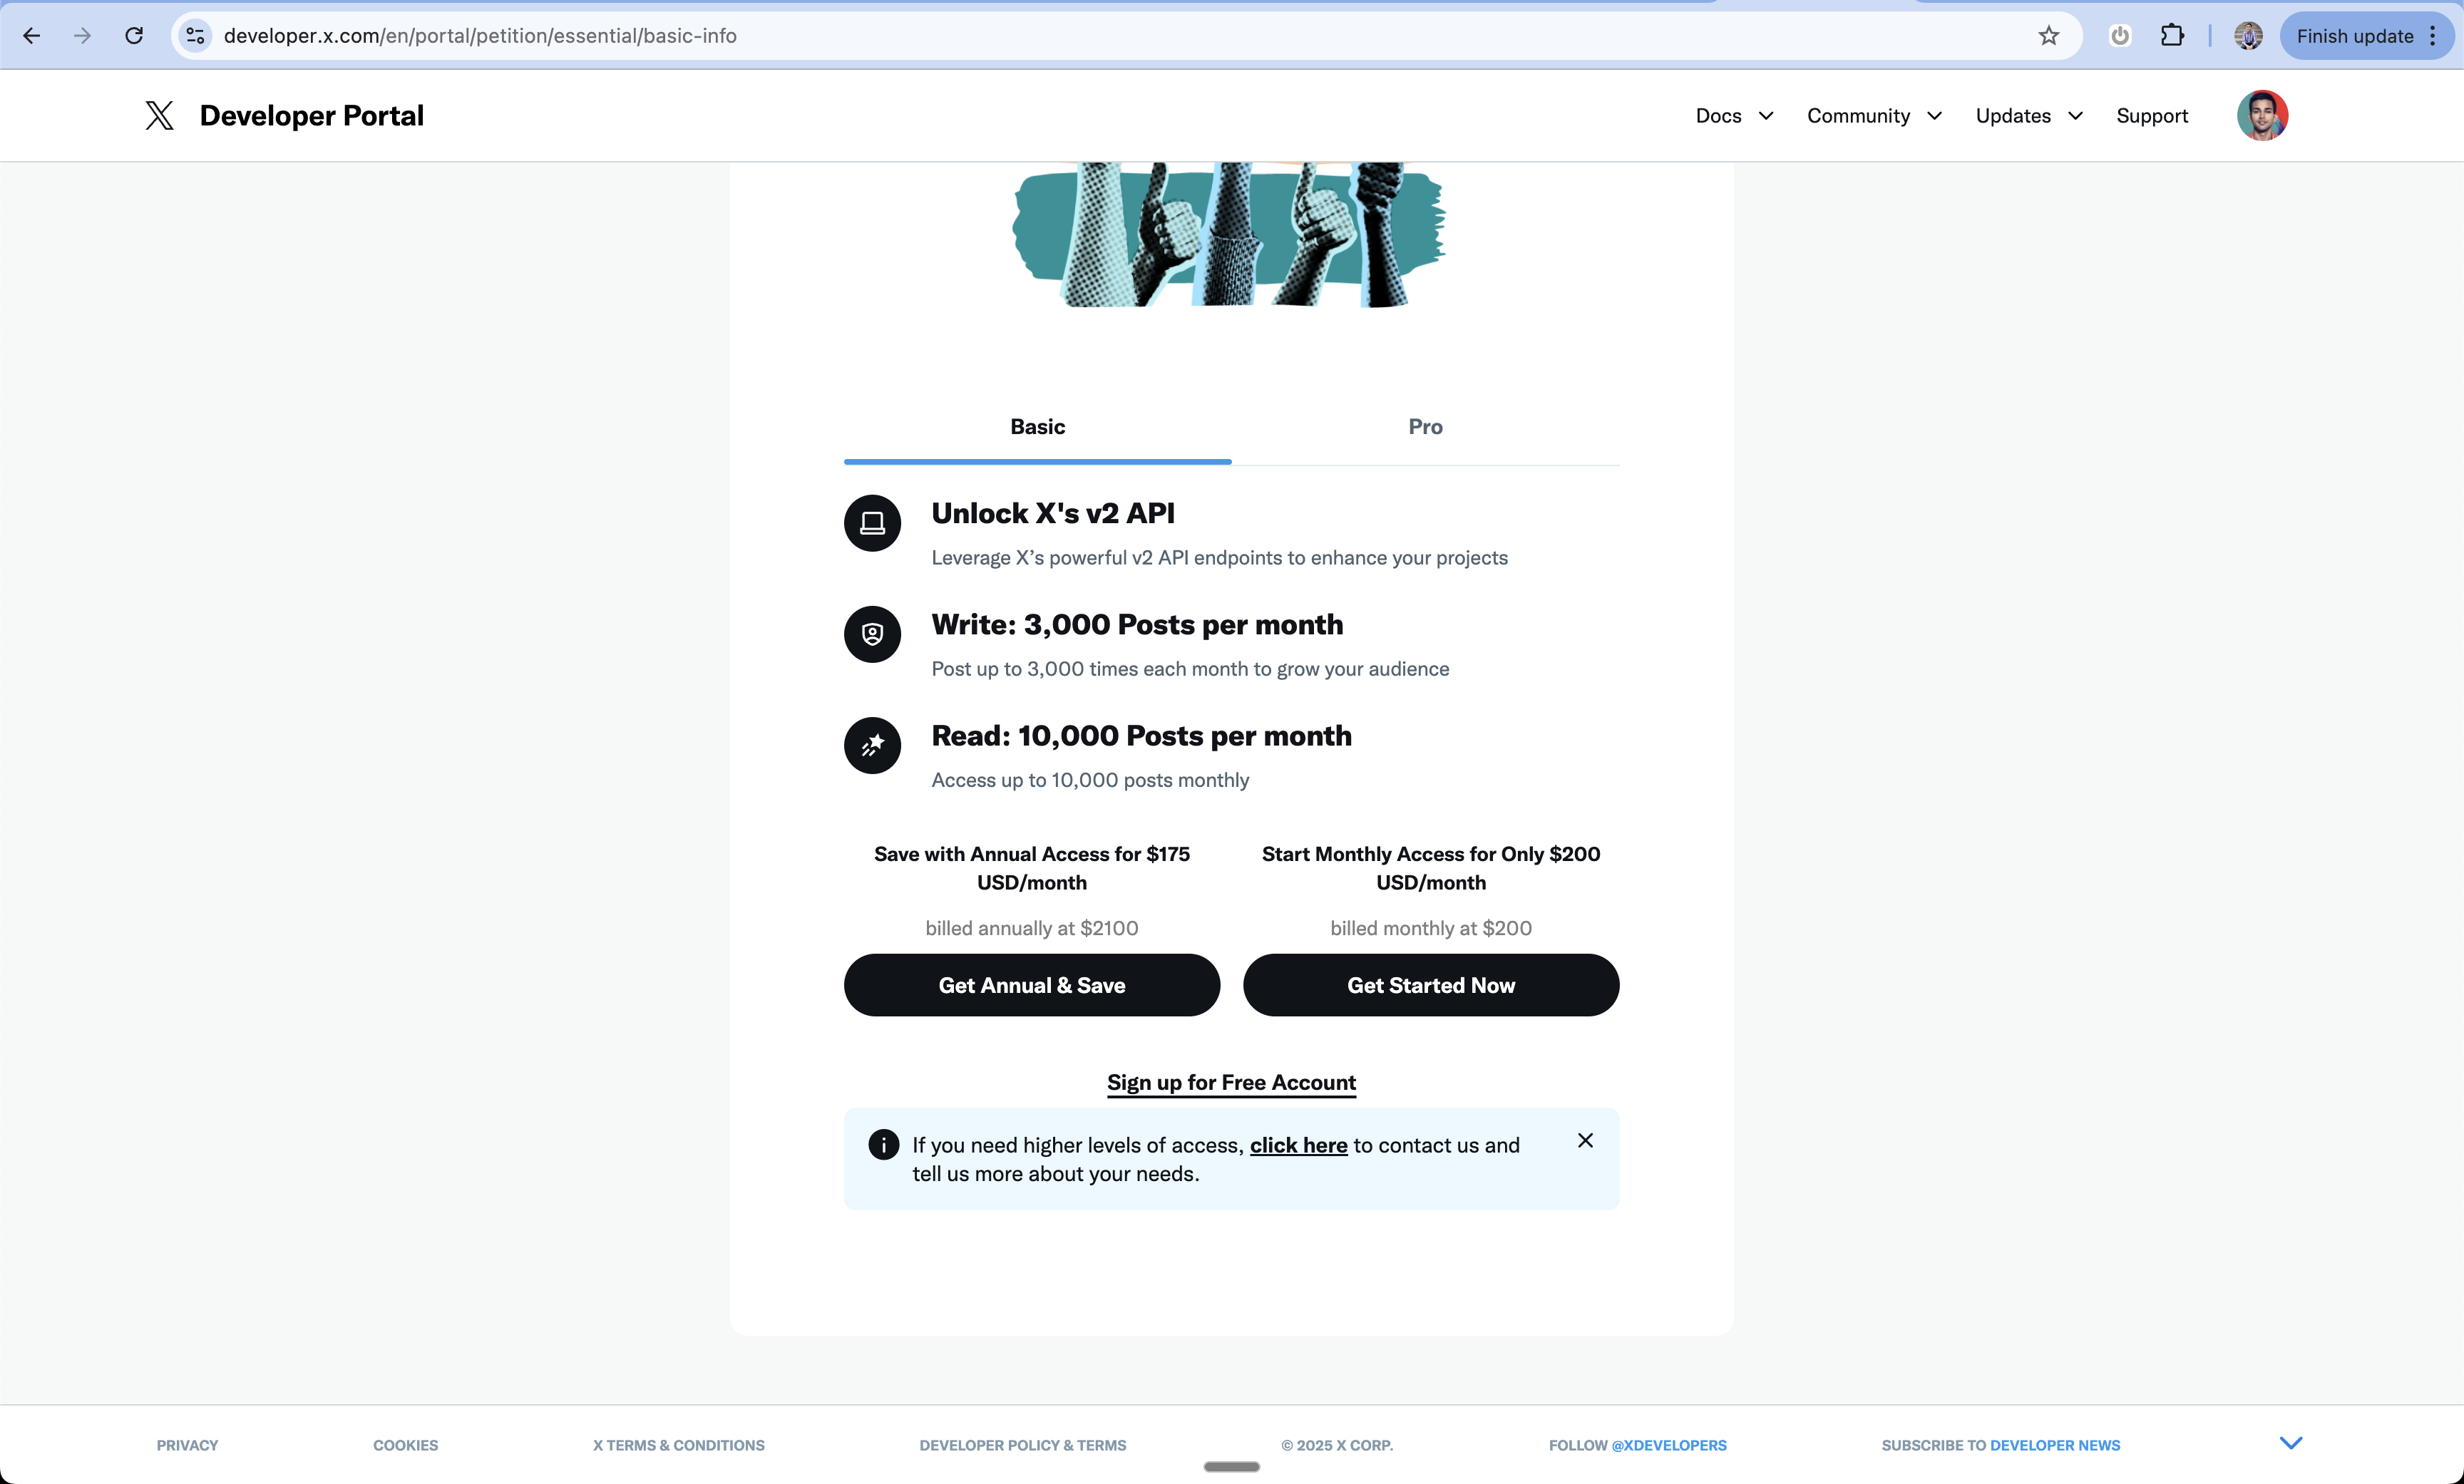
Choose Developer Plan
- Review the available developer plans
- You can sign up for a Free account if you prefer
- Select your plan and continue
4
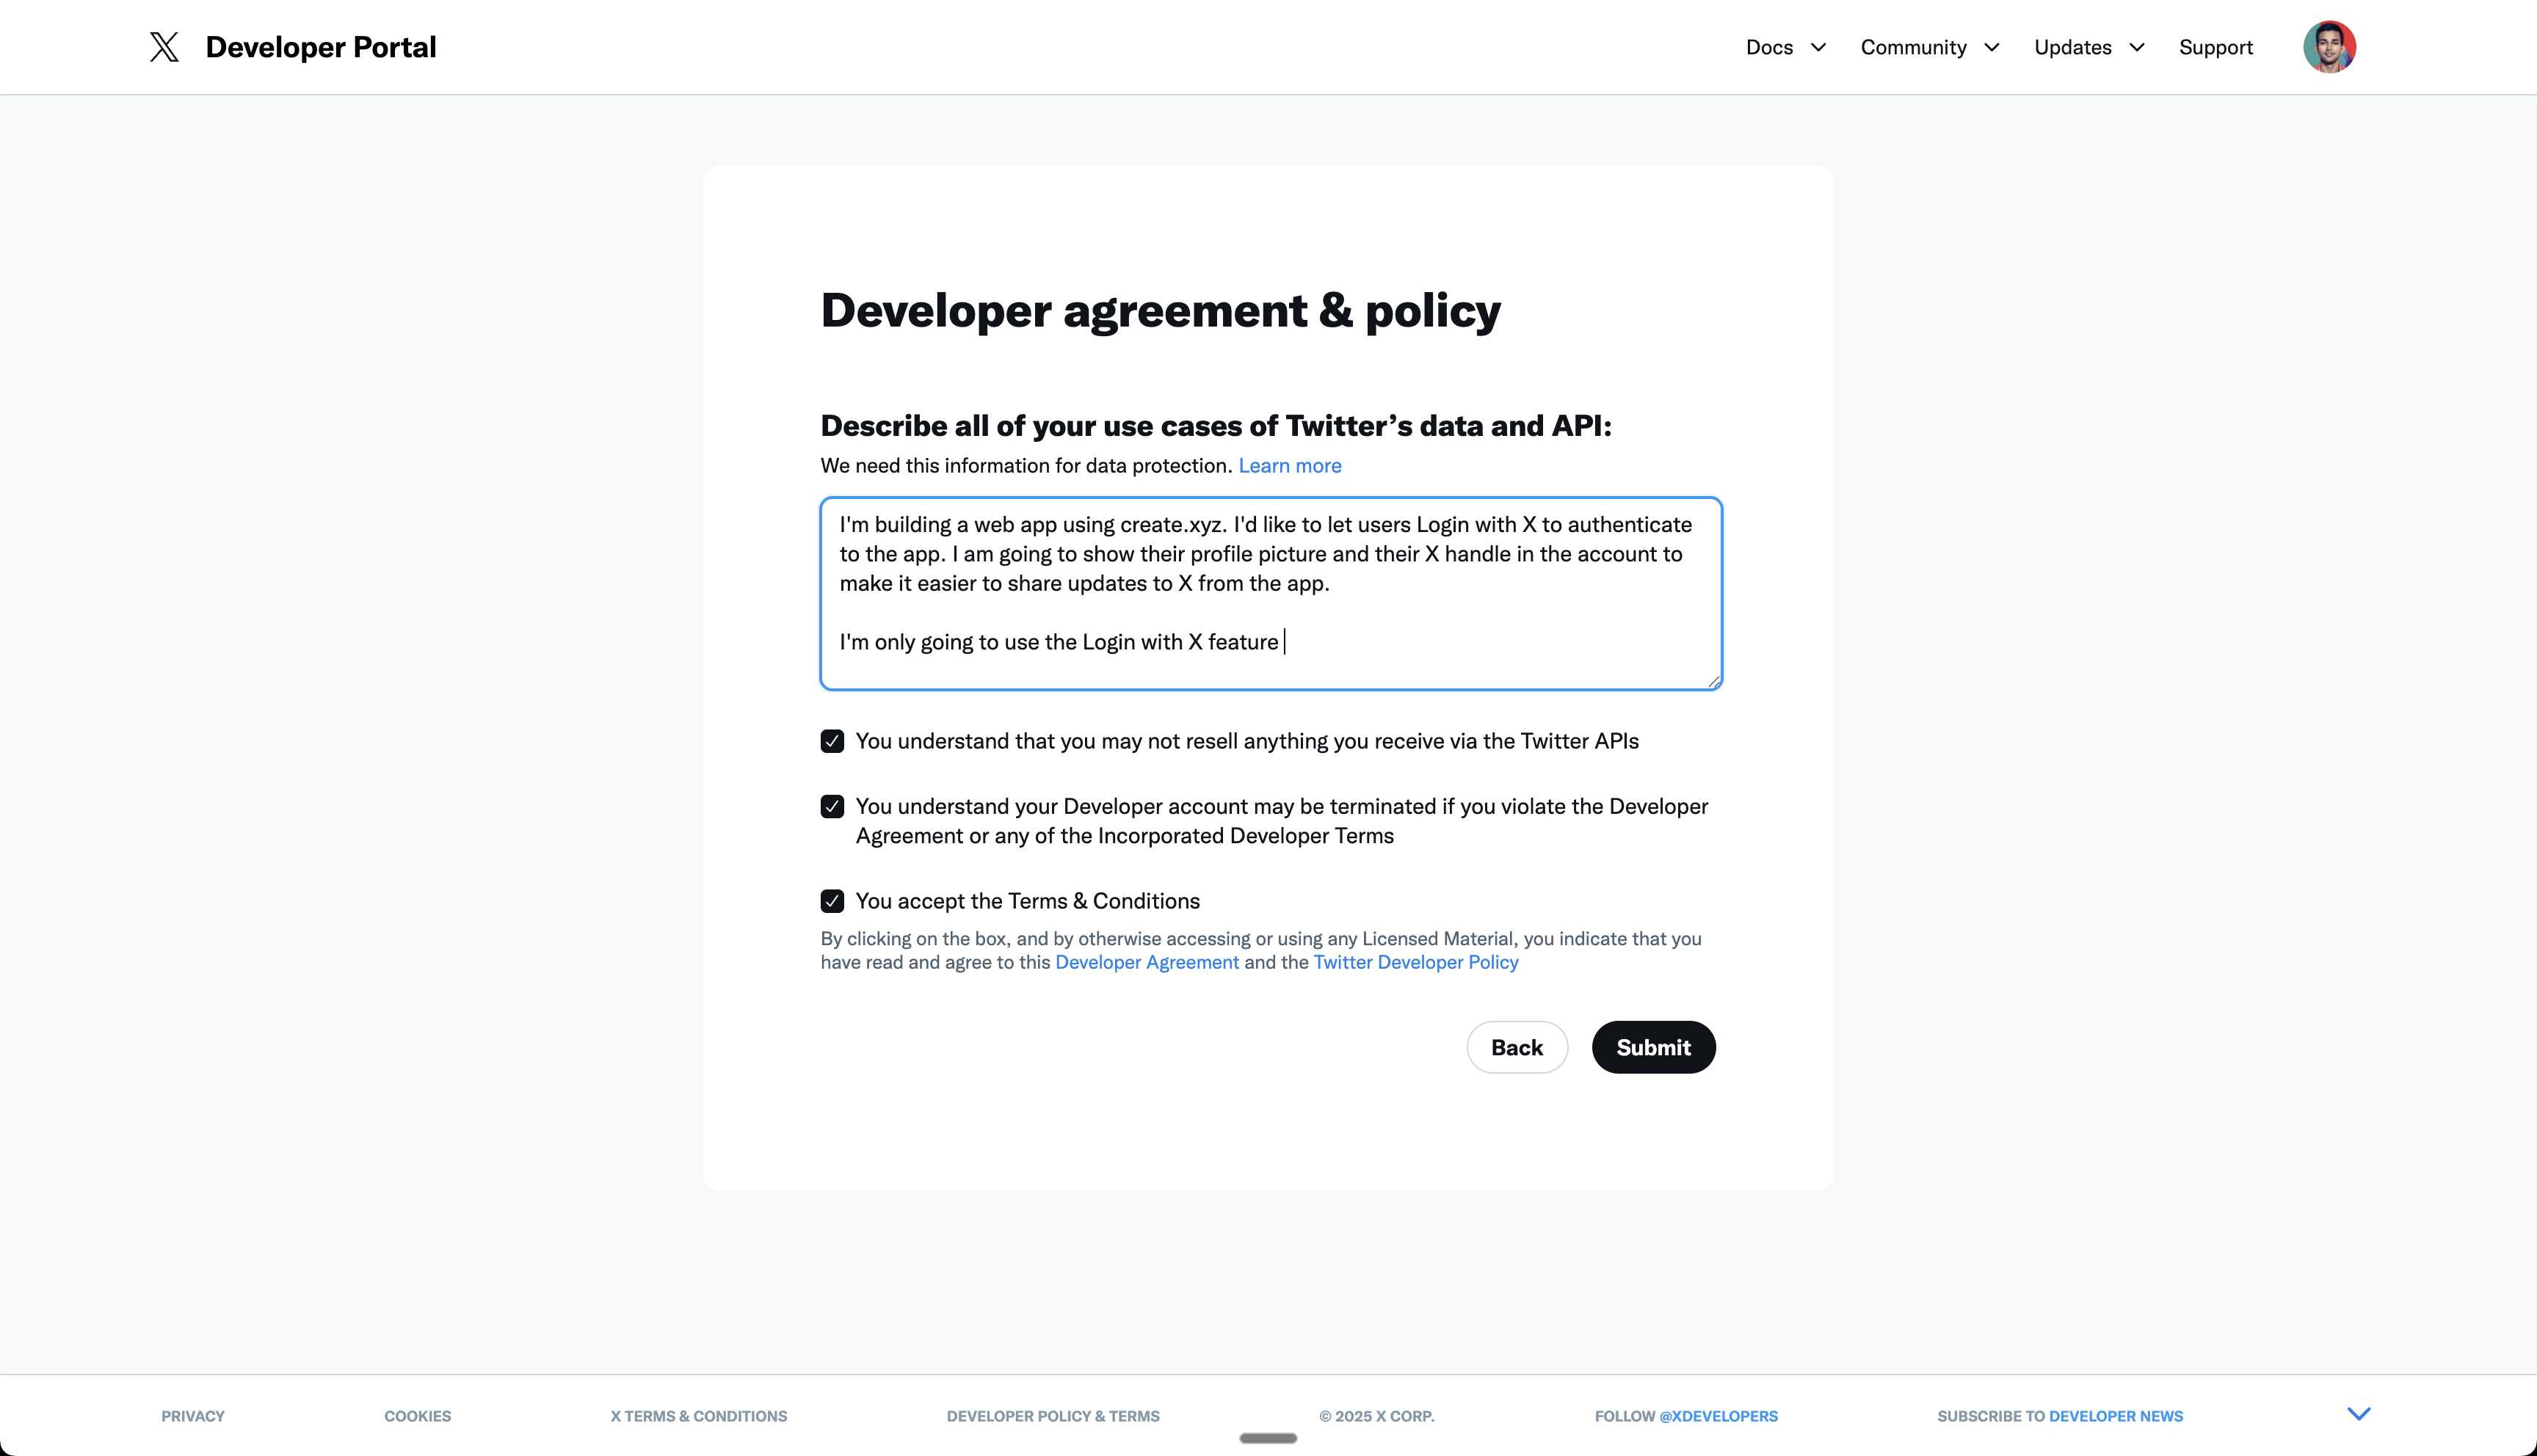
Accept Developer Agreement
- Review the developer terms
- Describe your app’s purpose and that you’re using Login with X
- Accept the terms to proceed
5
Create Project
- Once approved, navigate to your dashboard
- Click “Create Project” to begin
6
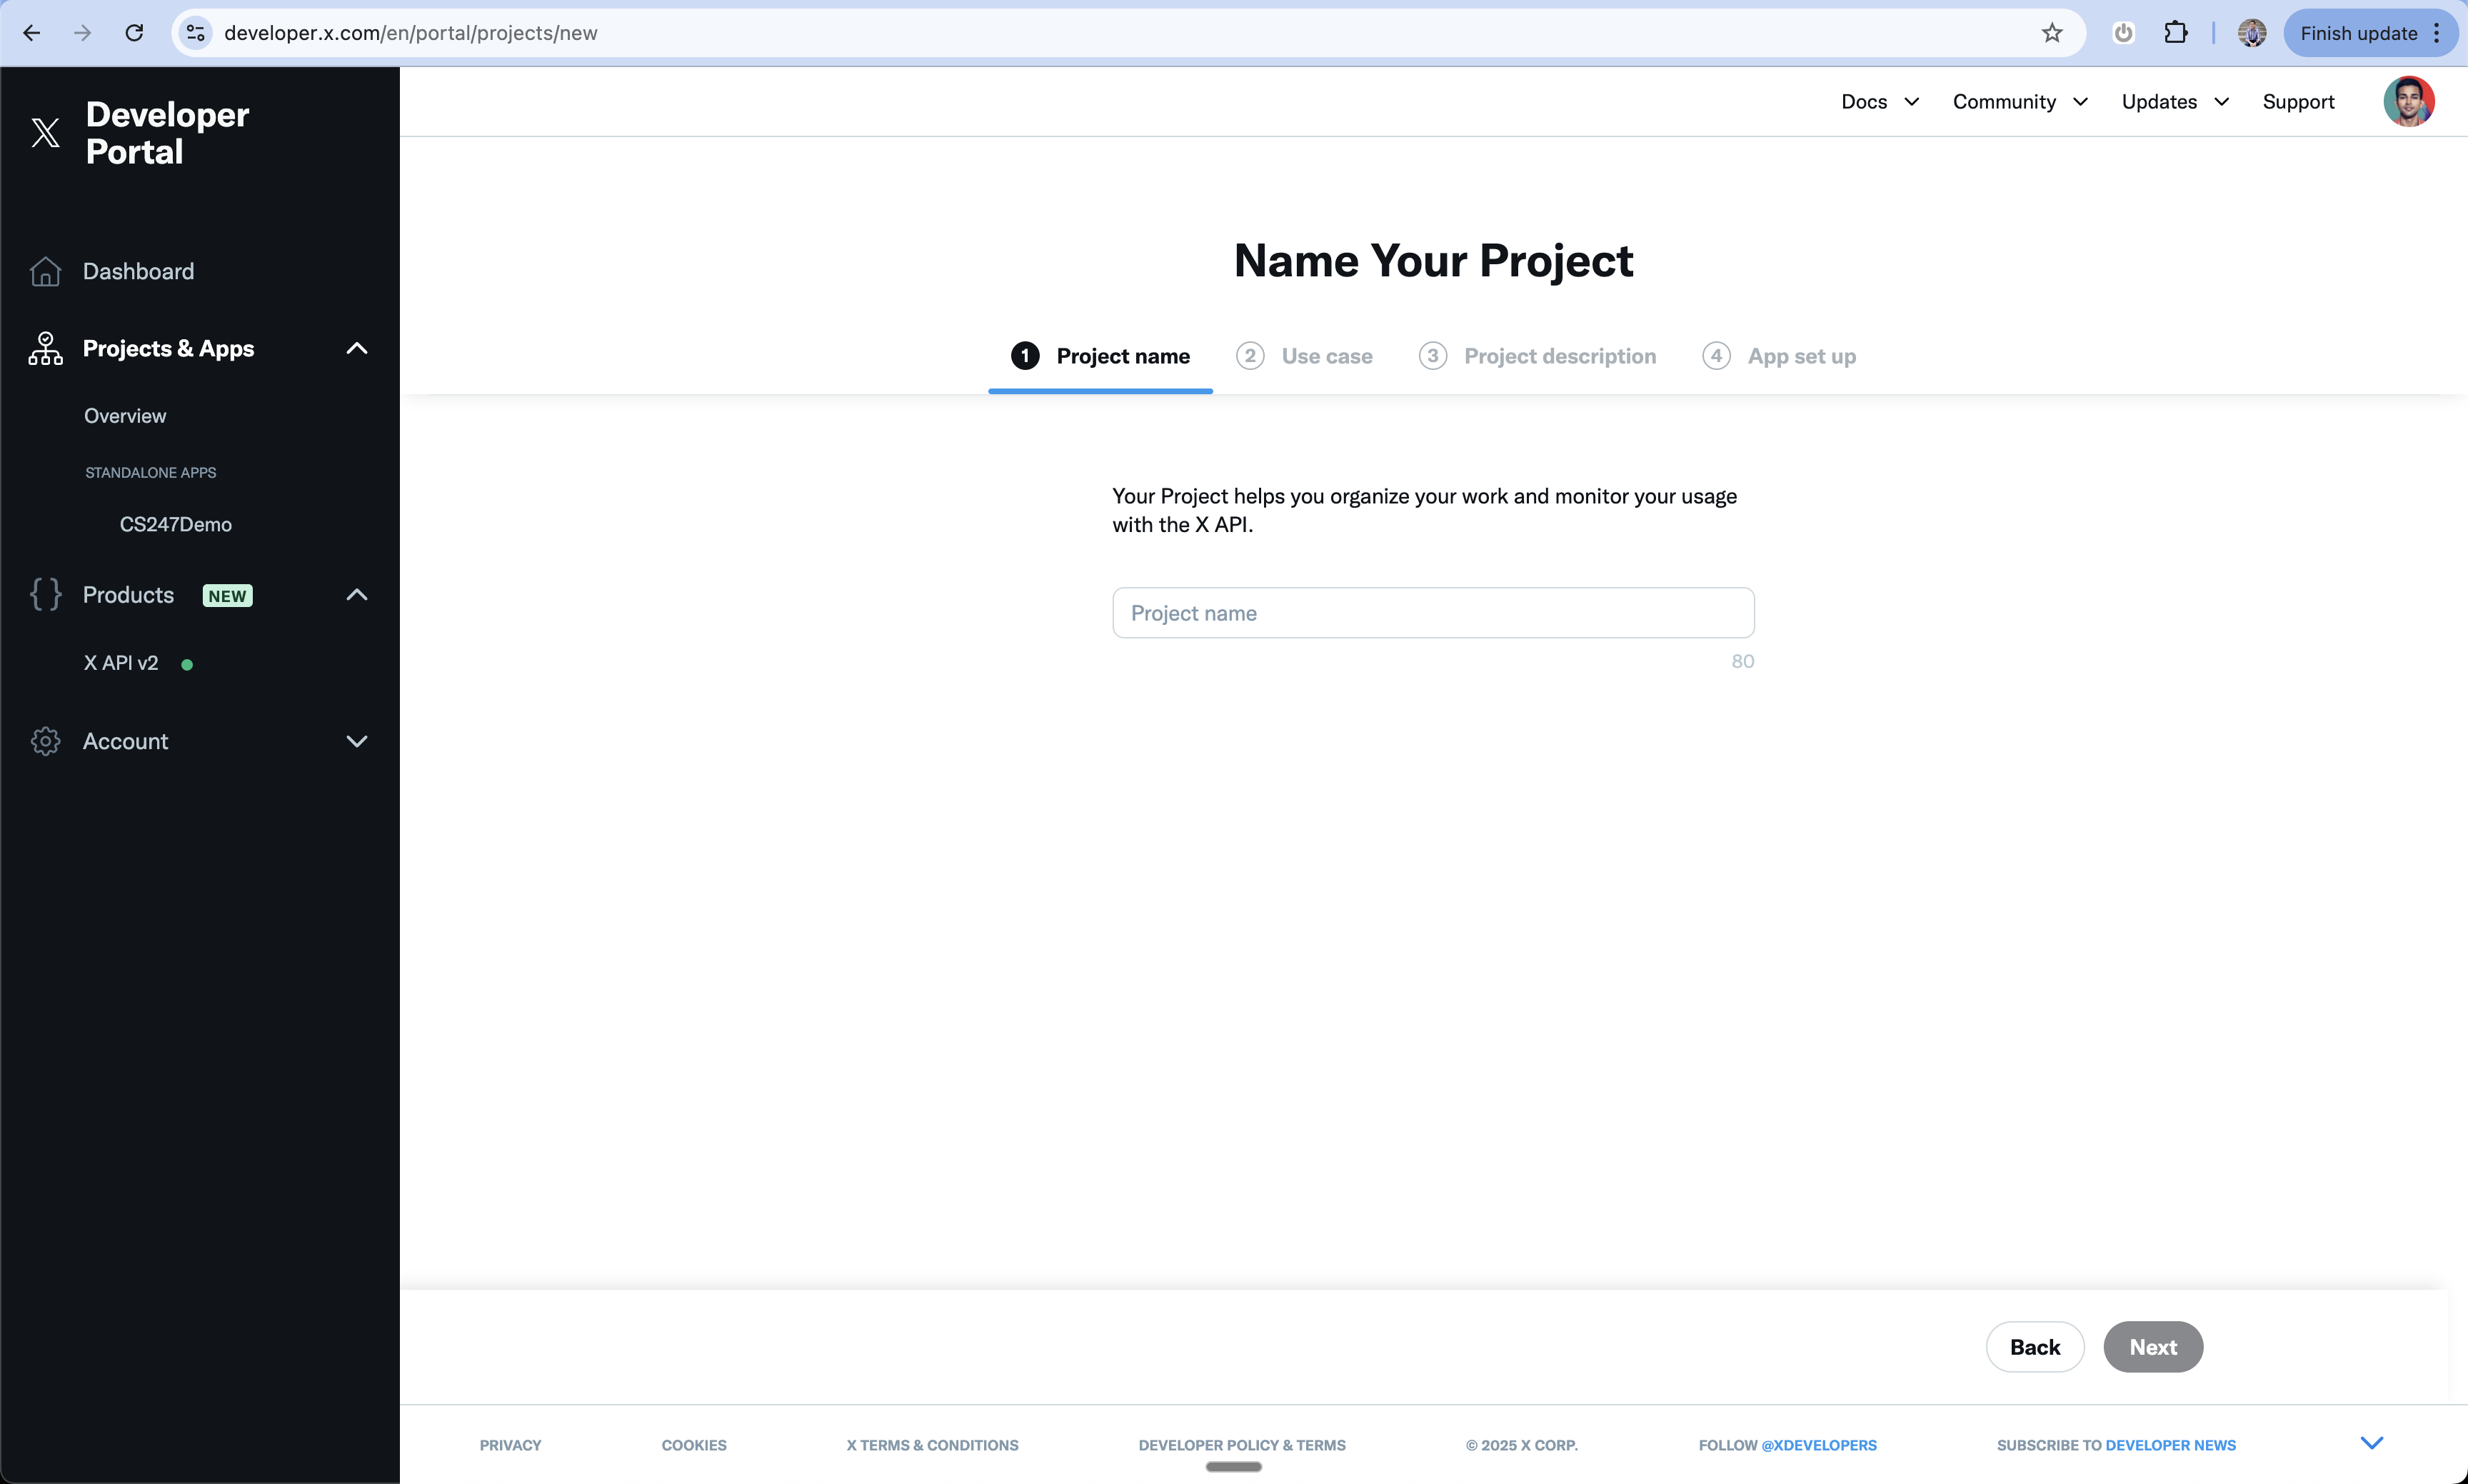
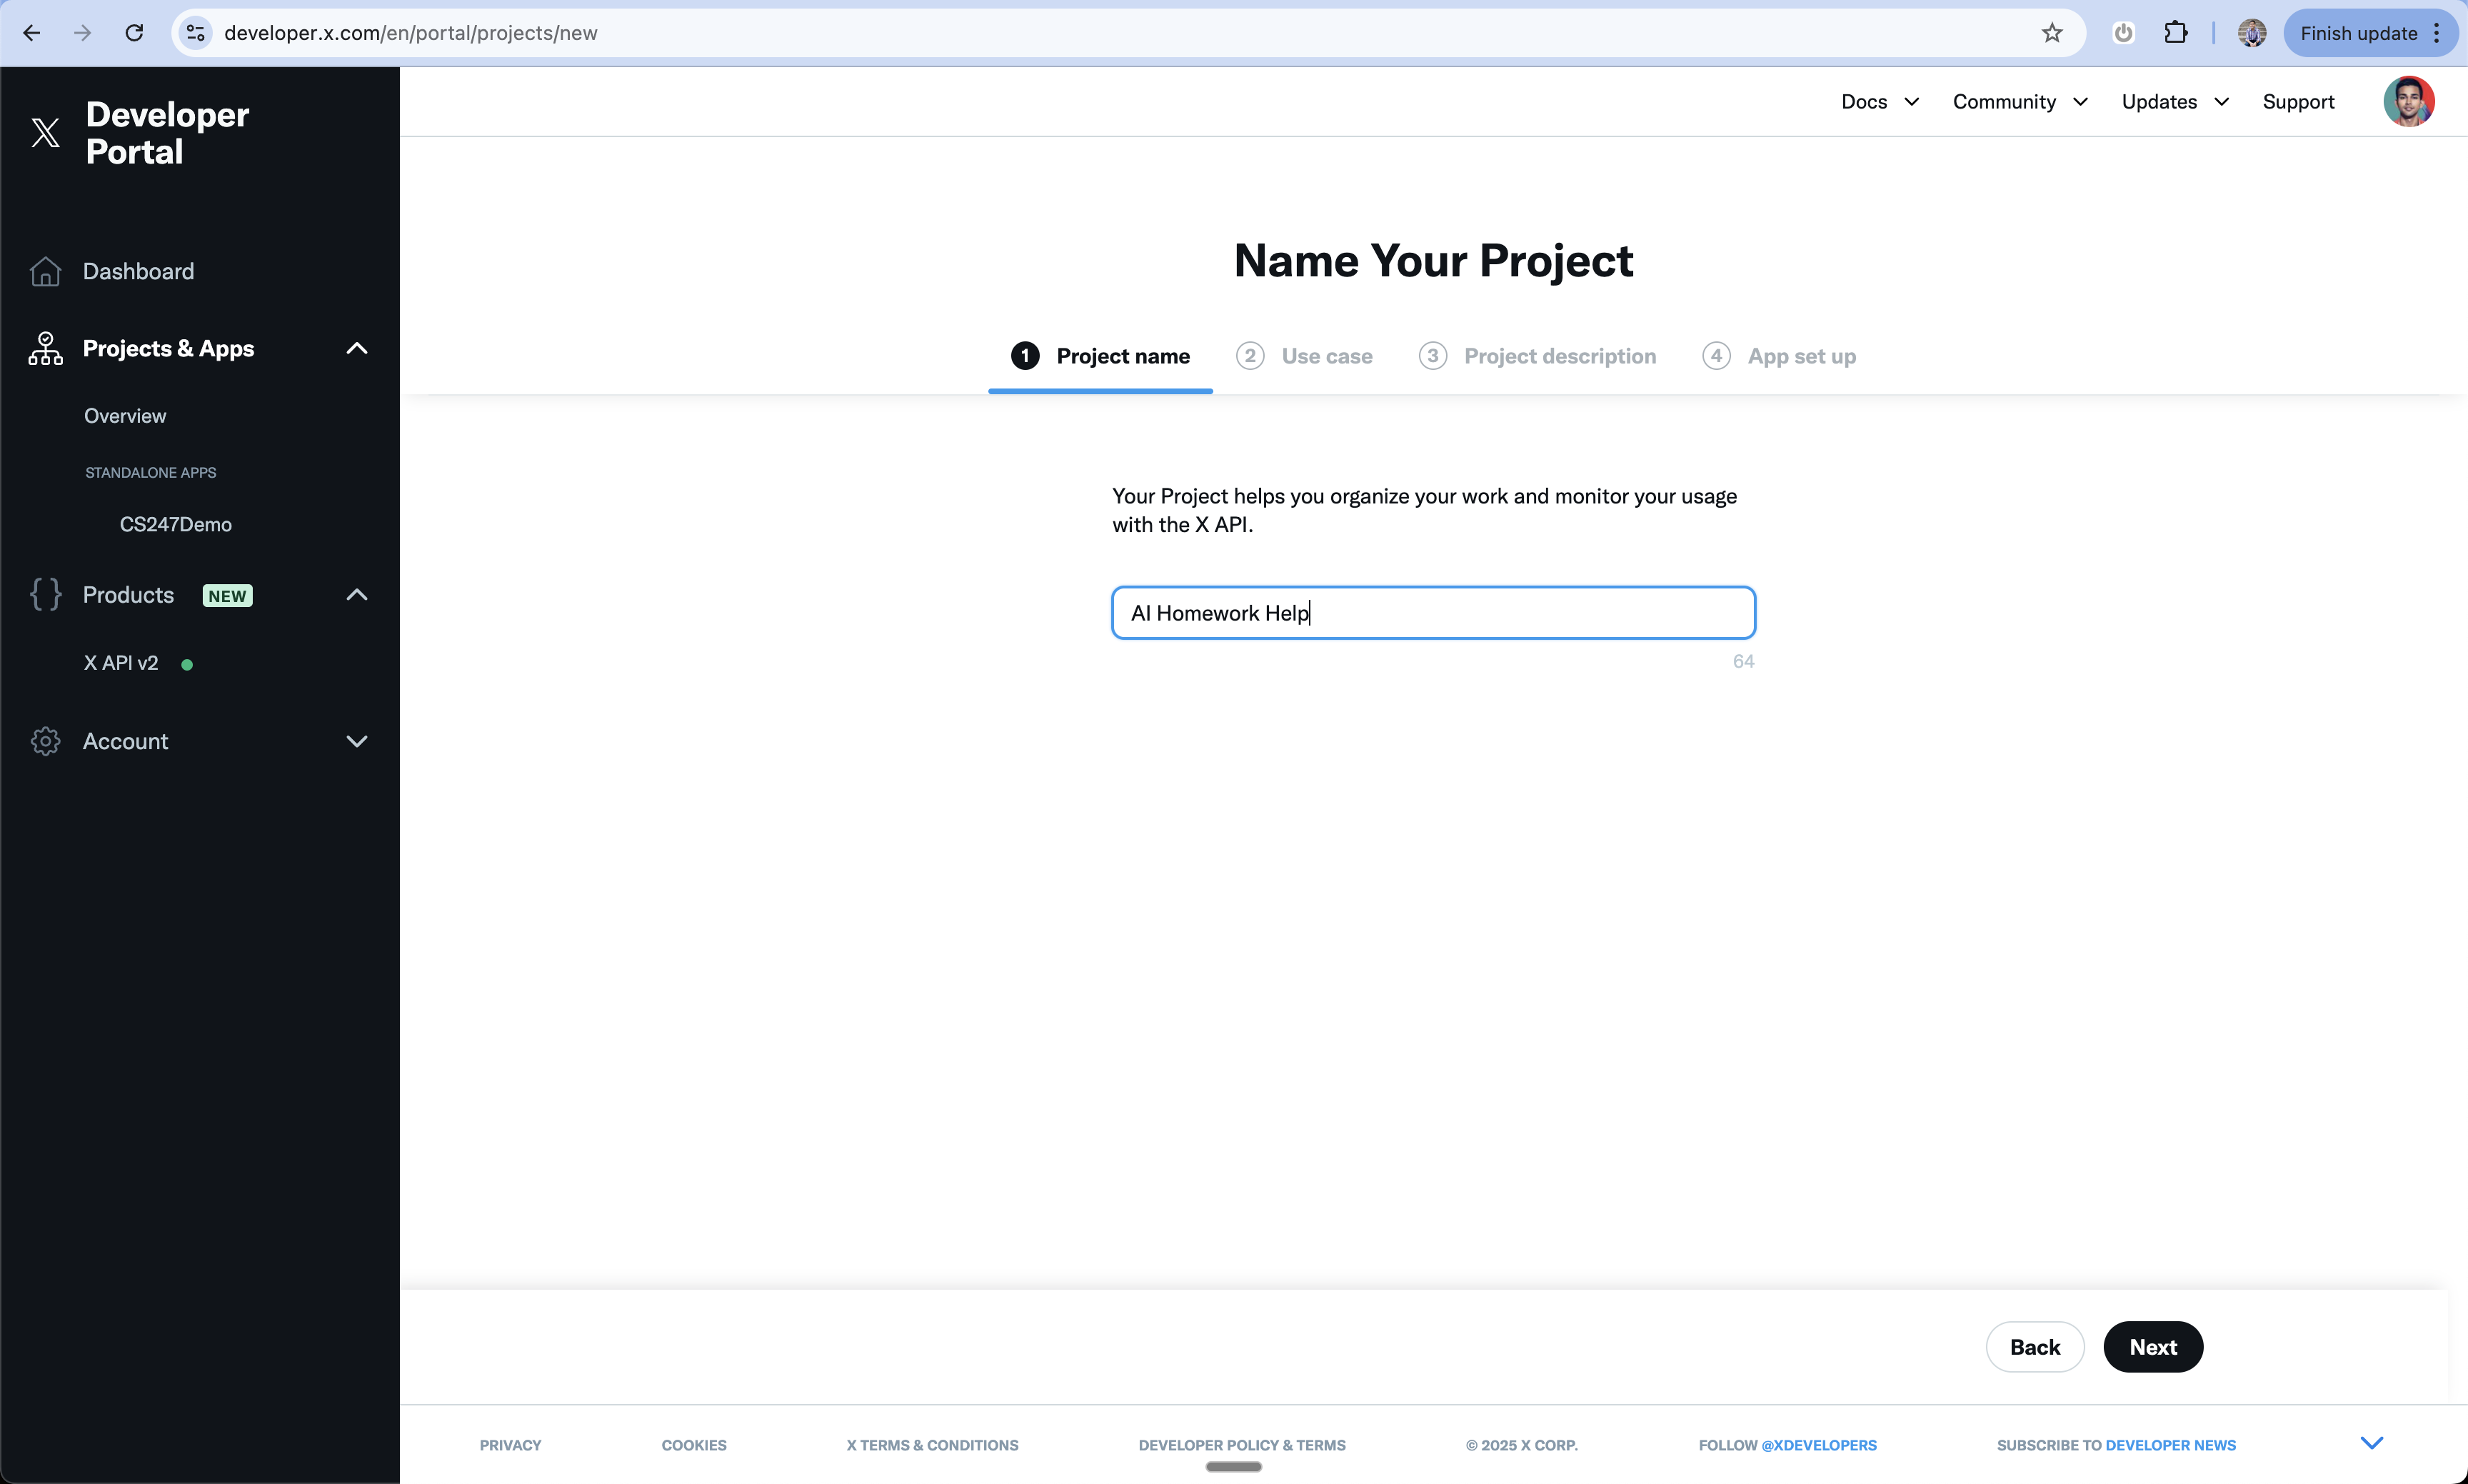
Name Your Project
- Choose a descriptive name for your project
- This is for internal organization
- Click continue
7
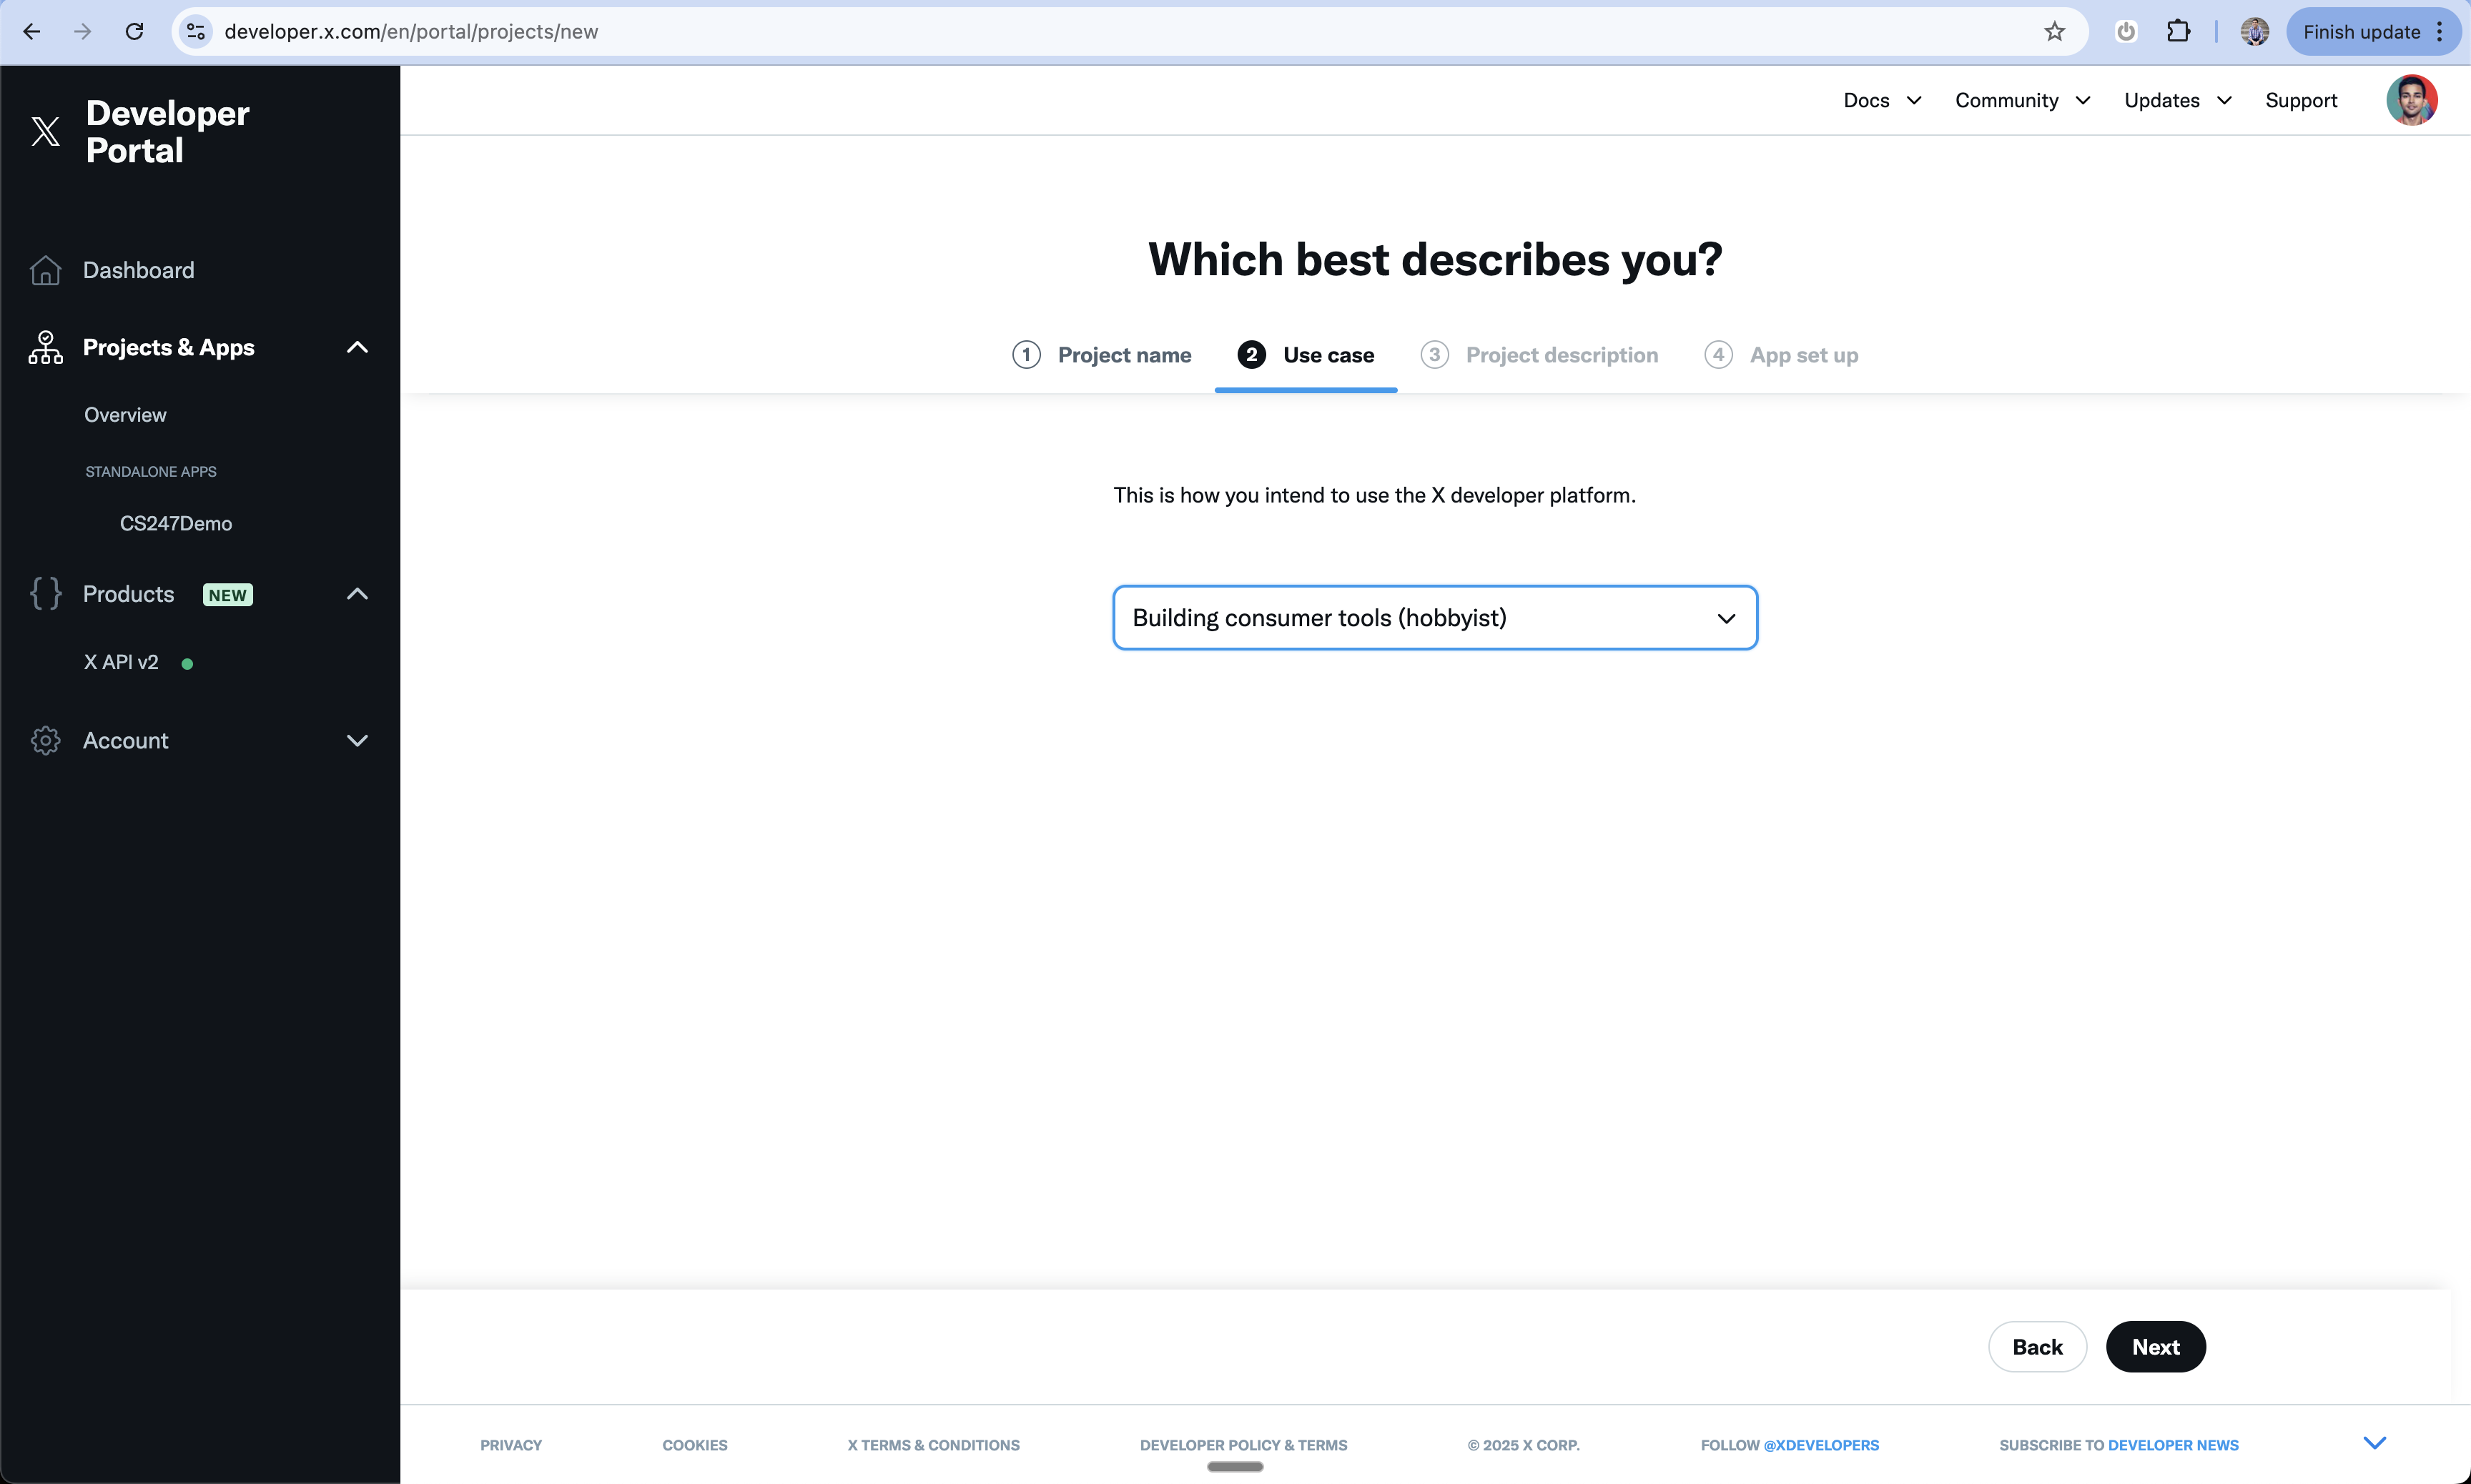
Select Use Case
- Choose the primary use case for your app
- This helps X understand how you’ll use their API
8
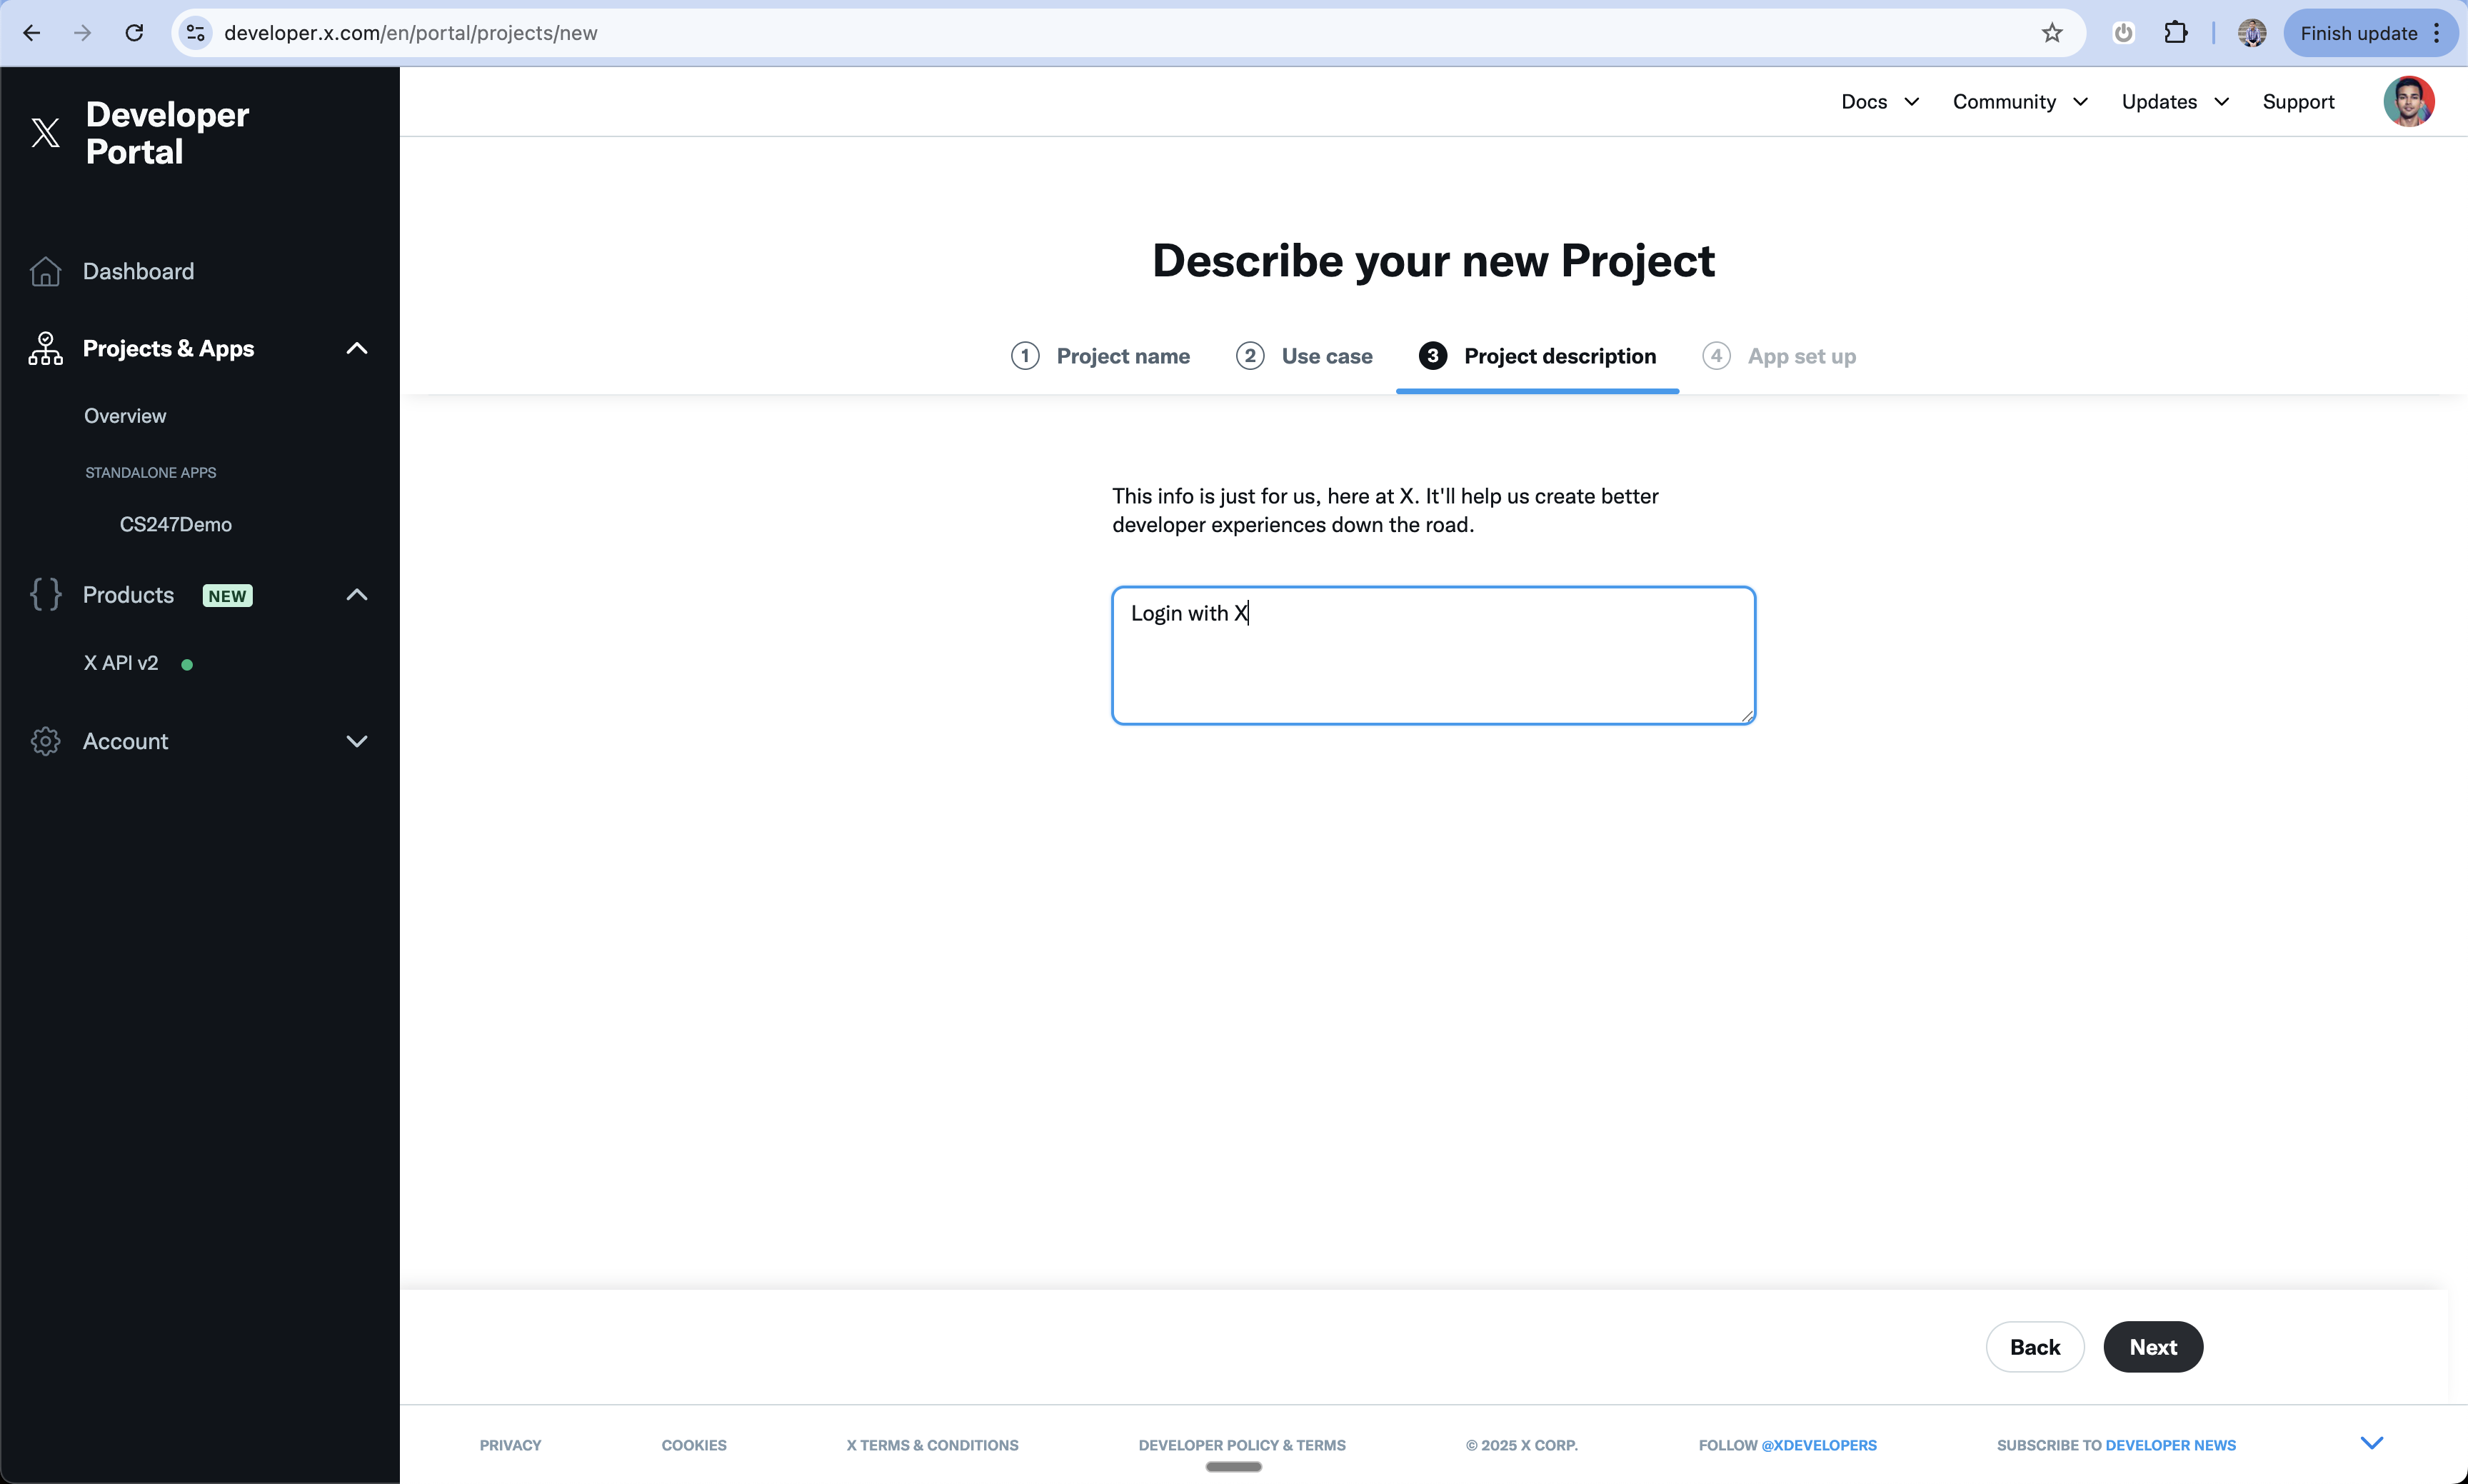
Add Project Description
- Provide a detailed description of your project
- Explain how you’ll use X’s features
- Be specific about your Login with X implementation
9
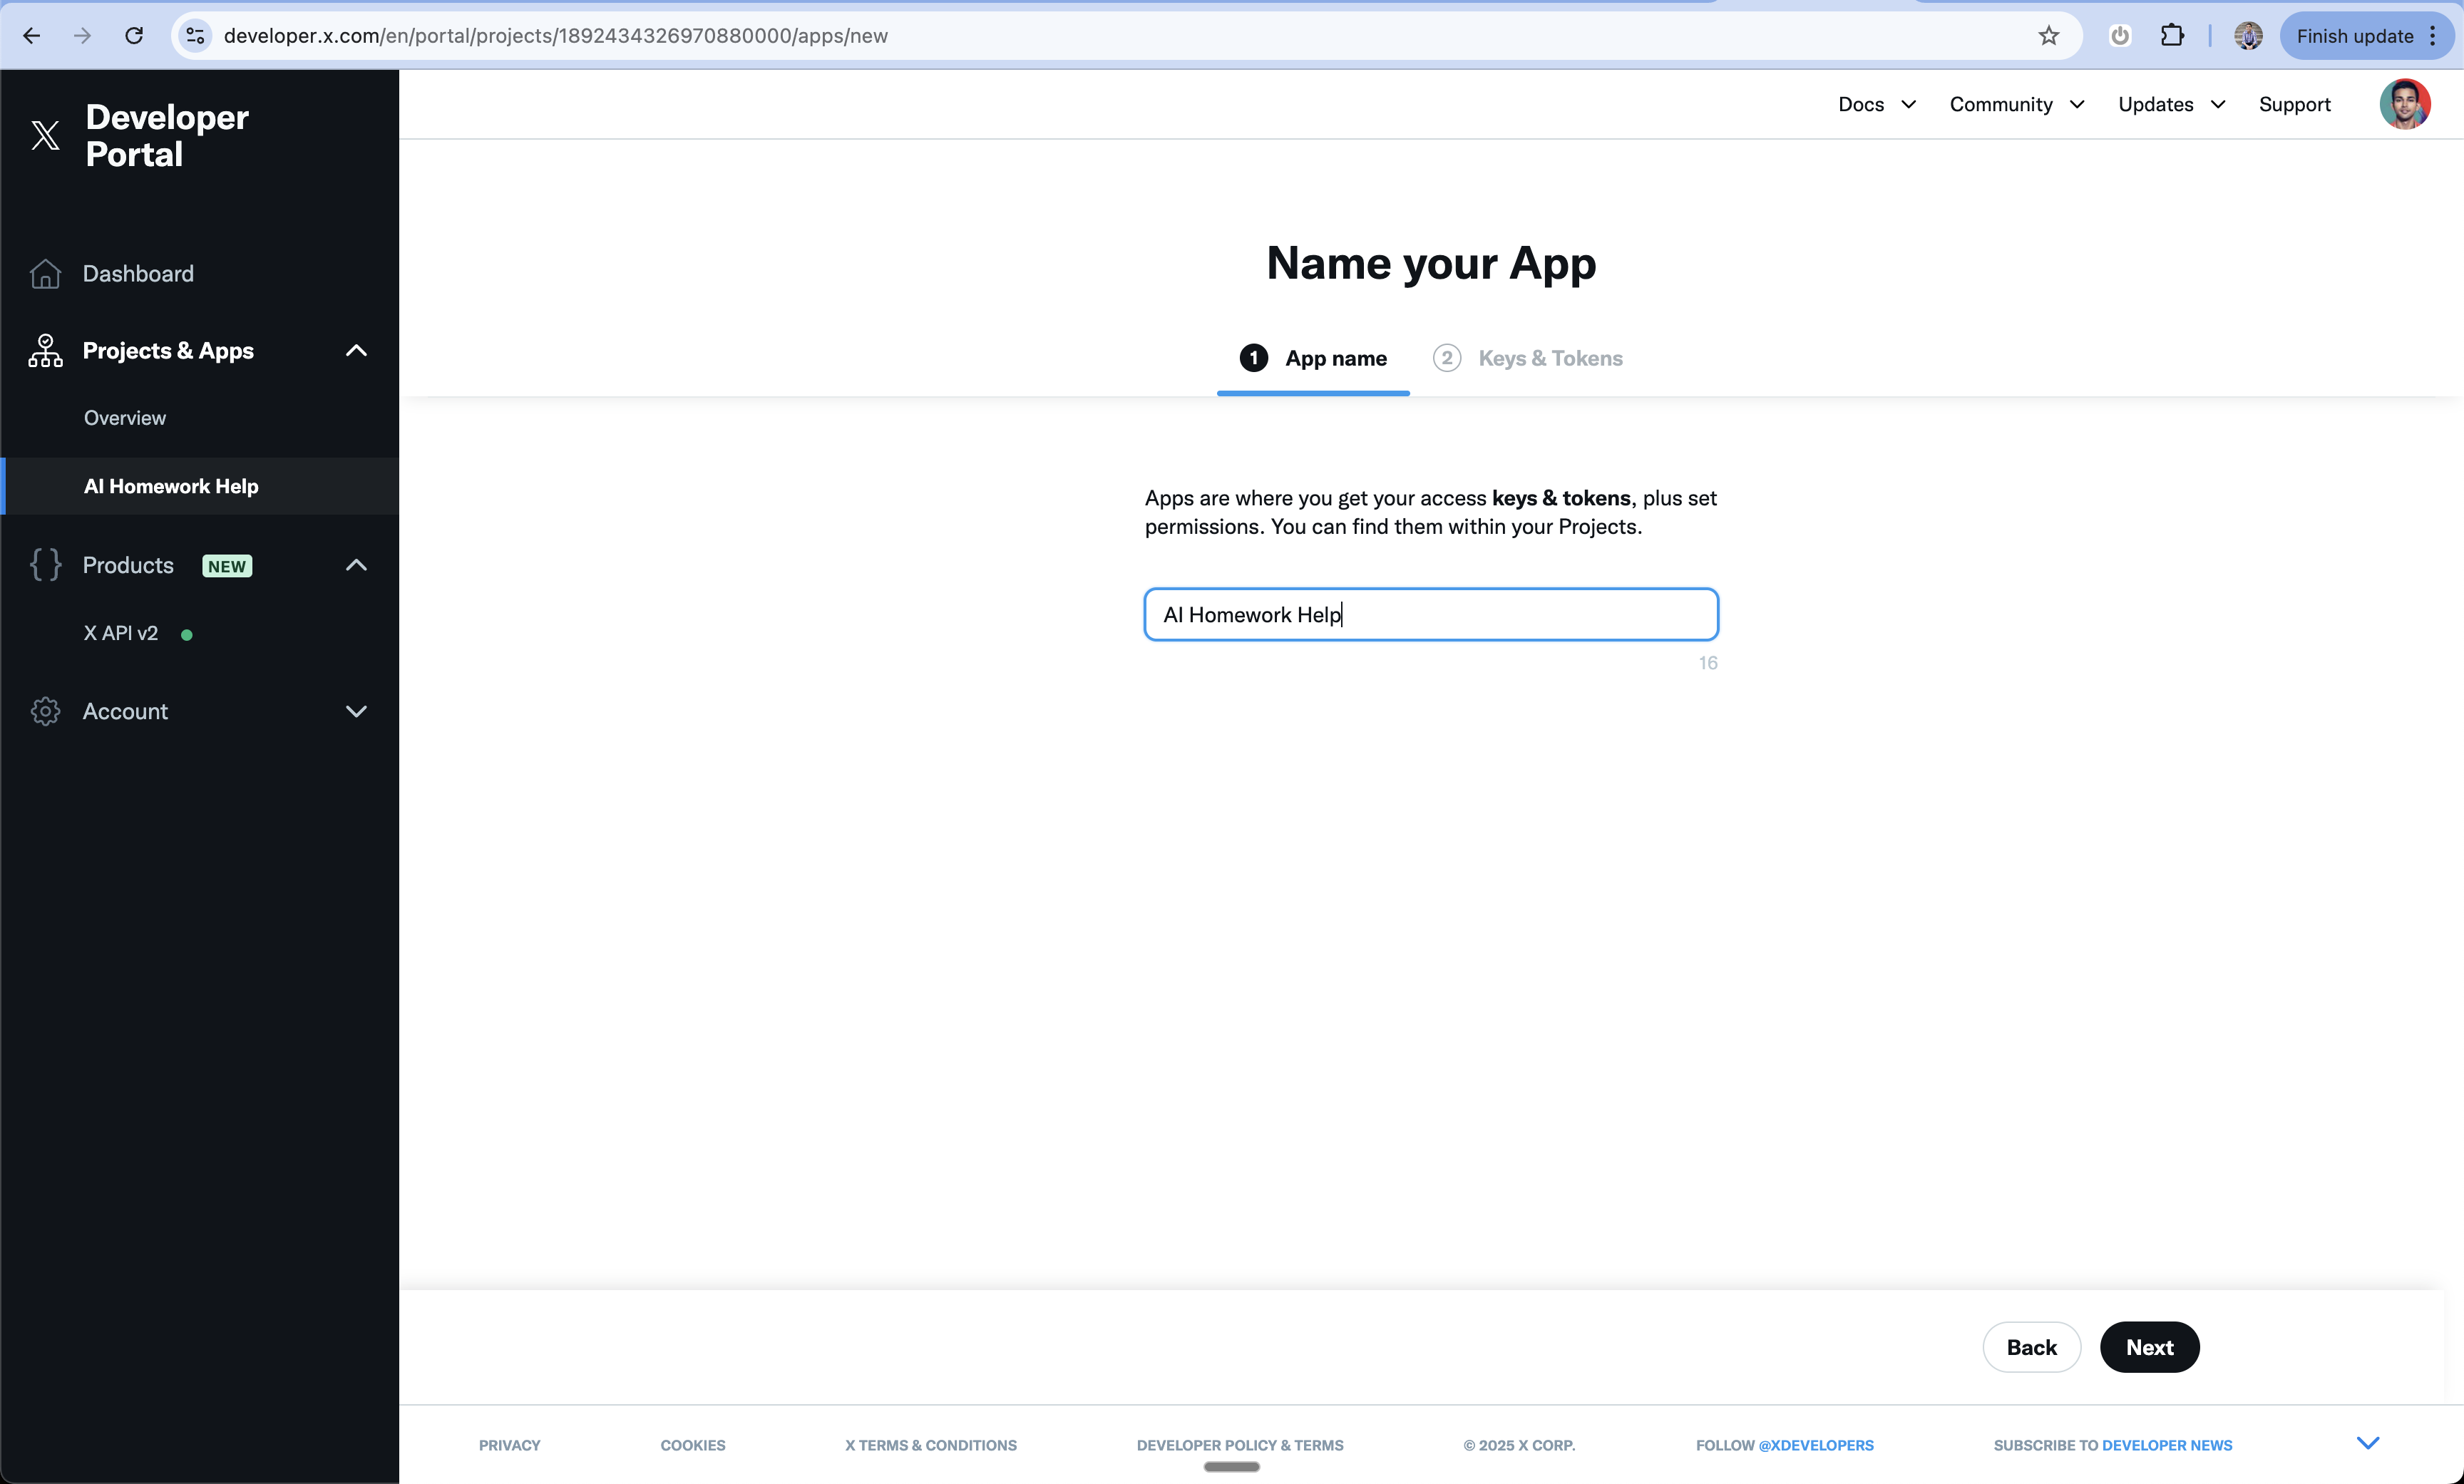
Name Your App
- Choose a user-facing name for your app
- This will be visible to users during sign in
10
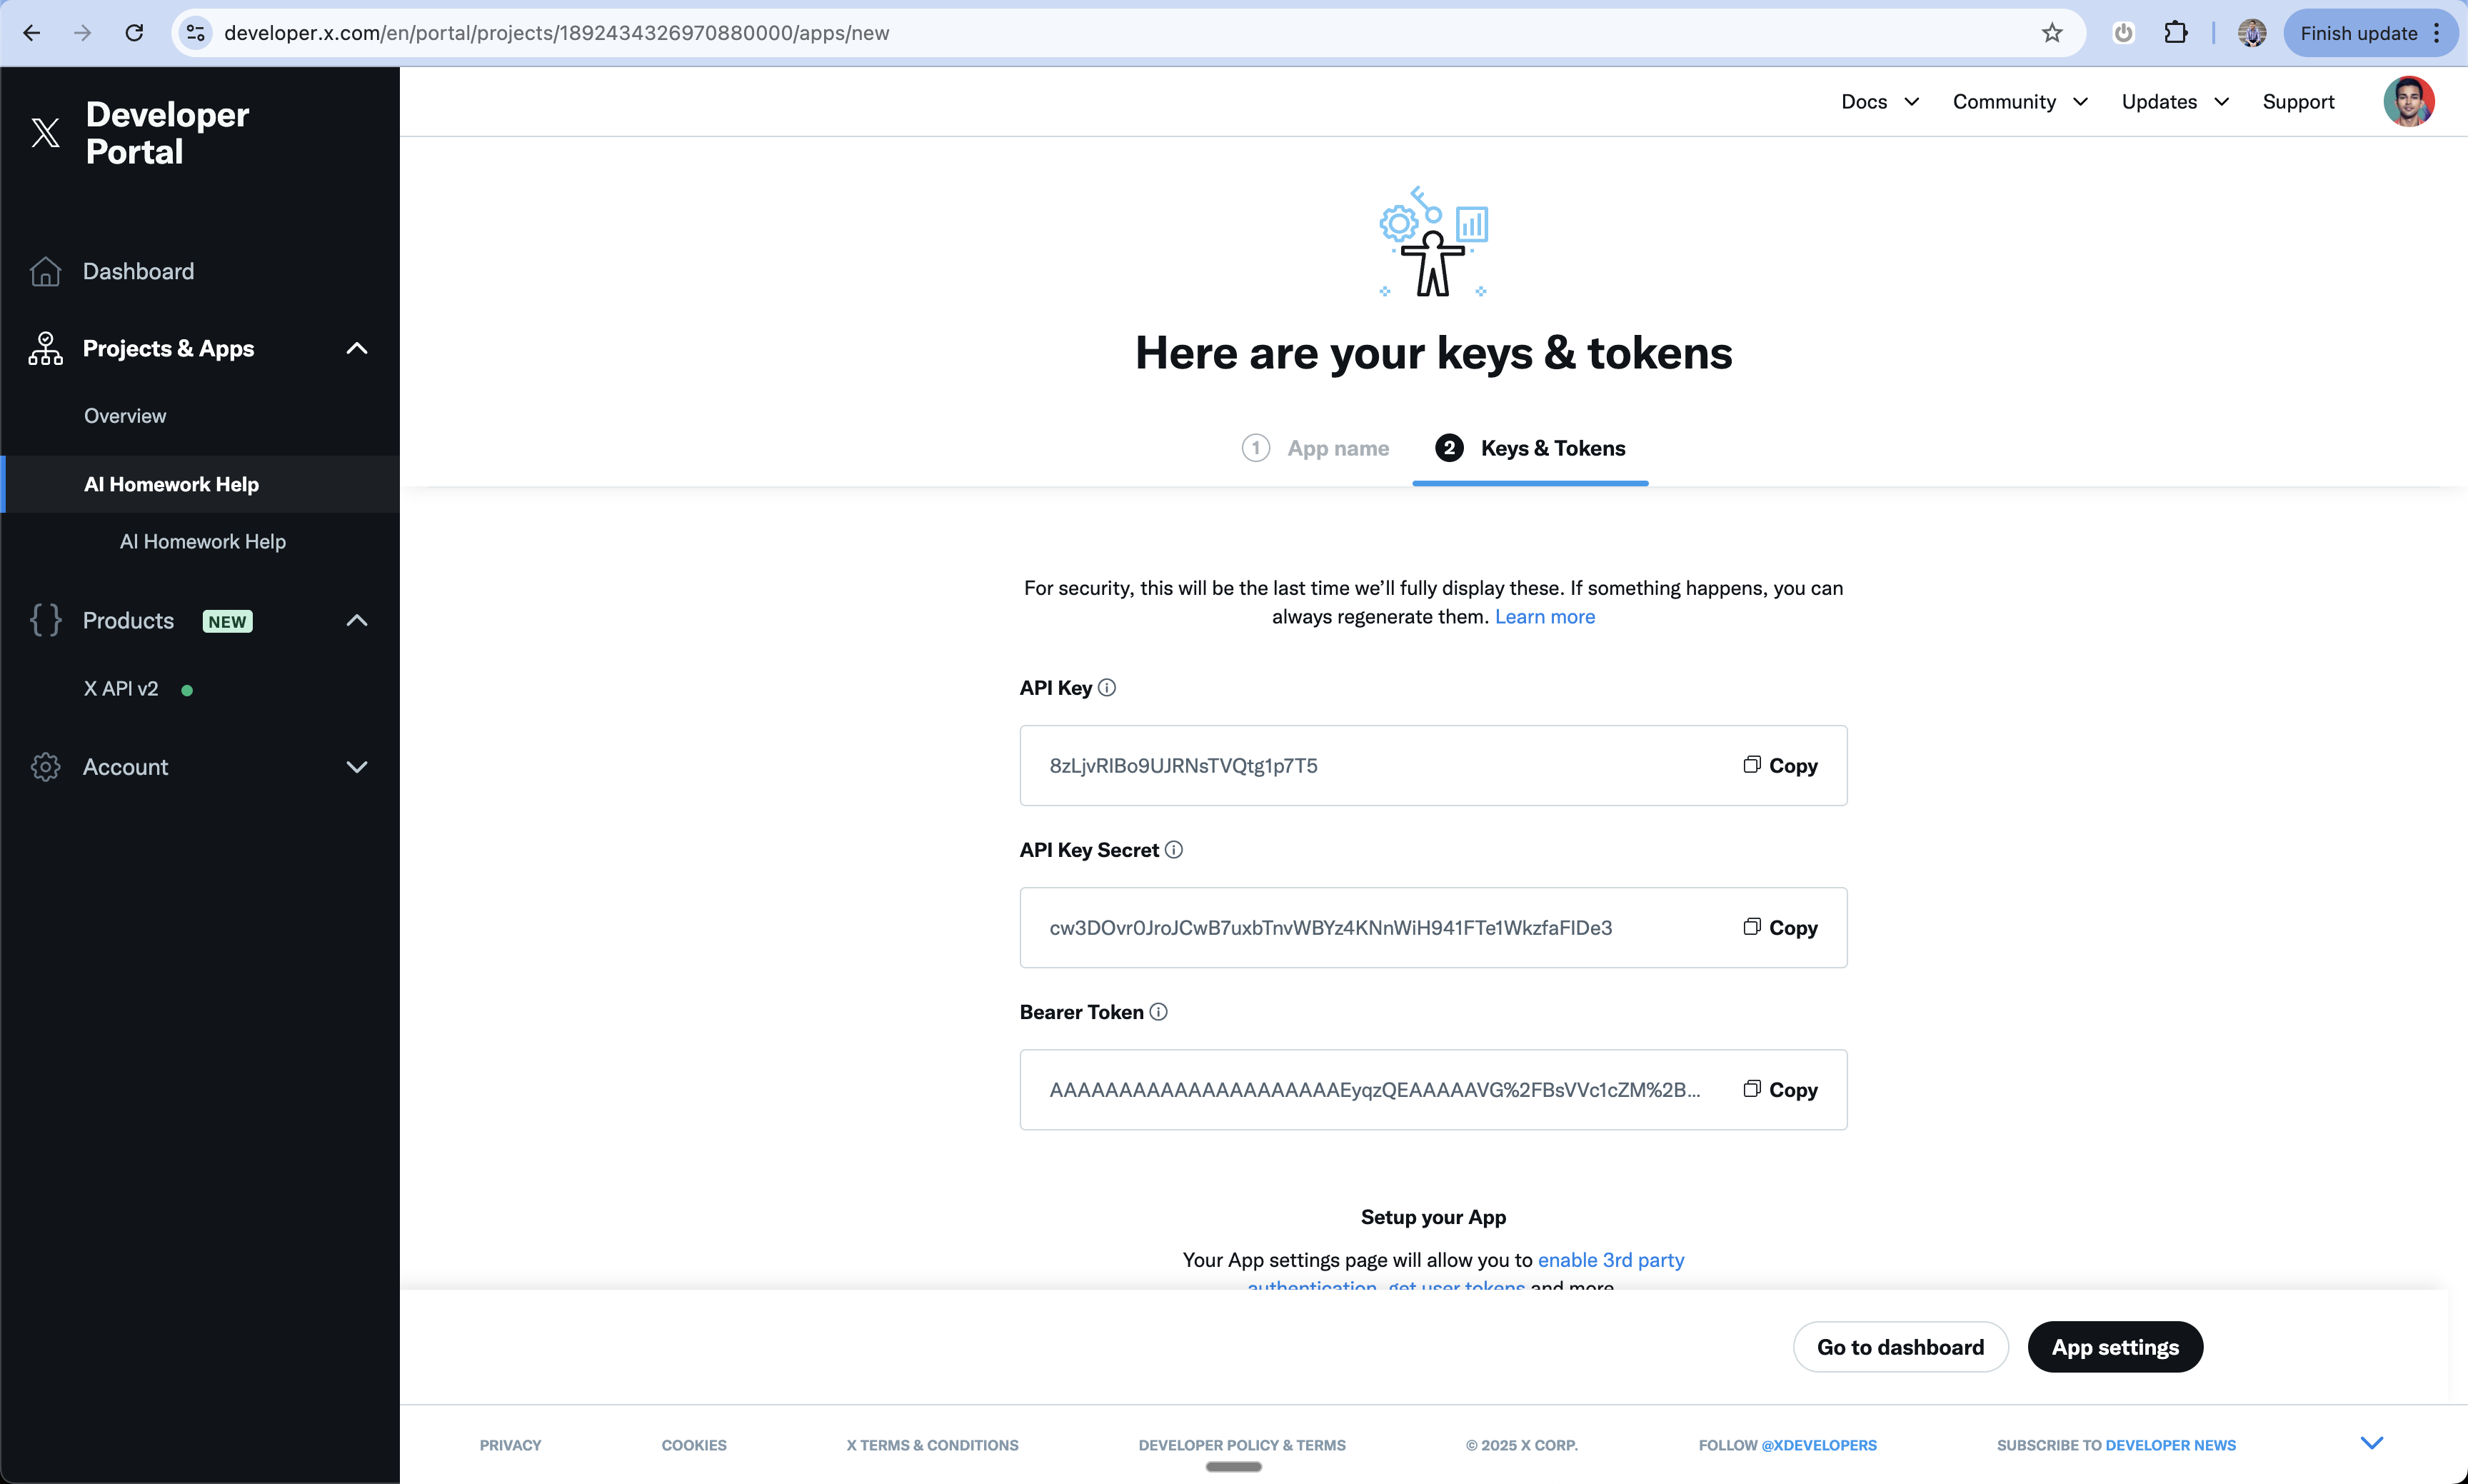
Skip Initial Tokens
- You’ll see initial Keys & Tokens
- These include API Key, API Key Secret, and Bearer Token
- You can skip these for now - click “App Settings”
11
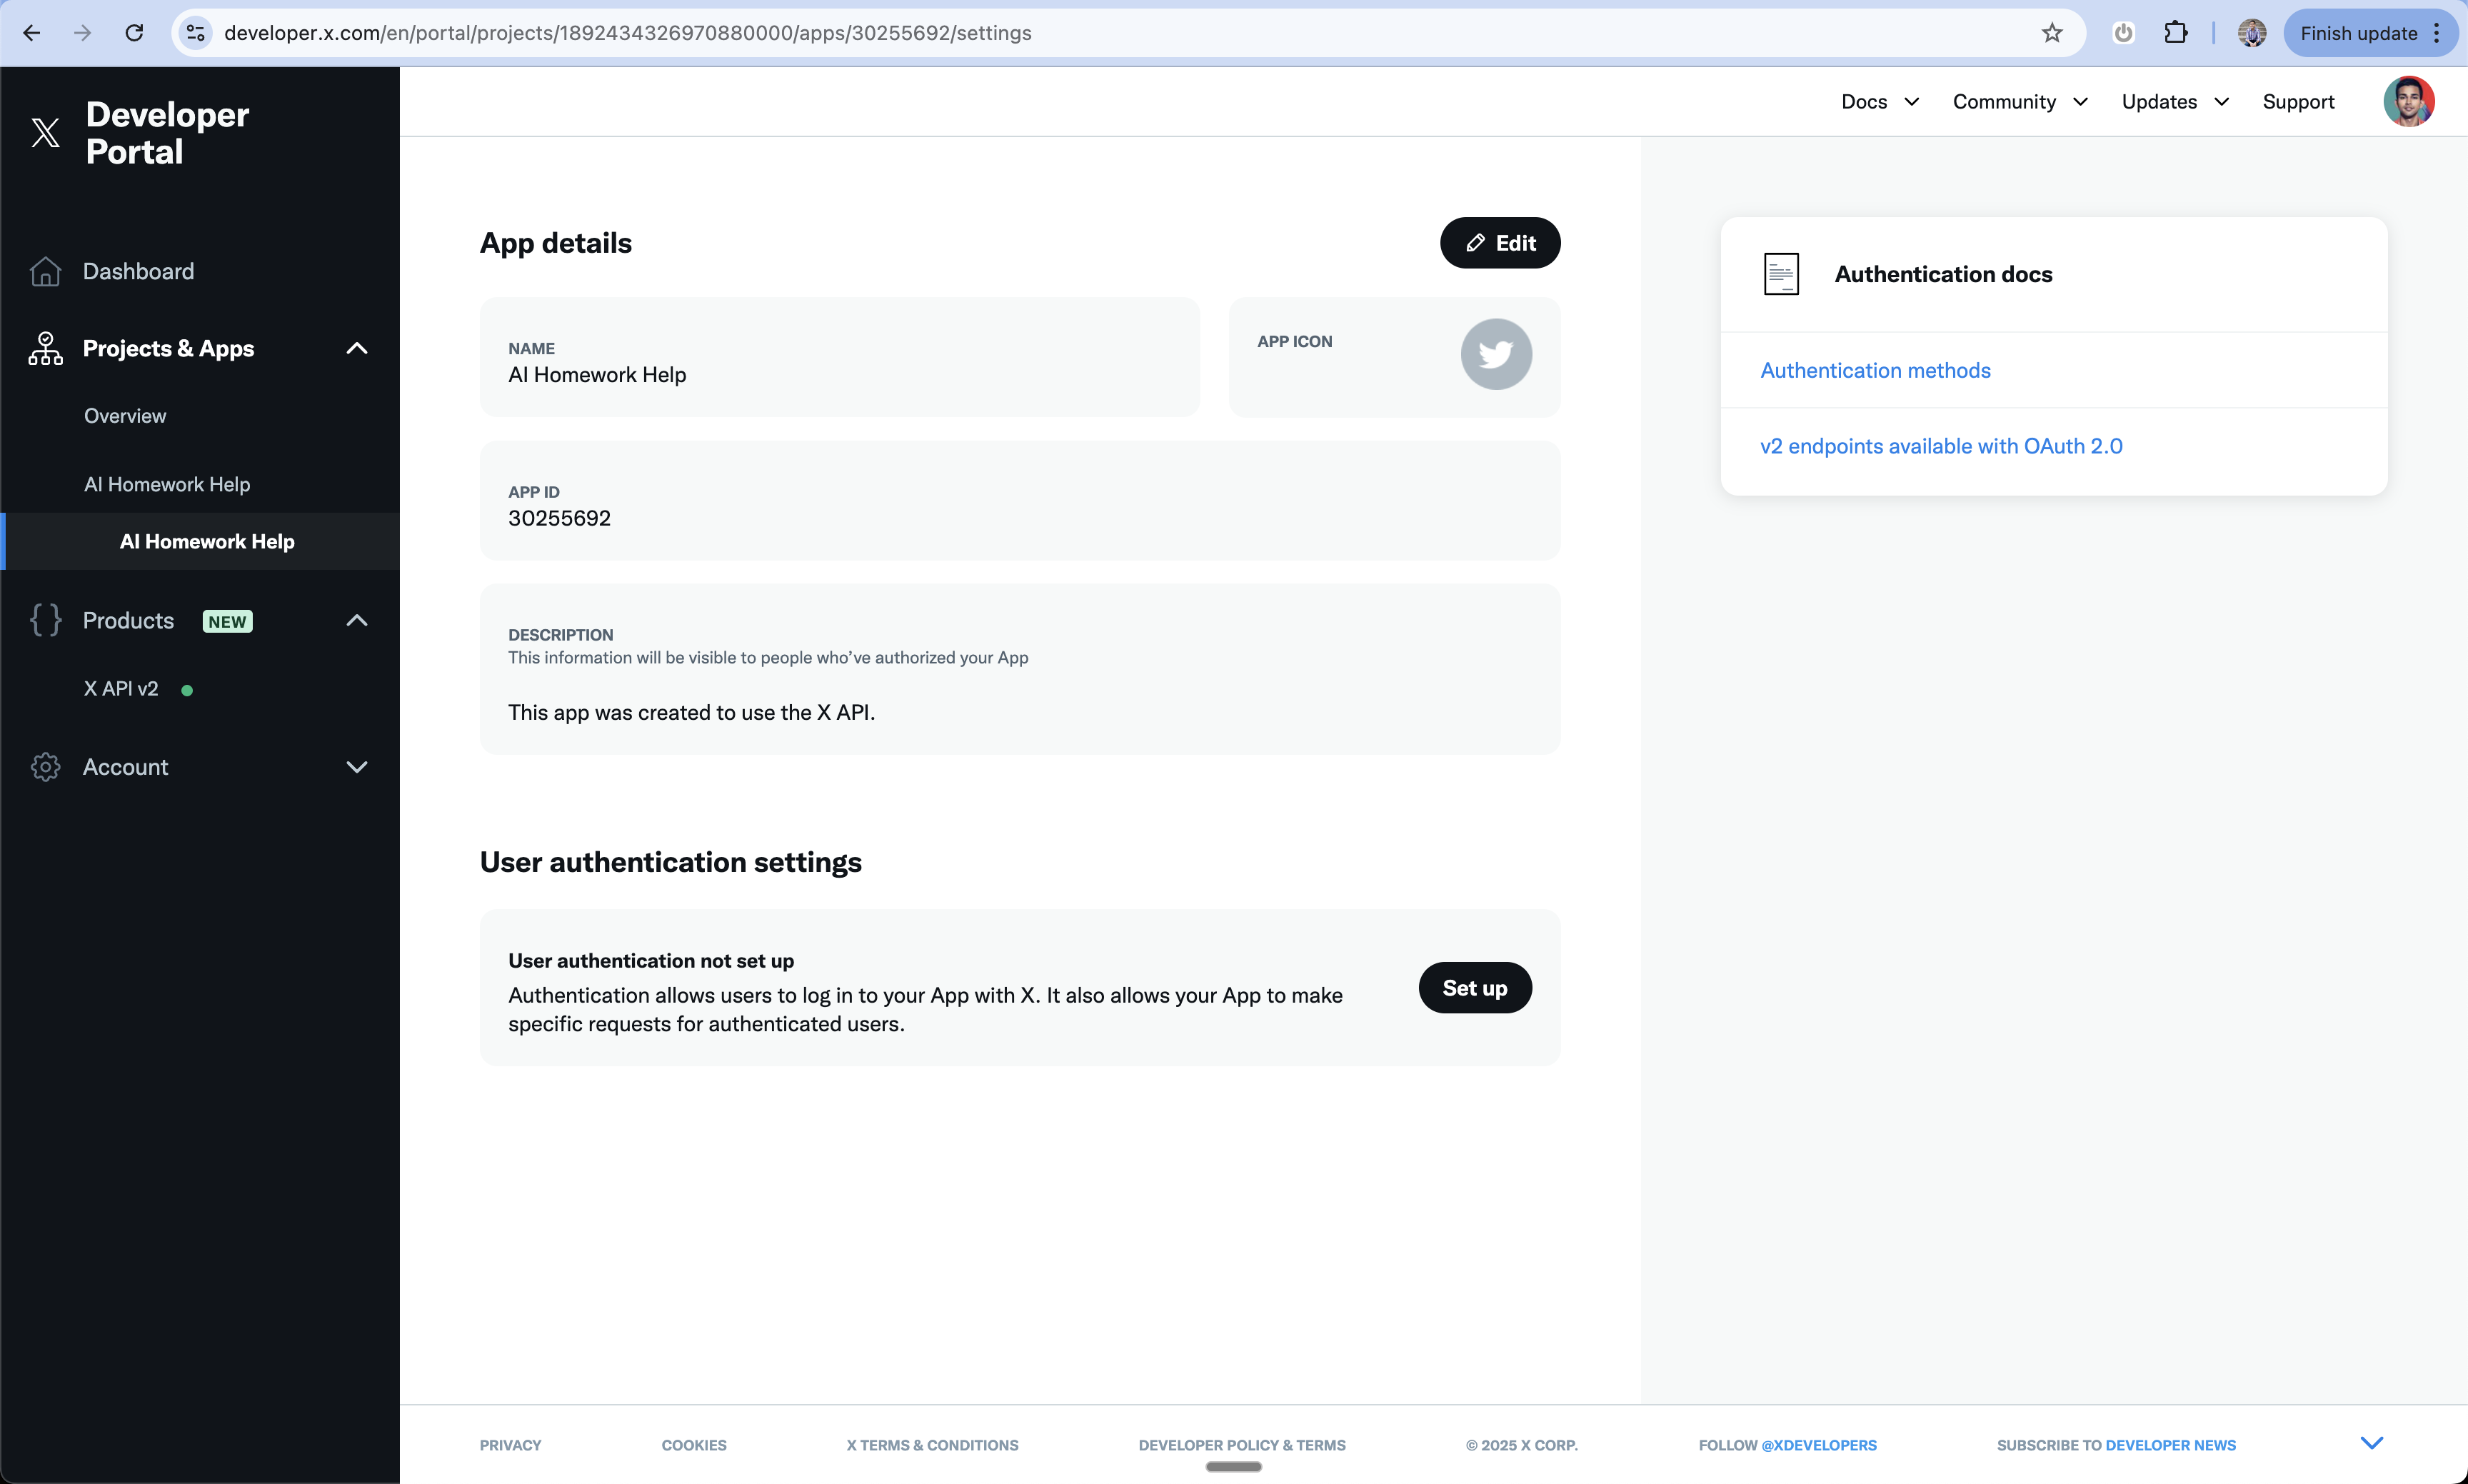
Configure User Authentication
- In App Settings, find “User authentication settings”
- Click “Set up”
12
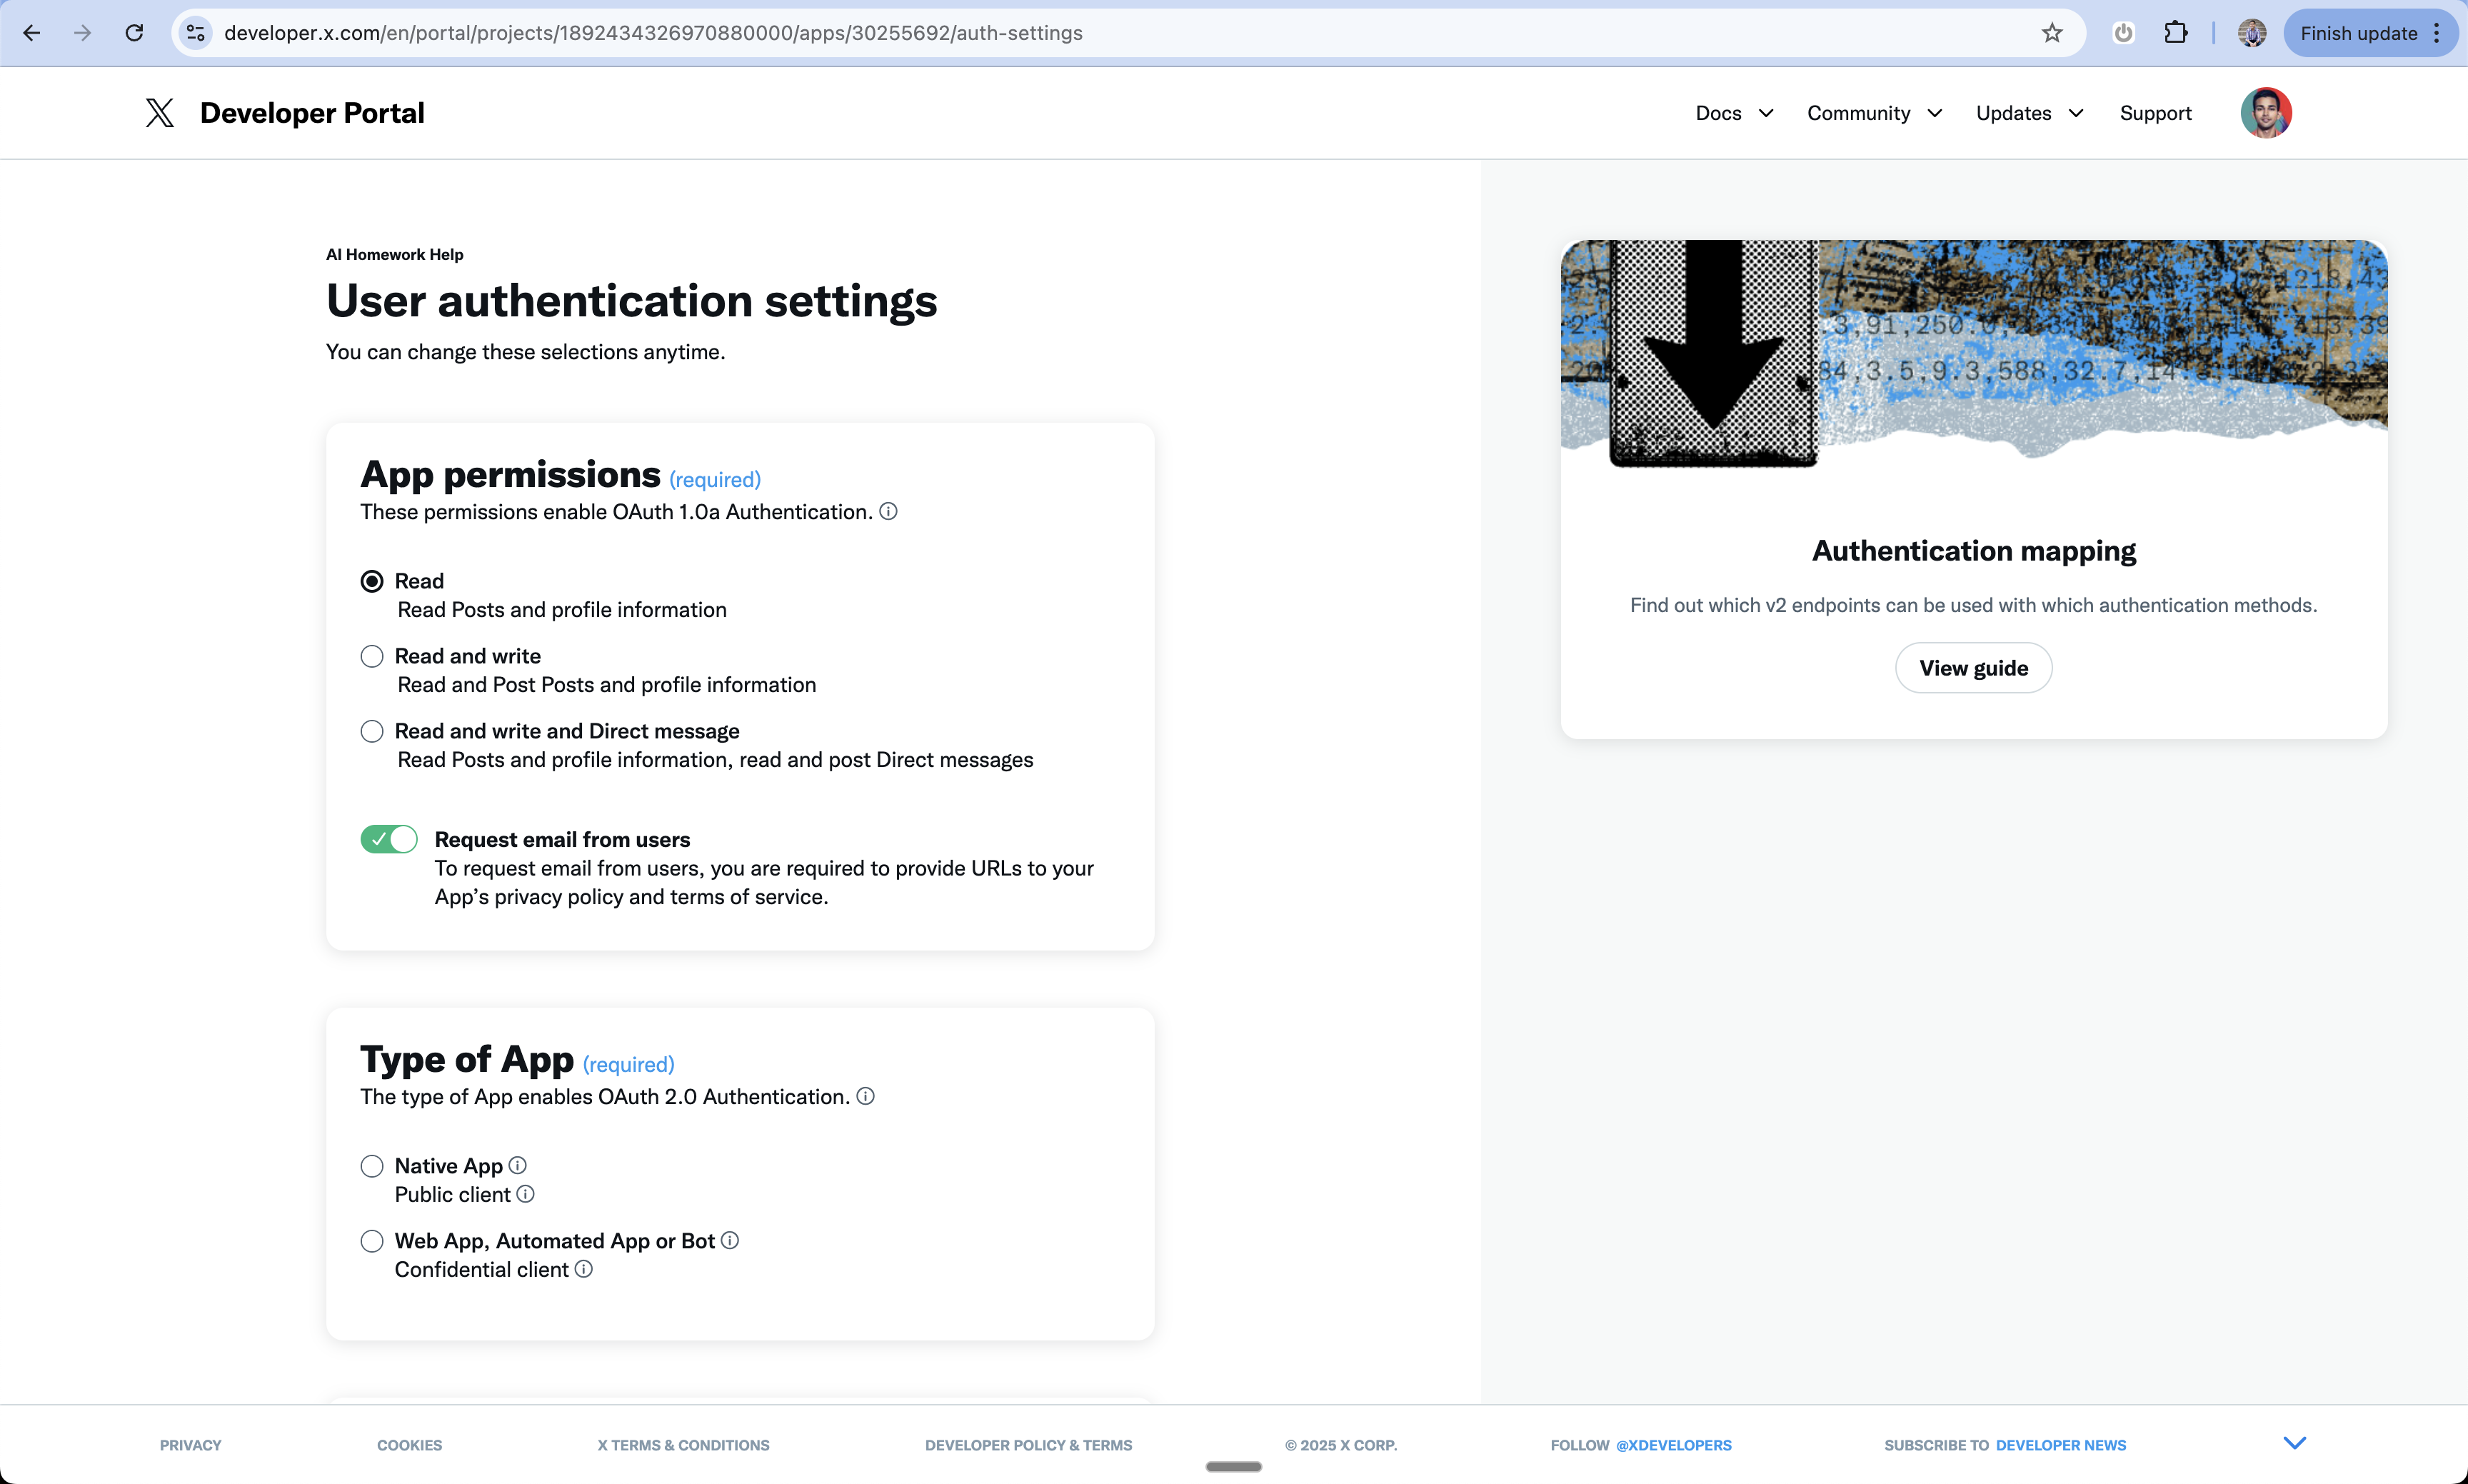
Set App Permissions
- Choose your app permissions level
- You can request read/write permissions
- Optionally request email access for users if you want your app to send users emails
13
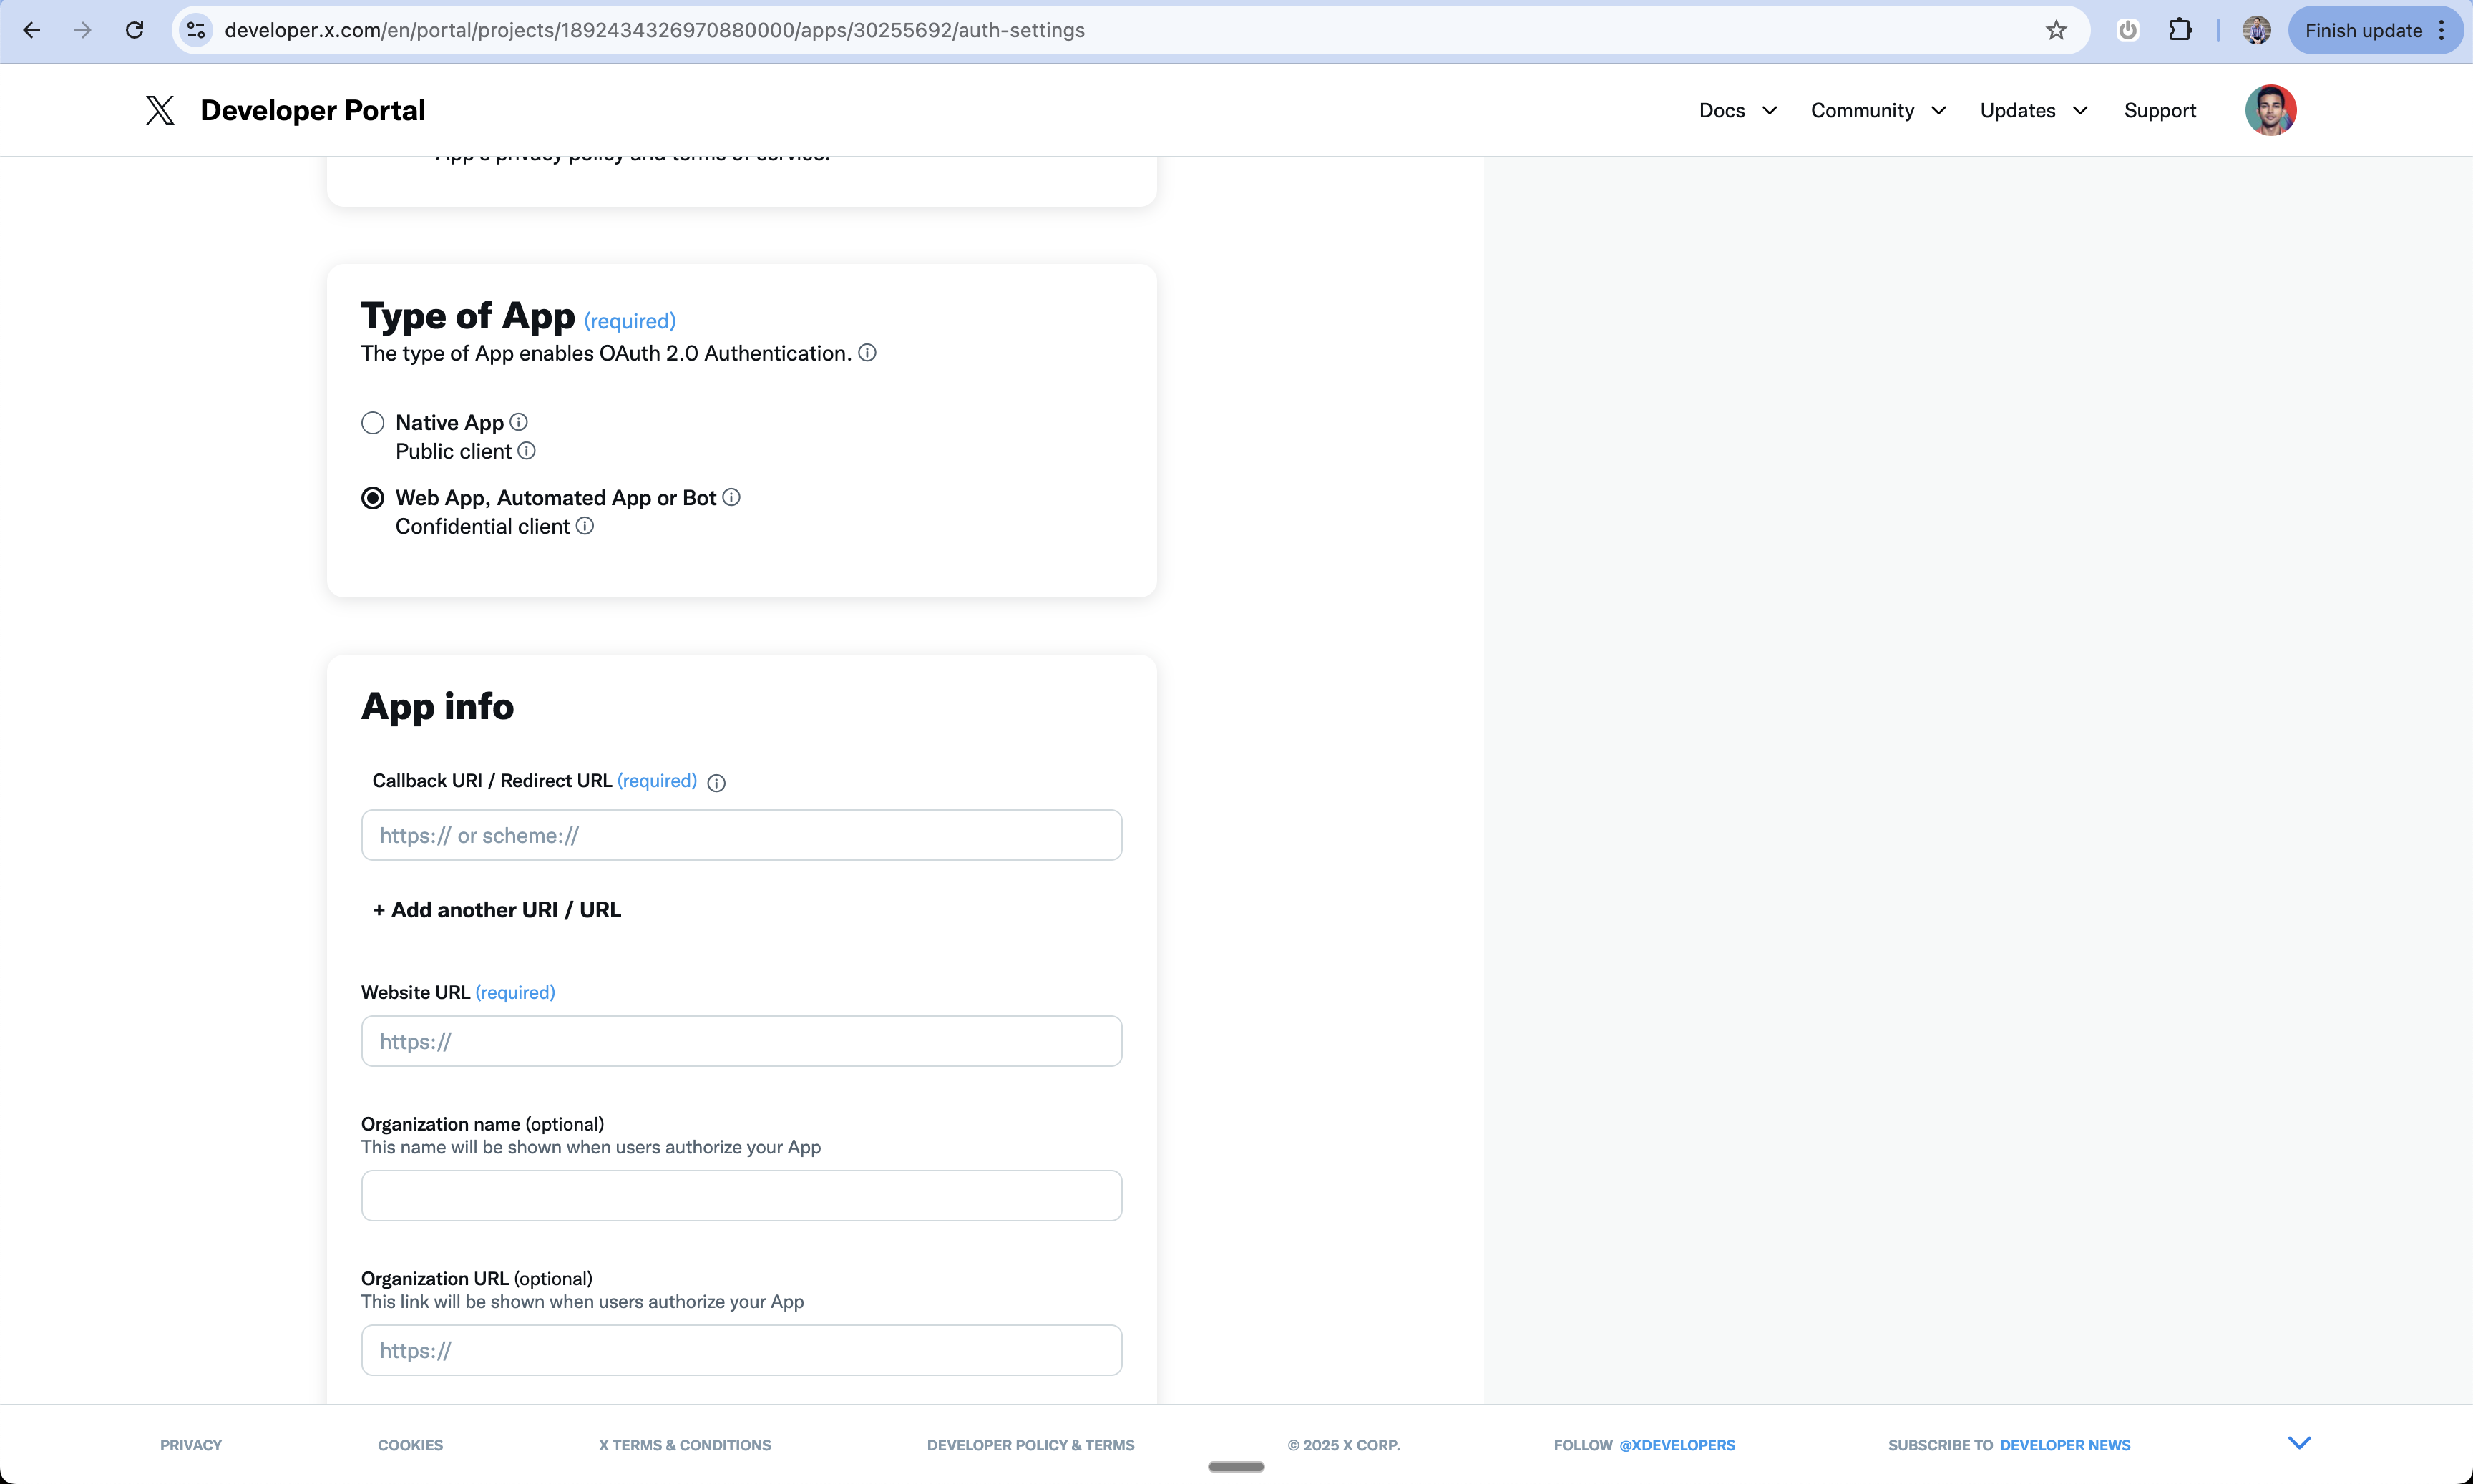
Configure App Type
- Select “Web App” as your app type
- This enables web-based authentication
14
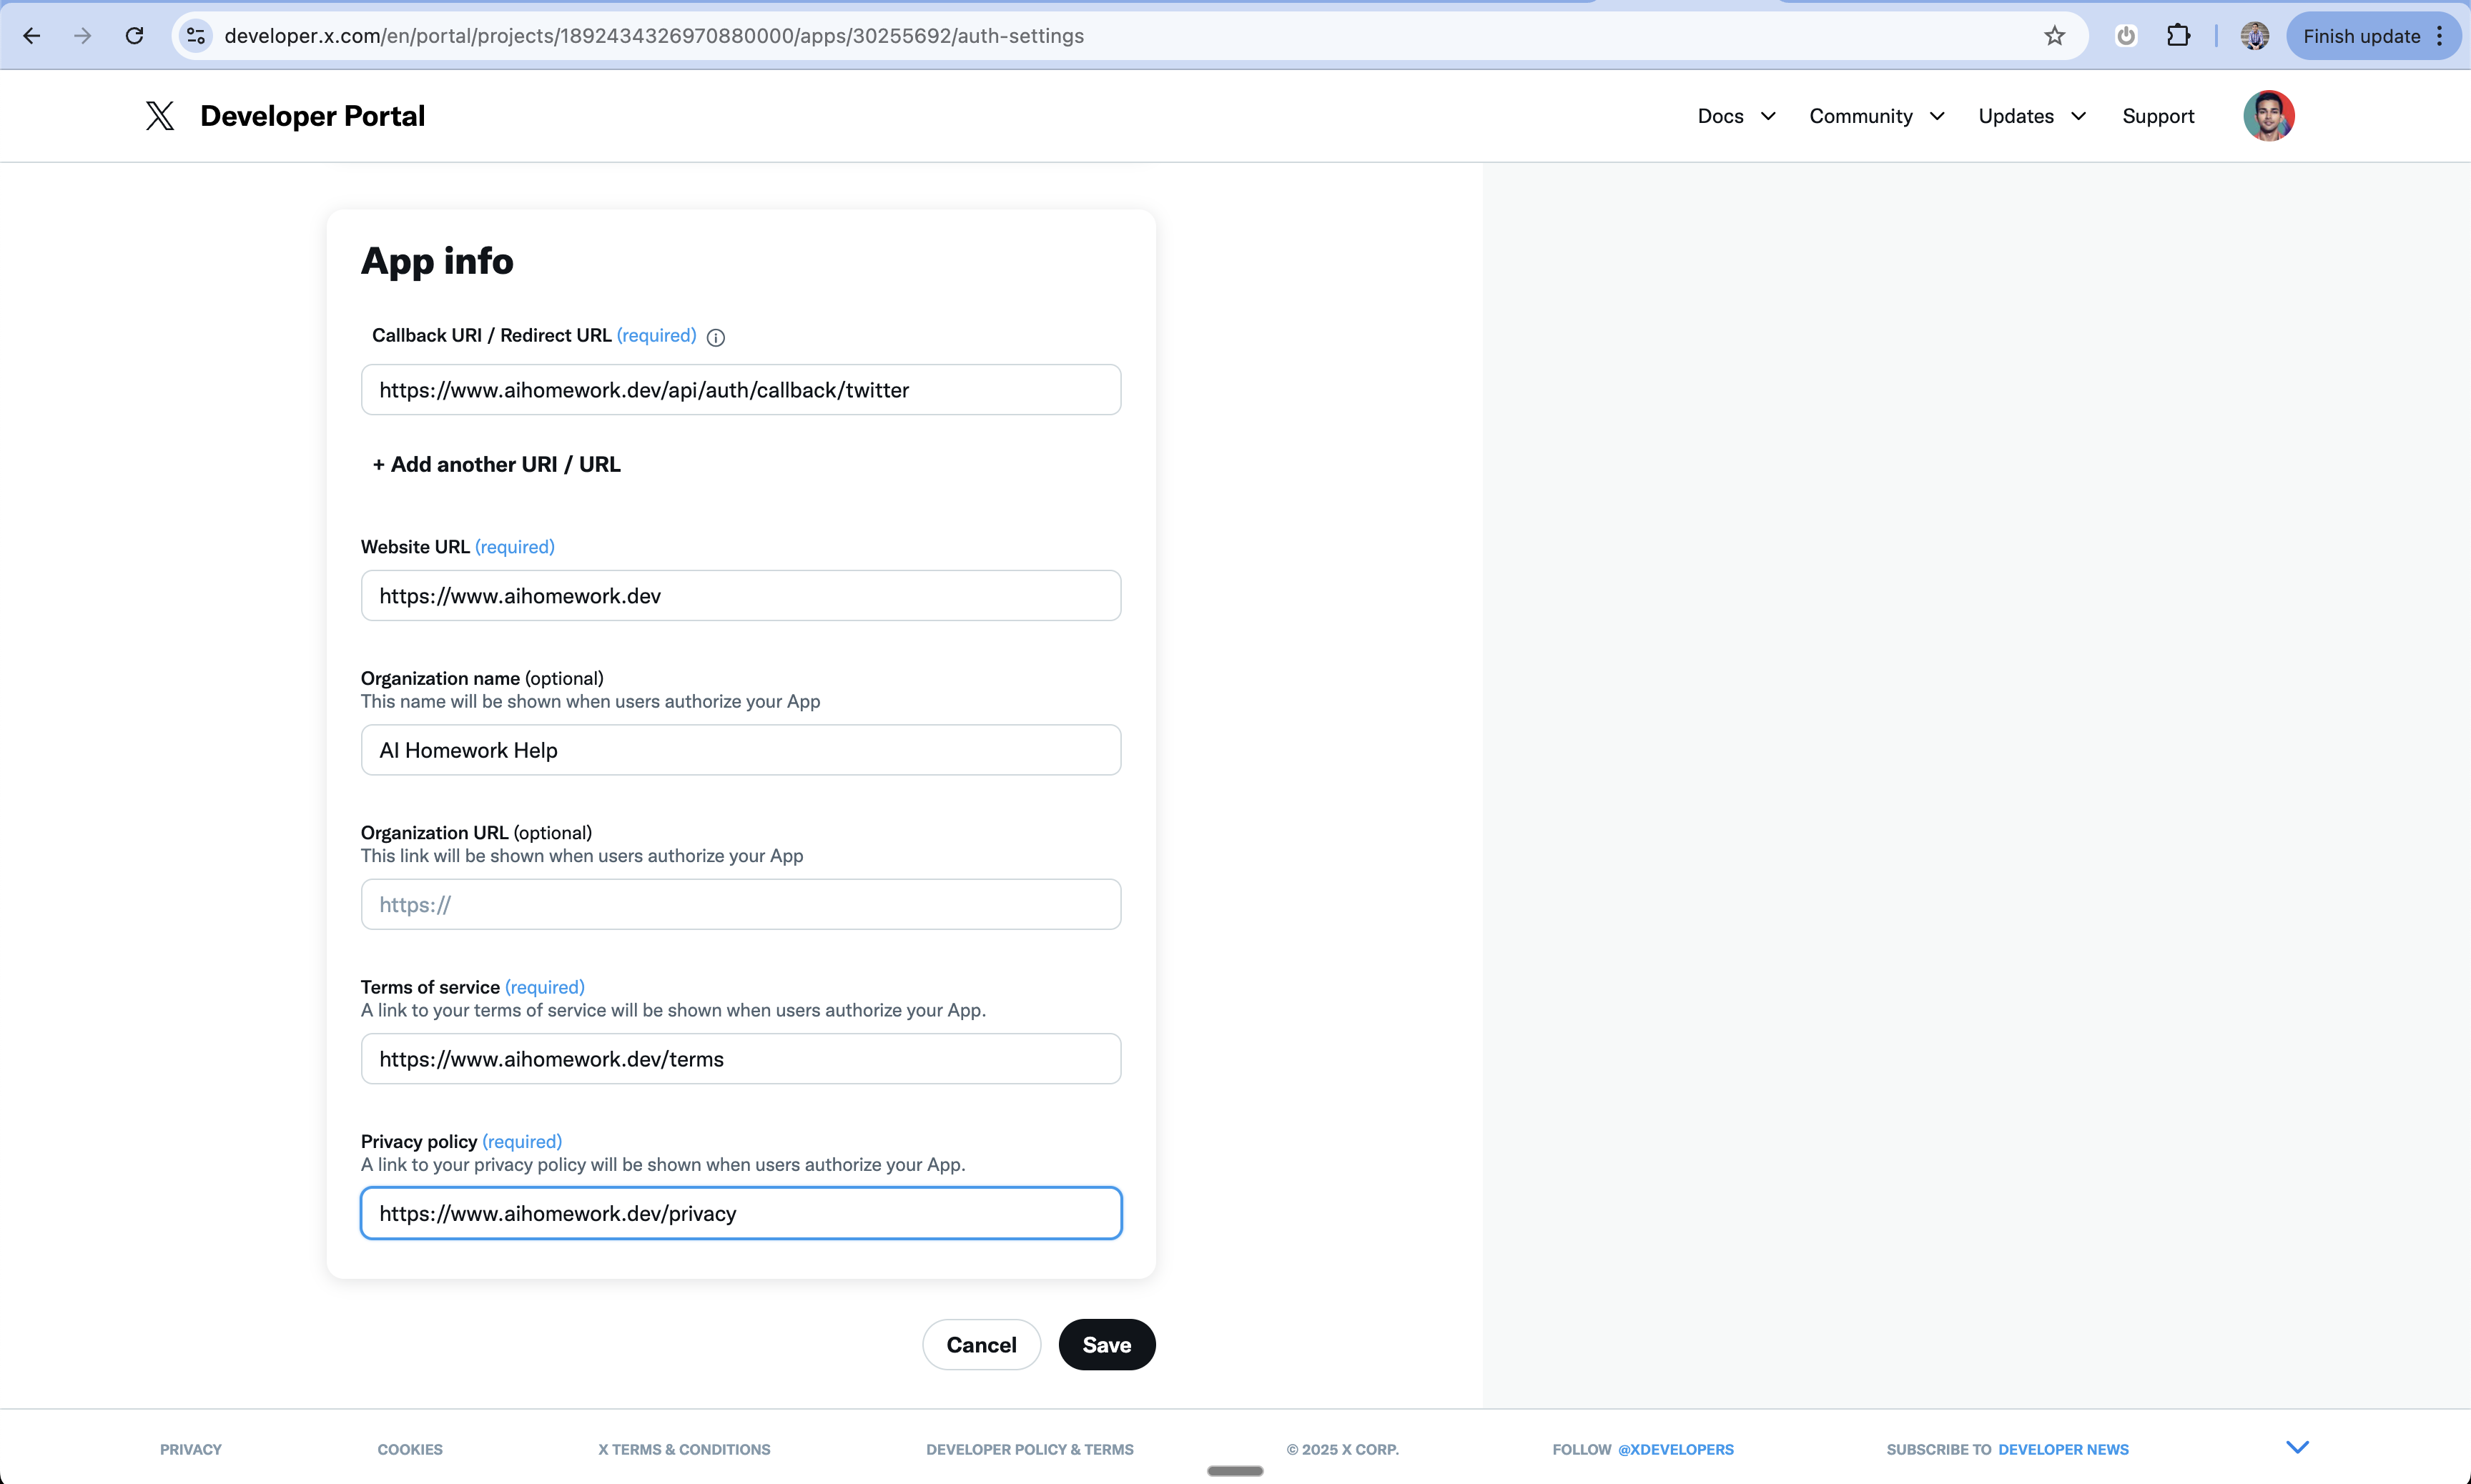
Add App Information
-
Enter your callback URL:
https://www.your-domain.com/api/auth/callback/twitter -
Add your website URL:
https://www.your-domain.com -
Add privacy policy URL:
https://your-domain.com/privacy -
Add terms of service URL:
https://your-domain.com/terms
15
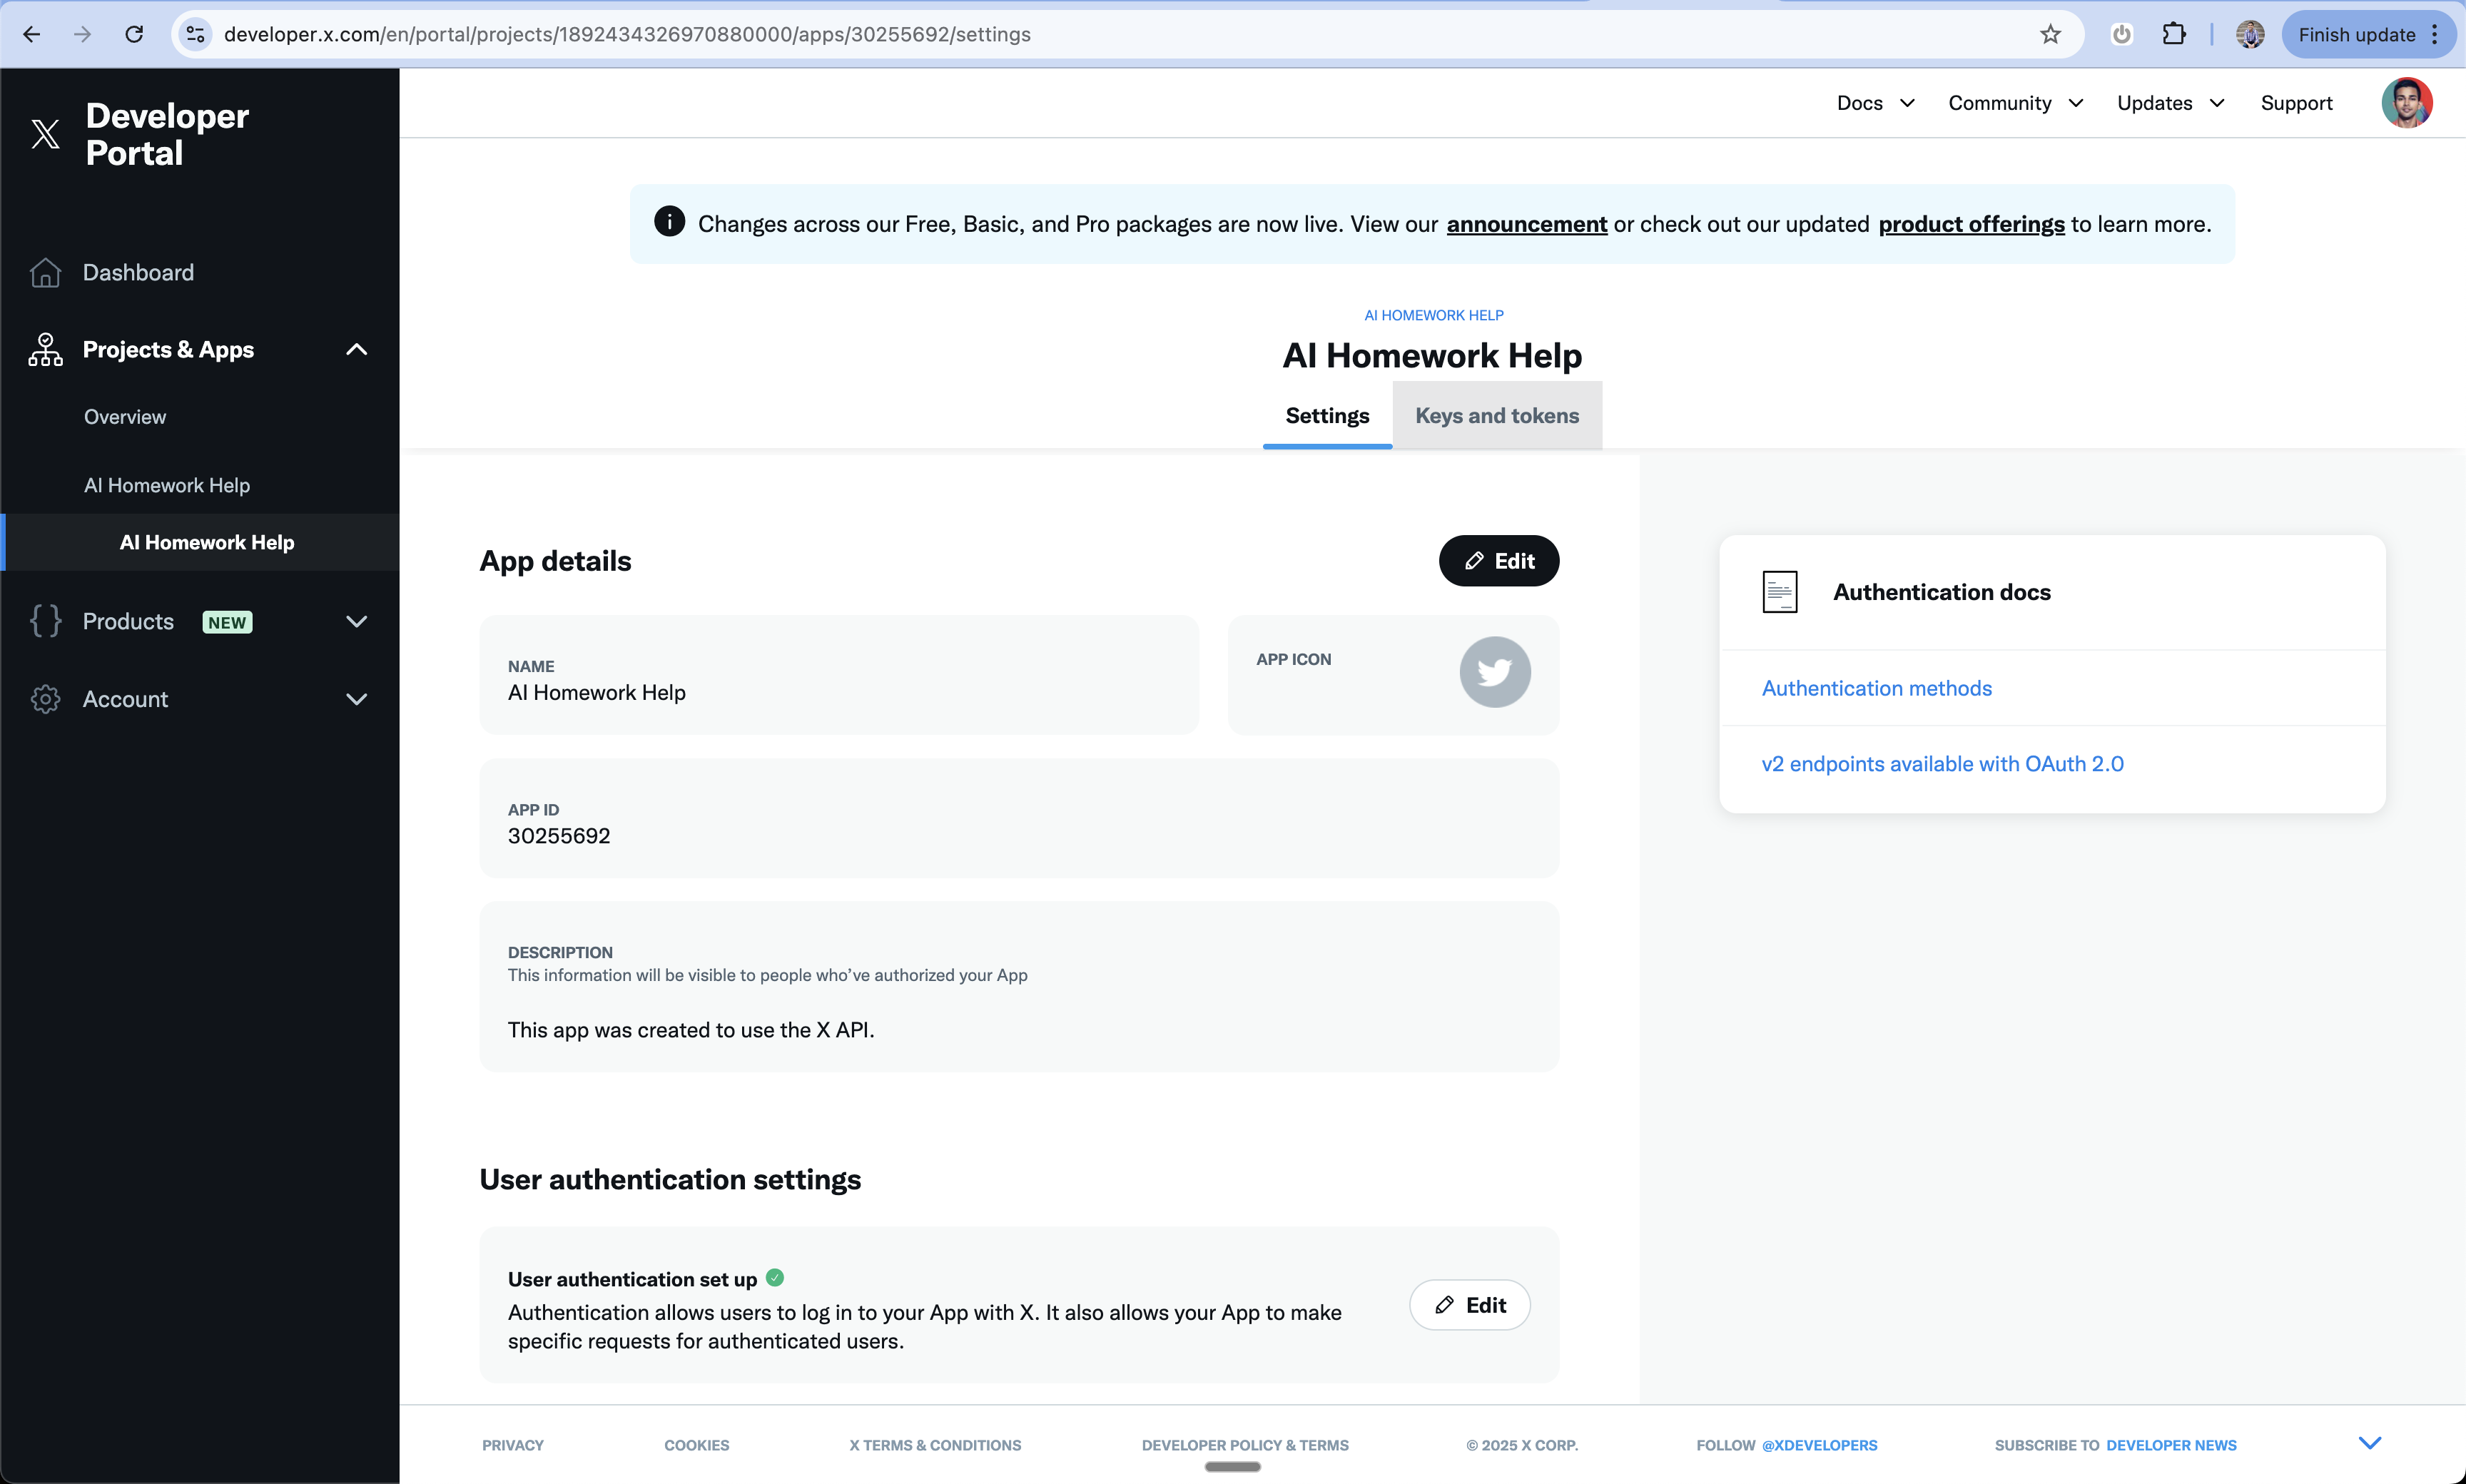
Access Keys and Tokens
- After saving settings, go to “Keys and Tokens” section
16
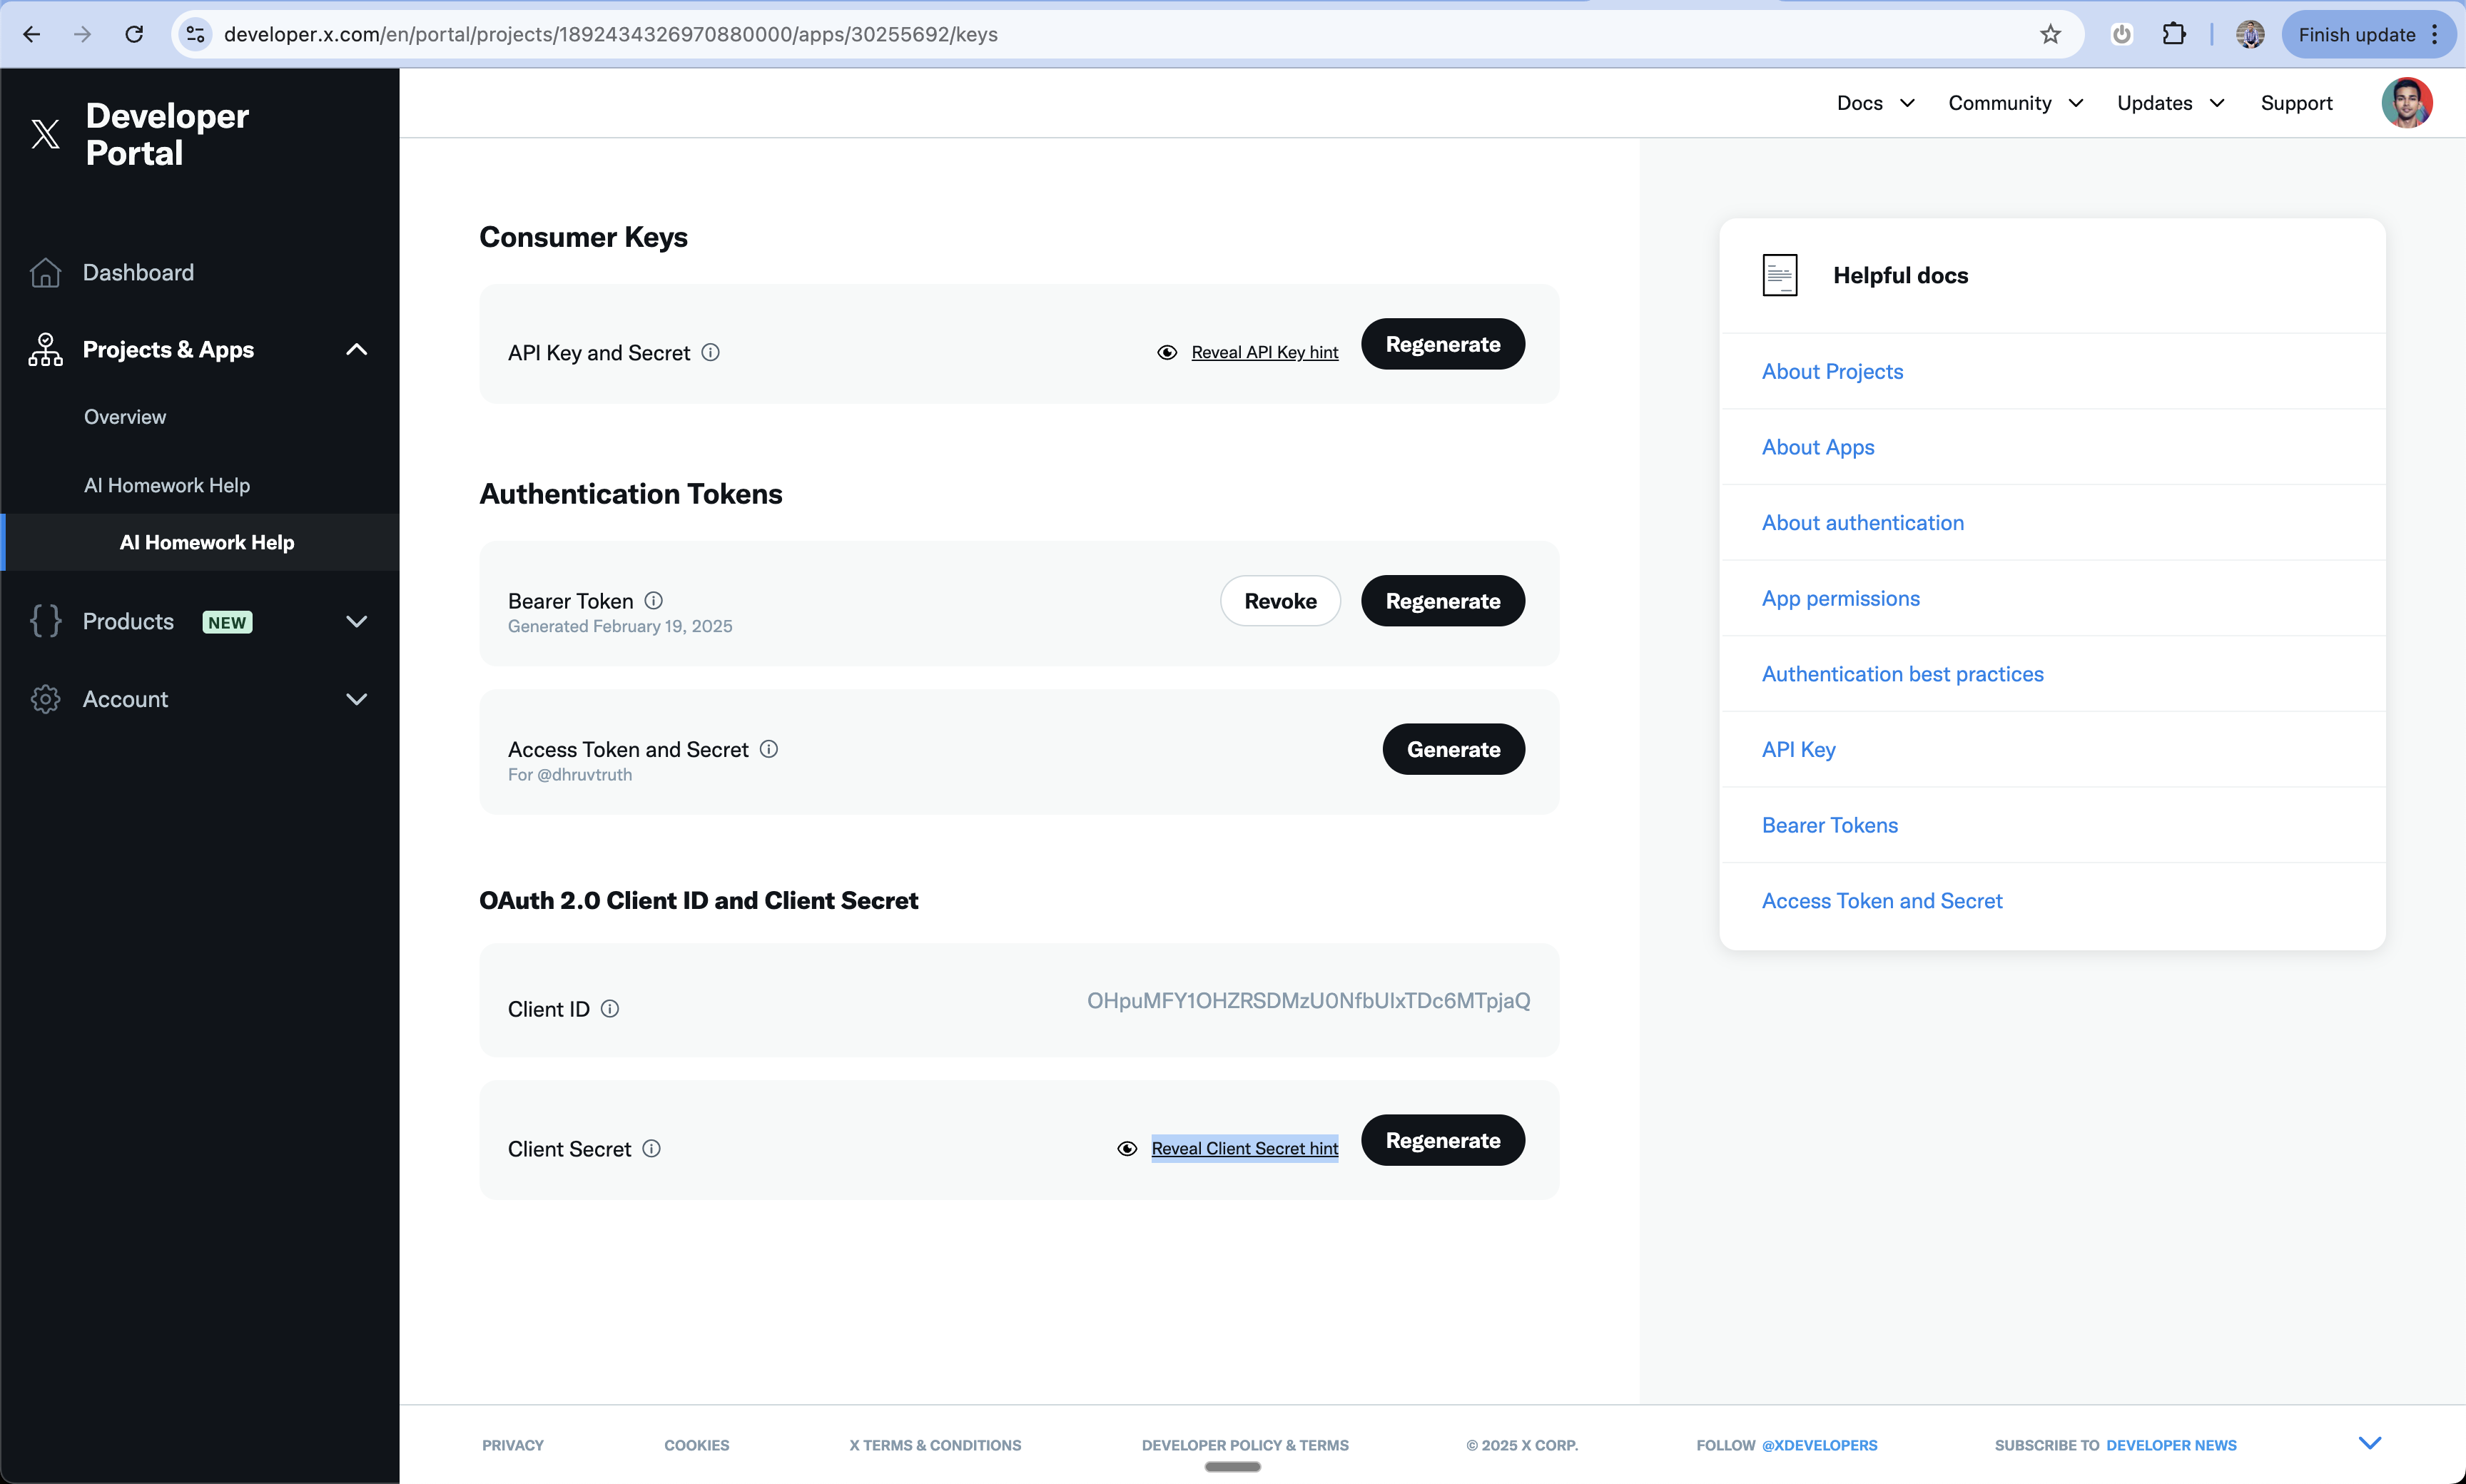
Copy OAuth Credentials
- Under OAuth 2.0 Client ID and Client Secret
- Copy the Client ID
- Generate and copy the Client Secret
- Save both values - you’ll need them in Anything
Add to Anything project
1
Enable User Accounts
You have two options:
- Prompt Anything with “Let users sign in”
- Enable User Accounts from the logo menu
2
Access Project Settings
- Click the 3-dot menu at the top of the chat
- Select “Project Settings”
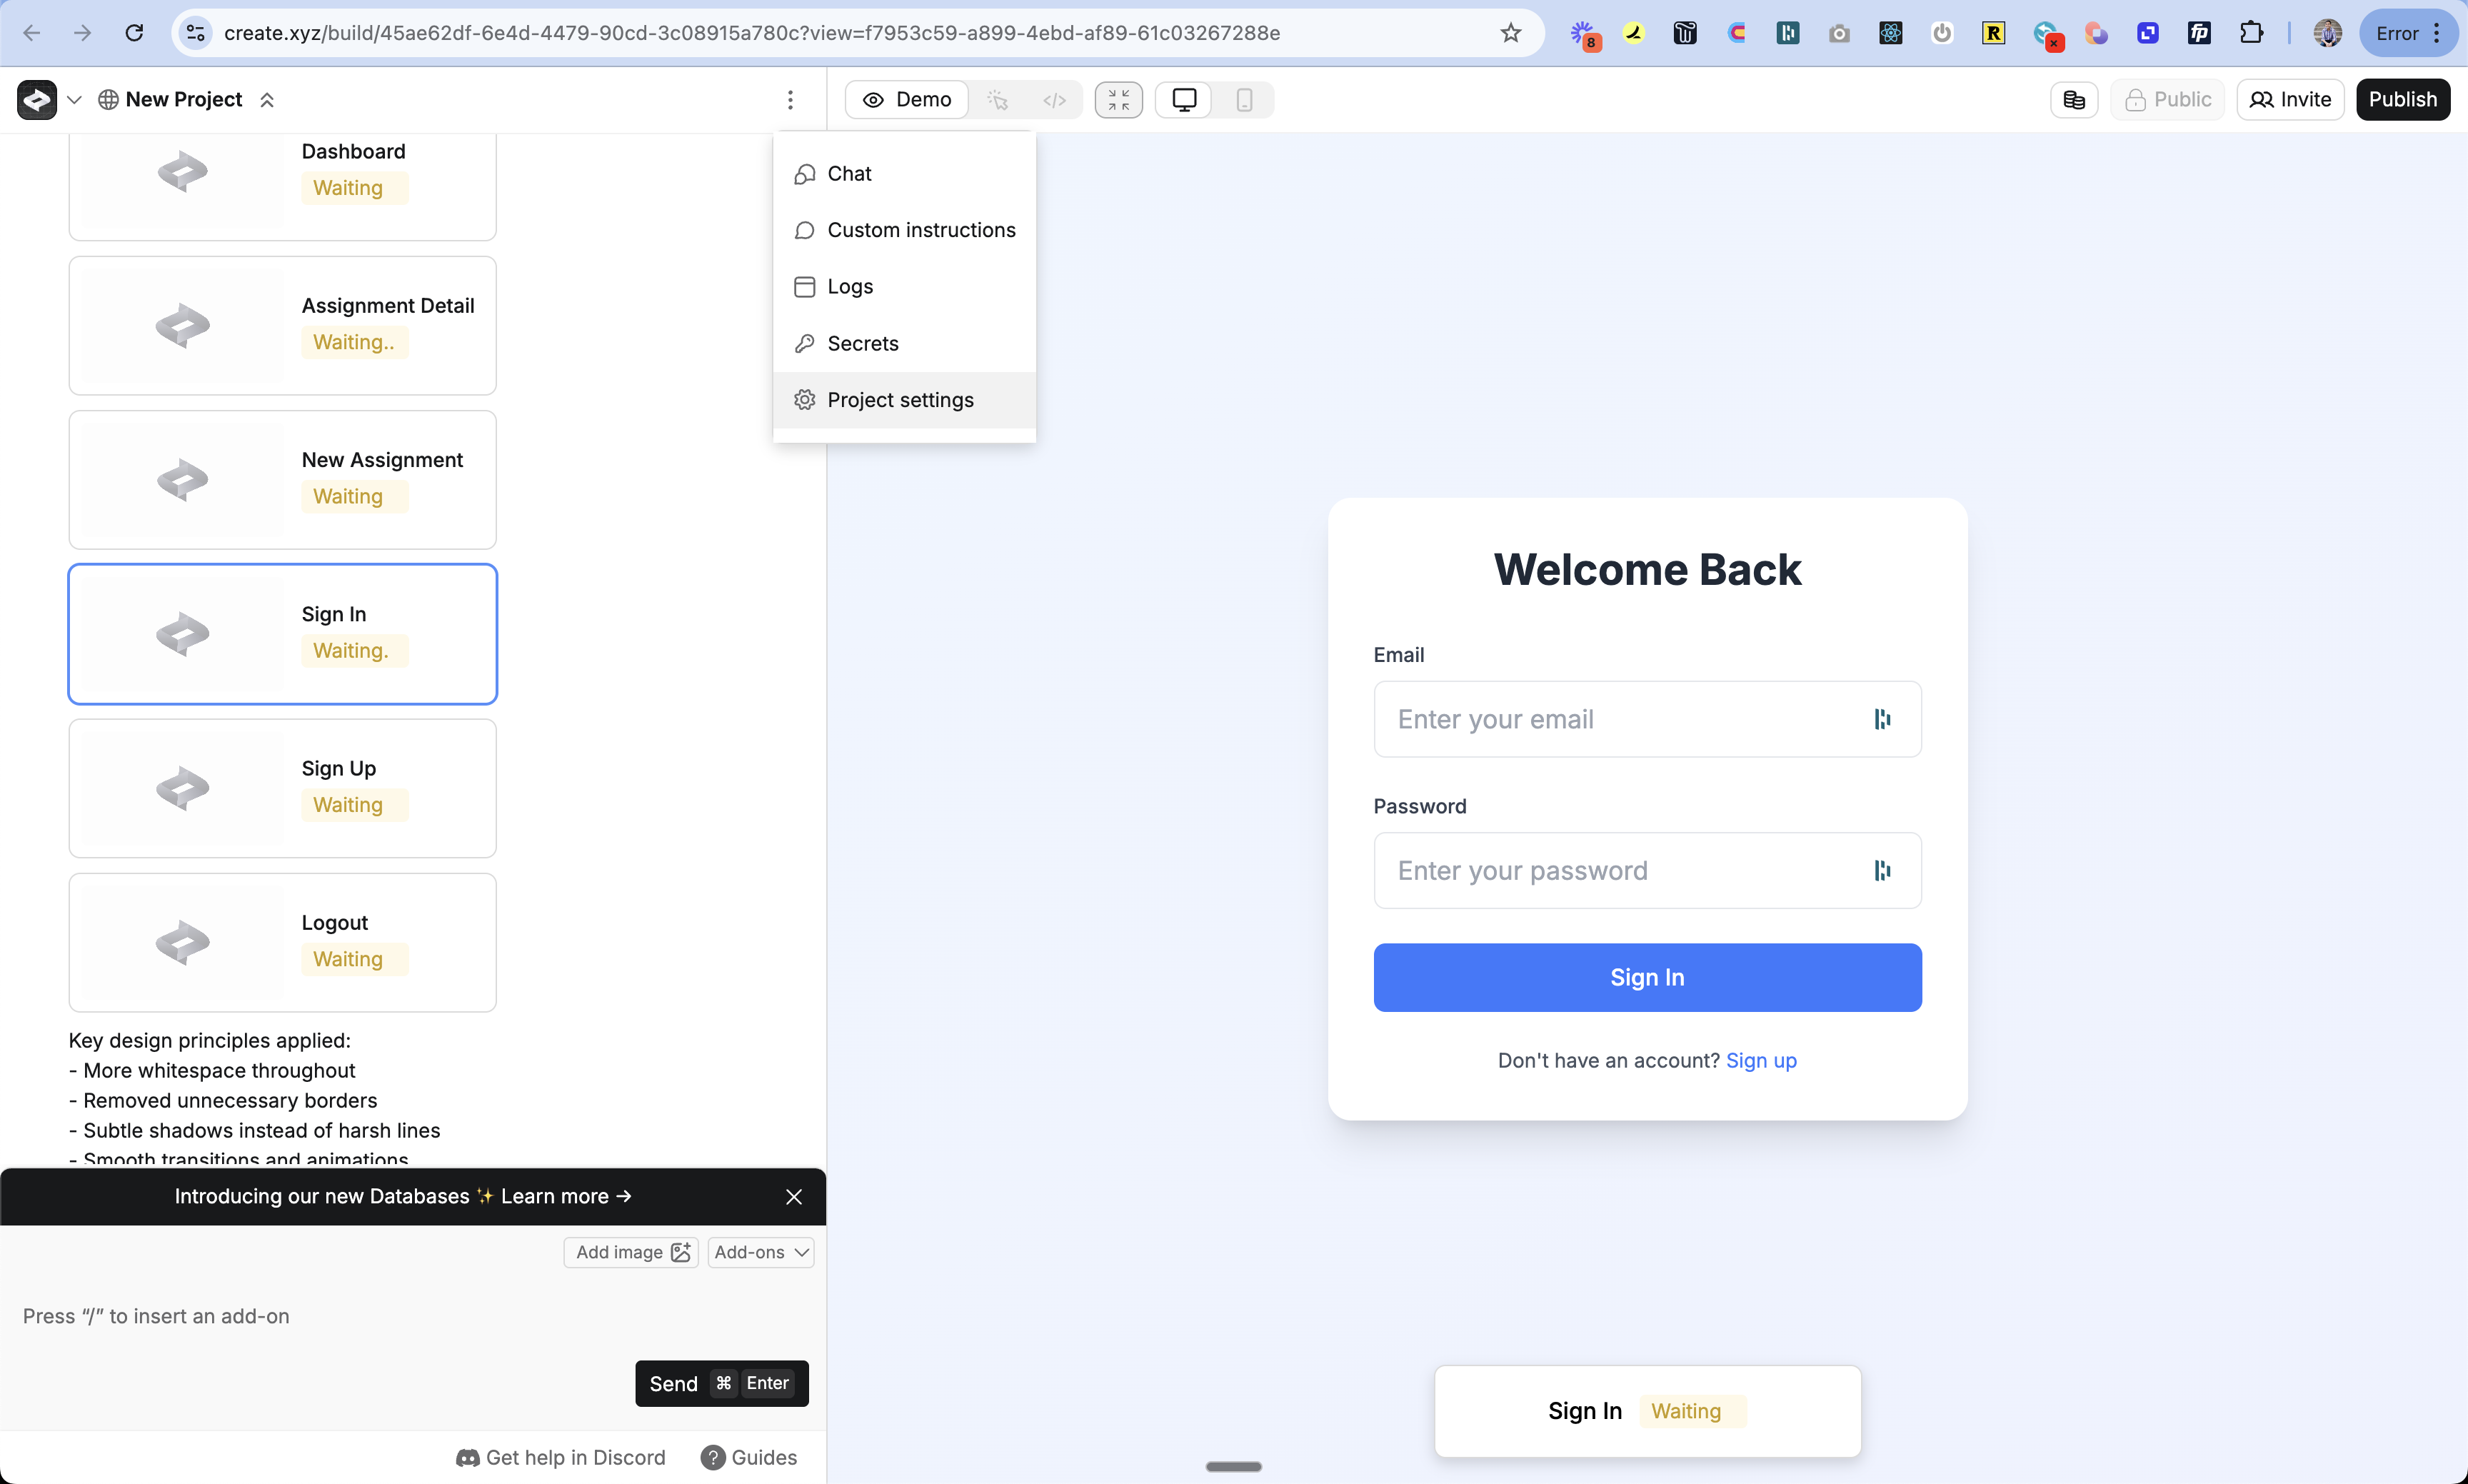
3
Enable Login with X
- Navigate to the Authentication section
- Find Login with X toggle
- Turn it on
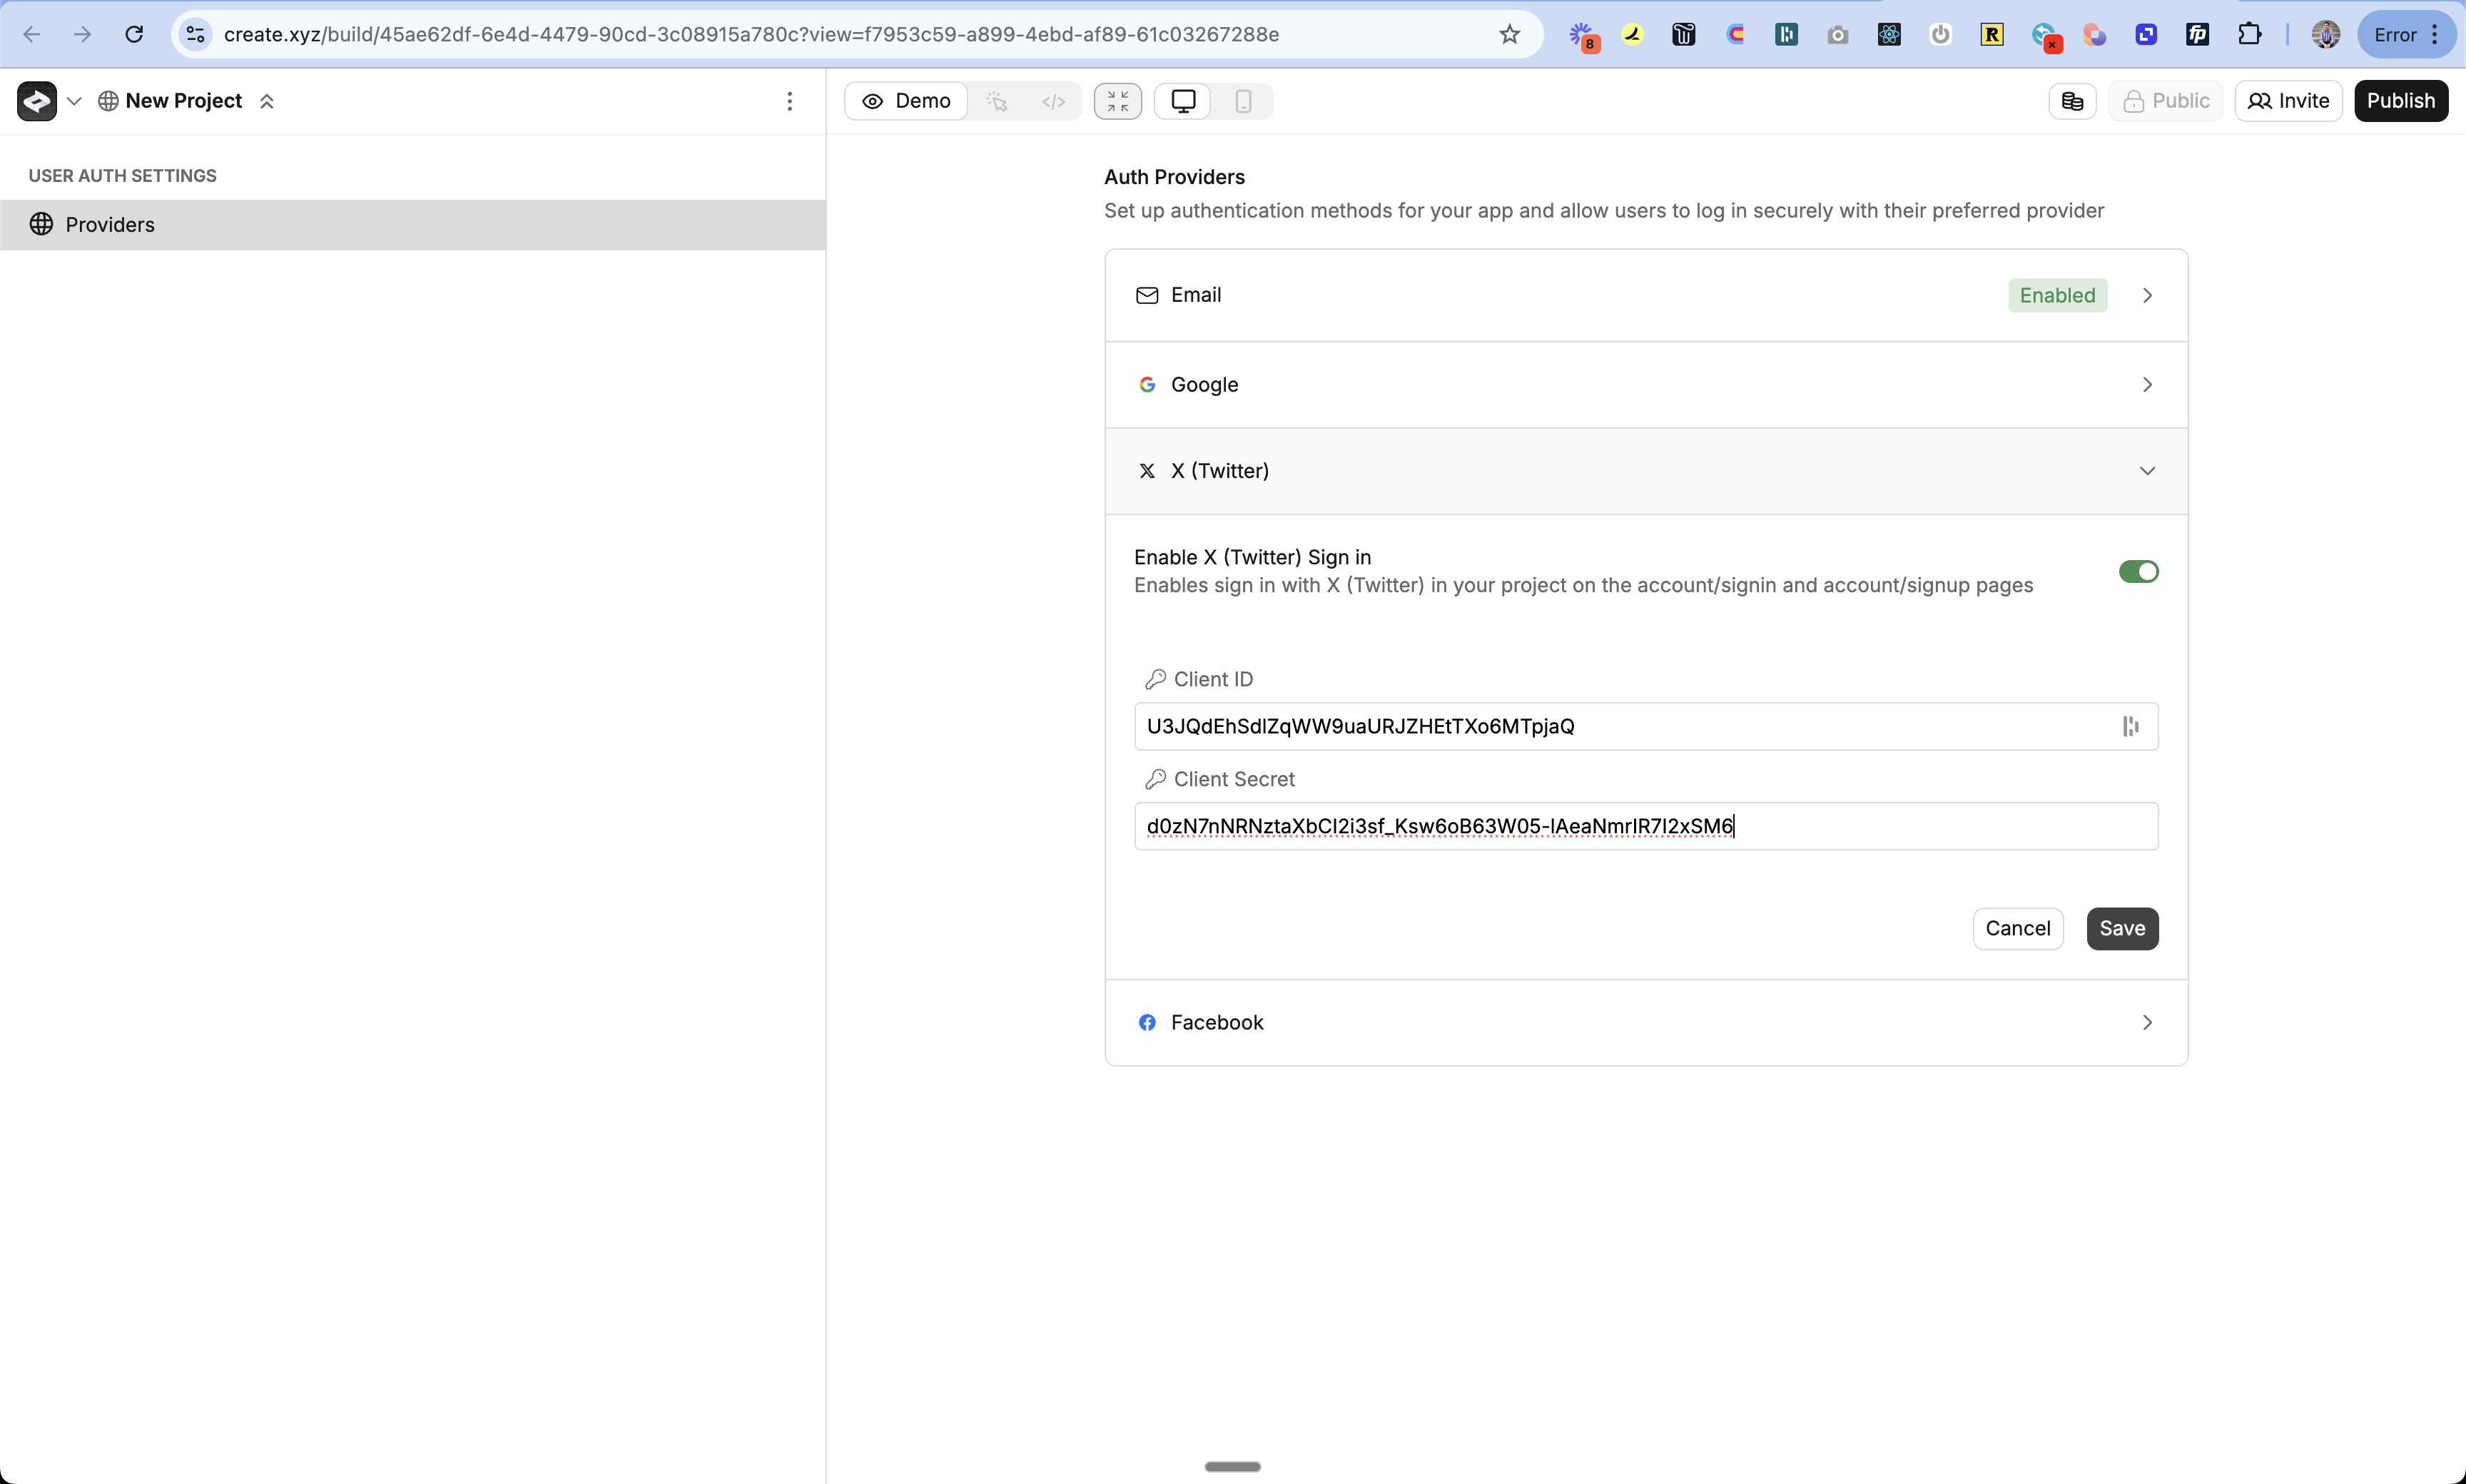
4
Add X Credentials
- Paste in your Client ID
- Paste in your Client Secret
- Click Save
5
Add Sign In UI
- Return to the chat
- Prompt Anything with “Add Login with X as an option”
- Anything will update your sign-in pages automatically
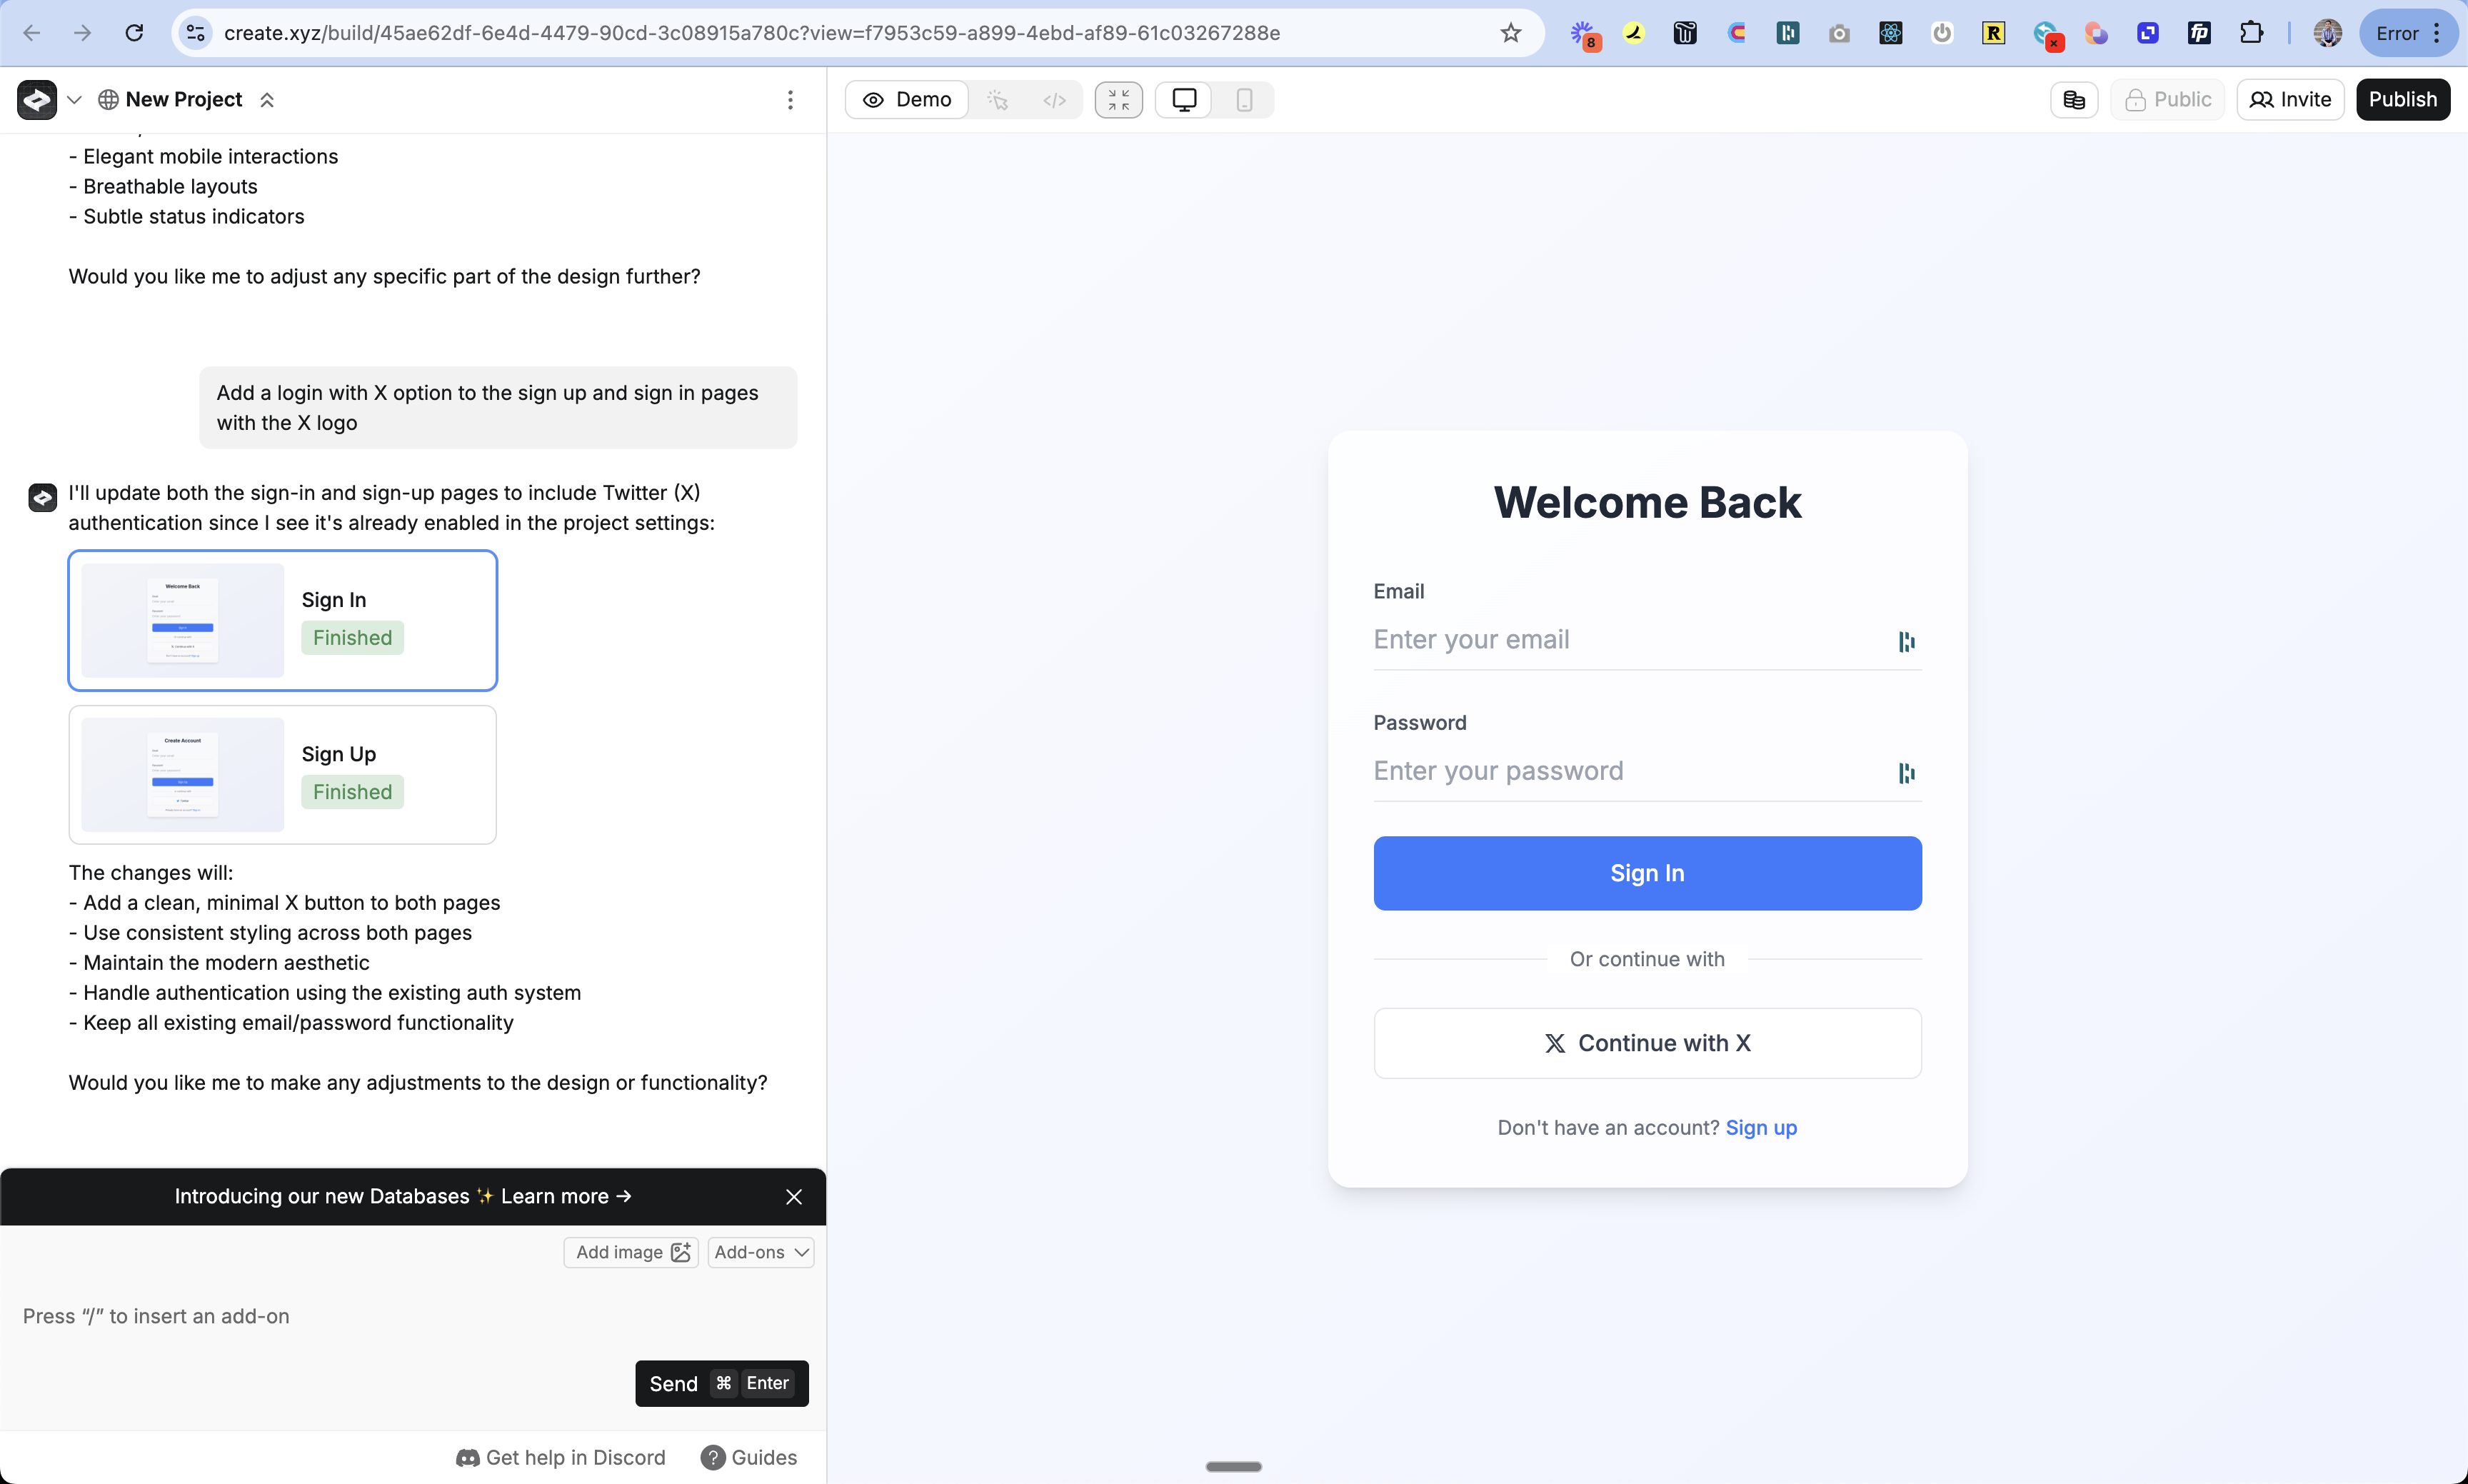
6
Publish Your App
- Click the Publish button
- Review your changes
- Publish to make the Login with X feature live
Testing
- Publish your changes
- Open your app in a new incognito window
- Go to the sign in page
- Try signing in with X
- Check the auth_users table to see your new user
Troubleshooting
Login not working
Login not working
- Double check your domain is exactly the same in Anything and X
-
Make sure your callback URL is right:
www.[your-domain].com/api/auth/callback/twitter - Check if your Client ID and Secret are pasted correctly
- Make sure OAuth 2.0 is turned on in X
- Make sure your app is live at your custom domain
Users can't sign in after domain change
Users can't sign in after domain change
- Update the callback URLs in X Developer Portal
- Update your website URL in X app settings
- Re-publish your app on the new domain
FAQ
What user info do I get?
What user info do I get?
By default:
- Username
- Display name
- Profile picture (if they have one)
Do I need X to review my app?
Do I need X to review my app?
- For basic login: No
- For extra features: Yes
- You’ll need to submit your app to X for approval